Last time we laid down our drums. Now it’s time to start making actual notes. This is where things get musical but also more complicated. The Gameboy DMG chip has 2 Duty channels. They make up the meat of each song. We can build on what we learned in the previous lesson and what we learn here will help us when we get to the final channel: the Wave.
Making a Duty Instrument
Making a duty instrument is almost exactly like making a noise instrument like we did in the last article. The main difference is that you get two duty channels to work with. The instruments work (almost) the same on both channels. We will get into some special stuff on Duty 1 later on. But for now we are going to keep it simple.
Just like with noise, you can open a duty instrument by clicking it from the list on the left.
Open one, and let’s see what is new compared to noise.
NOTE: There is some sort of graphical glitch on my machine around the duty drop-down so I put the value next to it.
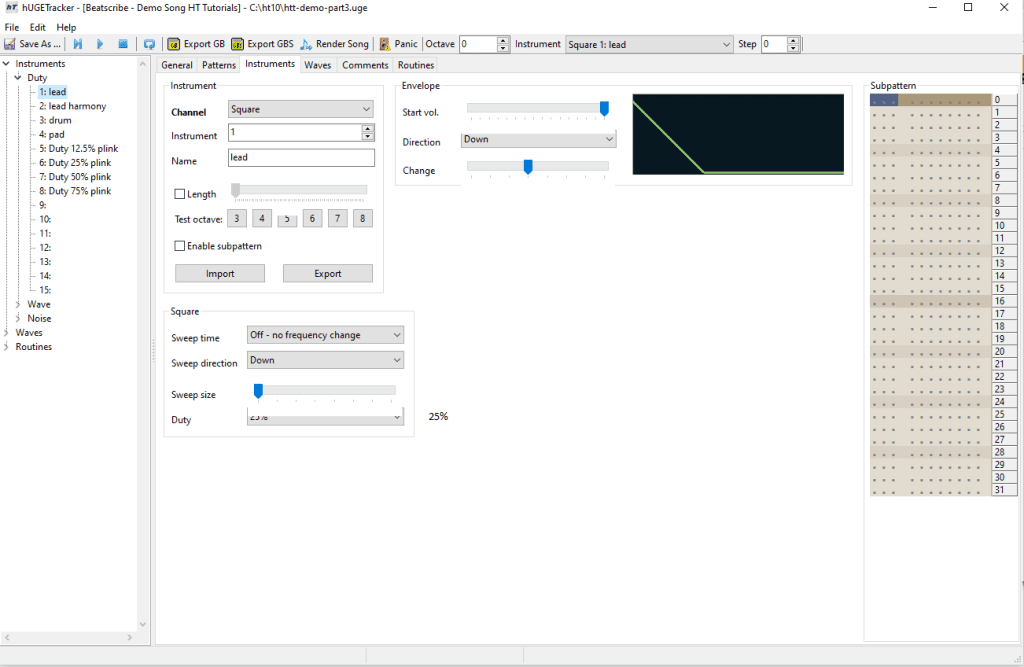
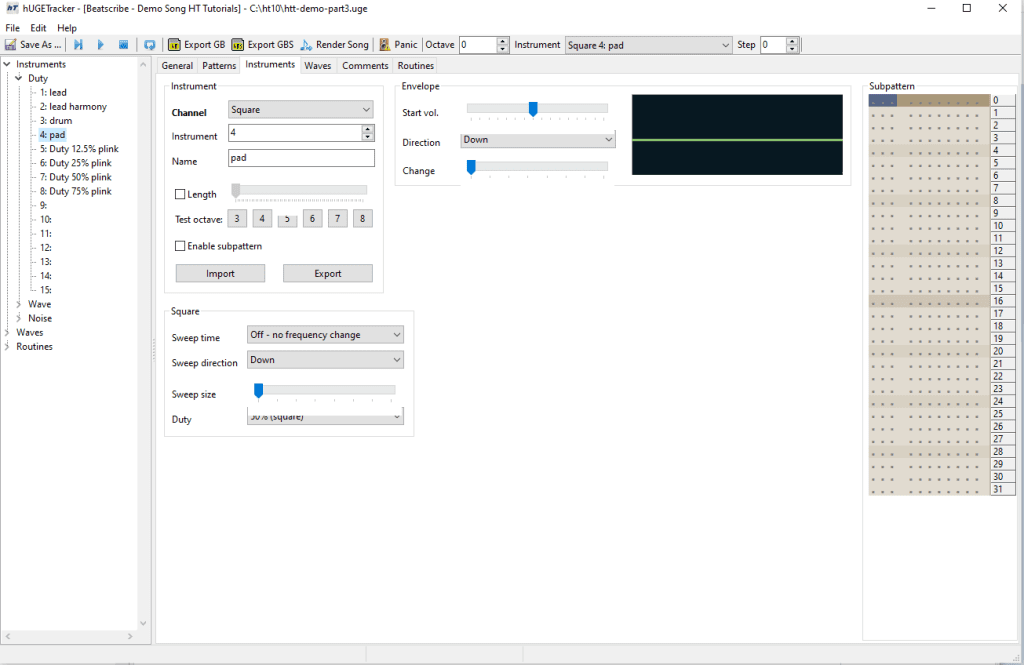
As you can see, it shares the instrument and envelope settings we already learned with the noise instrument config. But there is a new section labeled “Square” with some new settings.
“Sweep Time” and “Sweep Shift” allow you to produce a note that rises or falls in pitch over a certain period of time, like a cartoon bomb dropping. These settings only apply to the Duty 1 channel. On Duty 2, there is no sweep. We’ll use these settings more later on.
Finally we have the Duty setting. This changes the “thickness” of the note. Try changing it and hitting “Test Instrument.” You will hear it sounds like a thin, reedy instrument when it’s on 12.5%, like a synthesizer at 25% and 75%, and at 50% it sounds more like a flute.
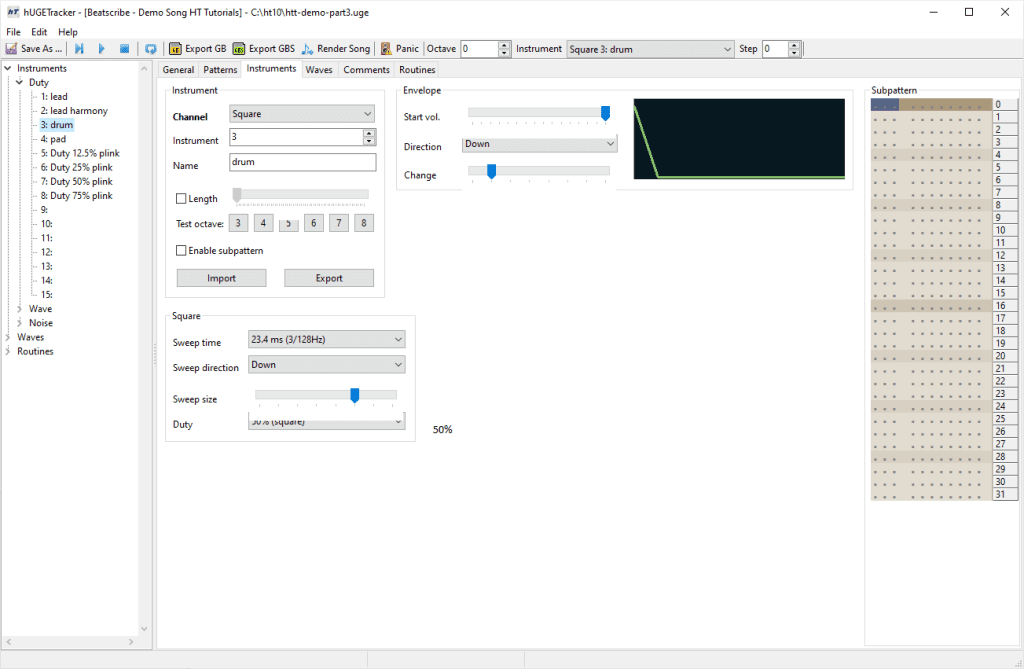
For now let’s set up our four instruments. Notice with instrument 3 (called drum) we are using the sweep function.
Instrument 1:
Instrument 1 is called “lead” and is a long-ish note that trails off with 25% duty, which is a slightly sharp but mostly smooth sounding note.

Instrument 2:
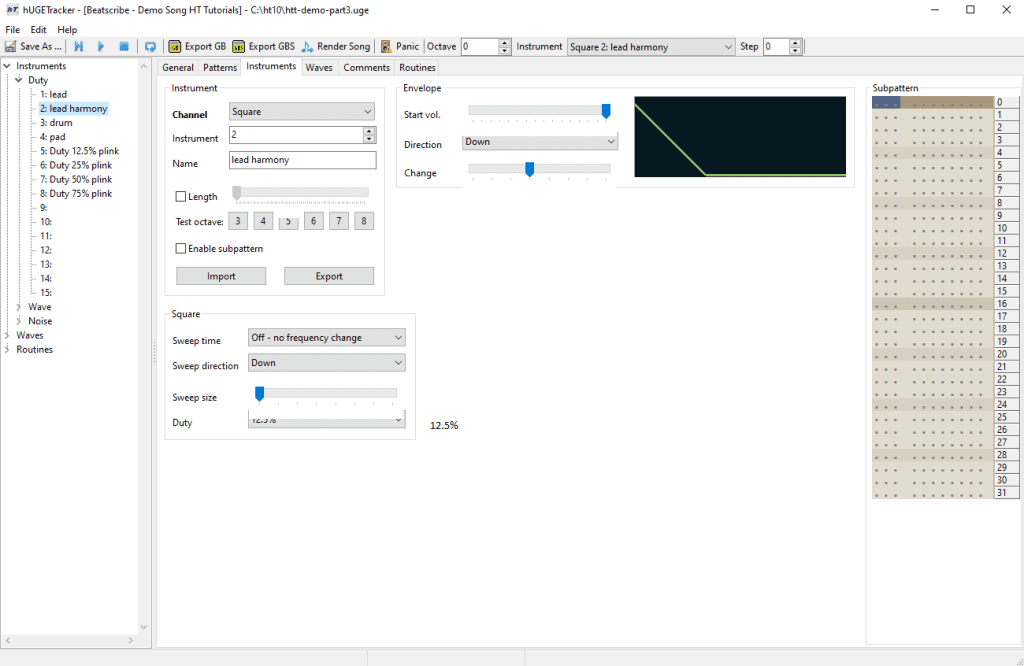
The “lead harmony” instrument is almost exactly the same as the lead, but its duty 12.5% which is a thinner sounding pulse.
Instrument 3:
This is the interesting one. It’s called “drums” and yes, the Duty (and Wave really) channel can make drum sounds. When you set it up you’ll hear some iconic Mega Man 2 drum sounds!
Instrument 4:
The “pad” has a lower value but no change value, meaning it plays until something else cuts it off.
Now we can lay down our notes just like we did for the drums.
Making music notes gets much more complex than making drum notes like we did previously. You can use your computer keyboard as a piano, much like in most trackers. Here’s the note layout:
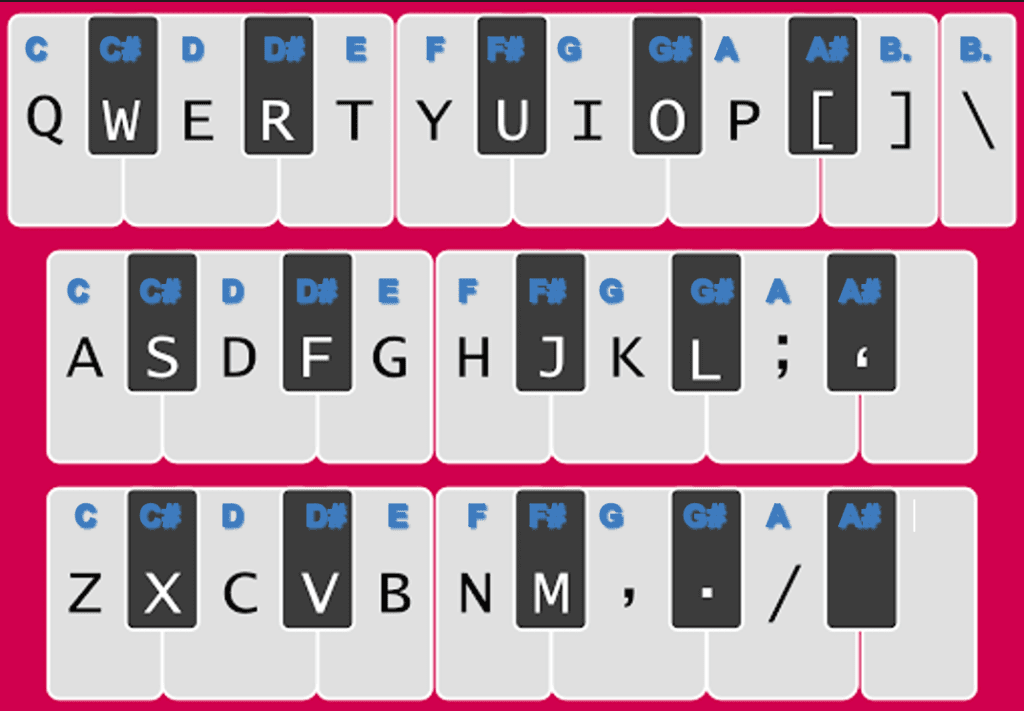
Depending on the selected octave, the notes will be different pitches, highest on the top level and lowest on the bottom row.
Time to enter the notes. It’s an odd experience at first. Laying down a melody is probably the hardest part of working with a tracker. Use the keyboard to find the right notes as shown here.
Here are some other shortcuts that might help:
- Del – Removes the note under the cursor.
- Backspace – Remove note and shifts notes in that channel under it.
- Cut/Copy/Paste – You can also cut and paste just like you would in an Excel spreadsheet. The keys differ if you are on a Mac or a PC, but you can Google it if you don’t know how to copy/paste.
Add the notes as shown here:
Remember to change to instrument 3 for those last few notes (pink).
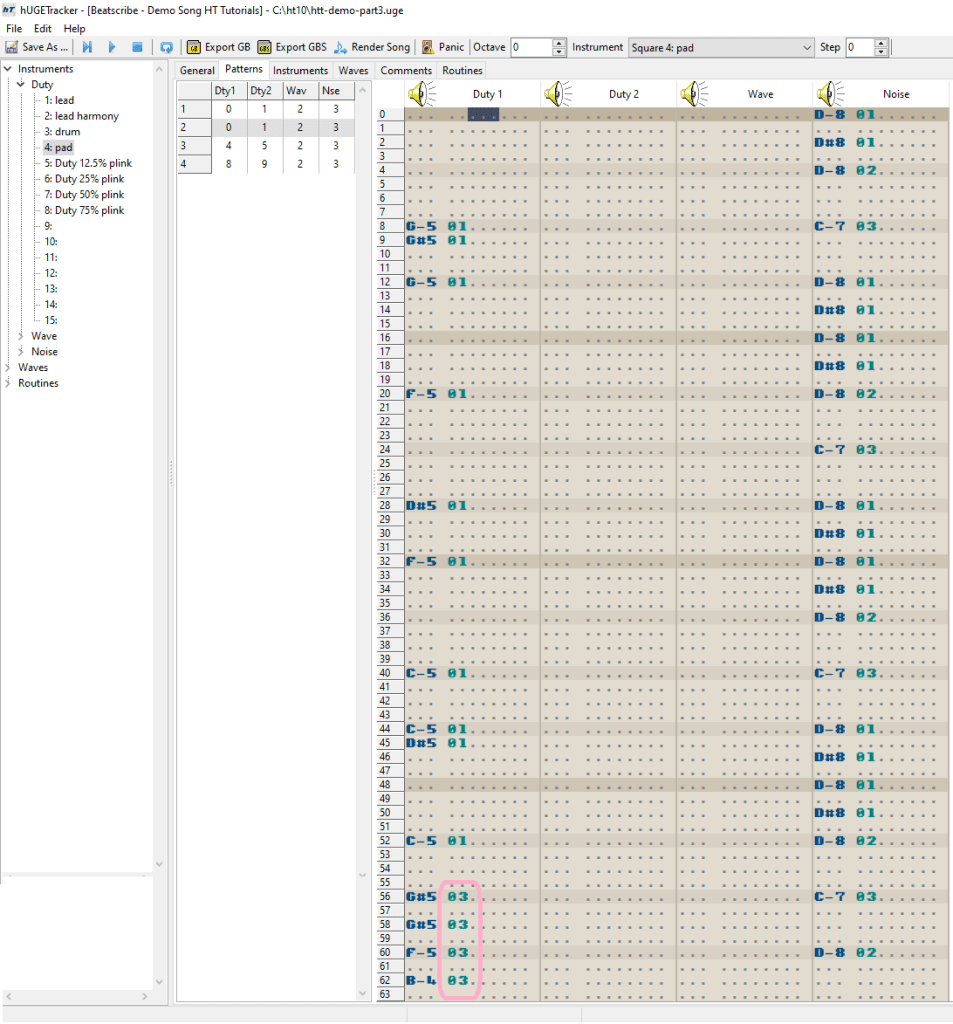
This time the same thing will play across all 4 patterns. This is a great opportunity to master
cutting and pasting just one channel. Alone, it sounds like the same thing over and over. Not very interesting but we will add more stuff later on! Press play and listen to your progress. There’s still a lot missing, but we are getting closer to the full sound.
What about Duty 2? We will come back to that in a future article as it will employ some other effects we will learn later on. Our song is still missing some crunchy GB bass. We will add that in the next tutorial featuring the Wave channel.
You can download the song as it should be at the end of this tutorial here.

Beatscribe has composed and produced soundtracks for games on Nintendo DS, Nintendo Switch, PS4, Xbox1, Sega Genesis and numerous iOs and Android games for over a decade, but his true passion is creating epic moods on ancient hardware like the Game Boy and NES.
