
Officially Lost It
Losing work sucks. I can count on my fingers and toes the number of times where GB Studio crashed or a power outage lost a huge chunk of work. Also, realizing you made a mistake and deleted something that you end up retreading to is quite humbling, but what if you’re also out of undo’s? The stark, chilling reality is that you’re going to have to do it all over again. Luckily, there are a couple of options to assist you to avoid these situations.
Backing up your project periodically is a great practice, whether it’s using a .zip file for keeping track of recent builds, or using git as we’ve gone over before in our Version Control guides. There is also a recent tool that many users gravitate toward in terms of ease of use and the preference for a visual interface; and that tool is GitHub Desktop.
When working with a team, using a tool like GitHub Desktop is essential. It can show you what has been changed, what needs to be pulled, and allows you to look at your history, all with just one click. Let’s get into how GitHub Desktop works, why it might be a better fit for you, and how to use its interface most efficiently.
Desktop a go-go
As its name implies, GitHub Desktop is a desktop application that takes all the complications of using git, wrapping it into a sleek form-factor, and making it relatively easy to see & push or pull your data, especially for beginners who aren’t familiar with the process. Hopefully, you’ve already created your account and are ready to start using the program. As you are welcomed to the “Getting Started” area, you’ll see some options for working with repositories, or in our case, projects.
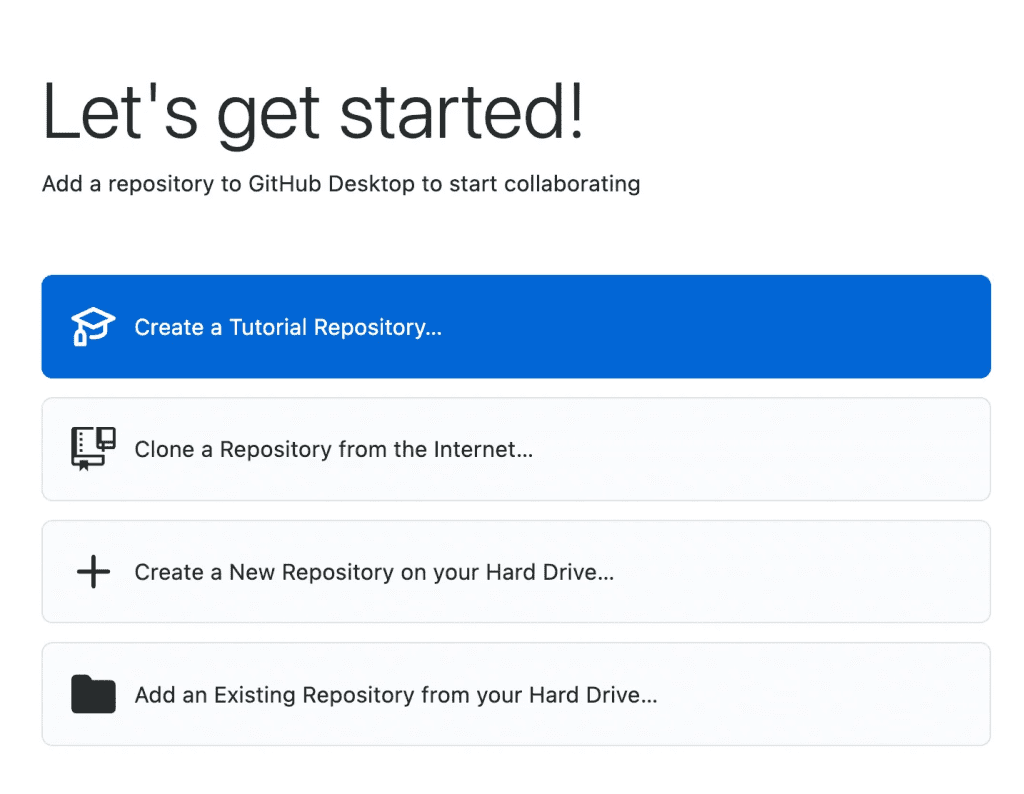
When we’re working with our GB Studio projects, we’ll select “Create a New Repository on your Hard Drive.” The reason we are doing this is that the repository, or local storage of the git files, is not yet created. This will create a hidden folder within our project called “.git” that will handle the process of pushing and pulling, and be able to tell GitHub Desktop what is new or modified.
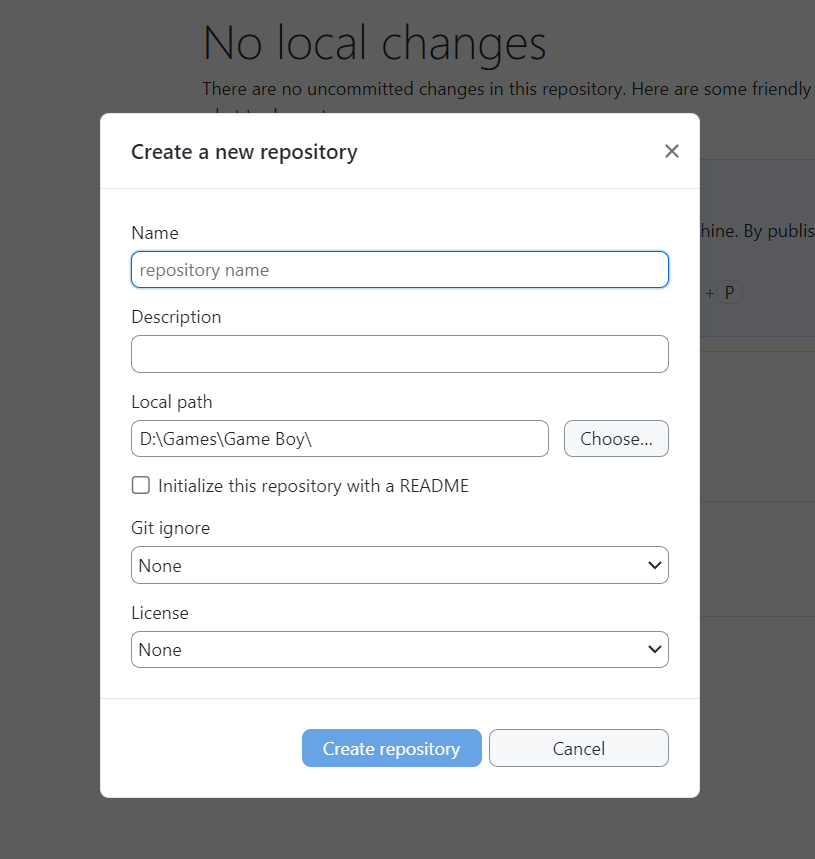
The name of our repository is a little bit deceiving, as this will actually be the name of the folder that your project currently resides in. For example, if I wanted to use my project “Cool Game,” I would have to go back and rename my folder first, as git does not support spaces in directory names. Now that my folder name is “Cool_Game” or “Cool-Game” (either works), this is the exact name I type in the Name field.
Inside the Description field, you can add a short description for the project as a quick summary. Anything longer than a sentence should be added on github.com itself, as it allows you to create a long-form “README” with markdown and other options.
Next, the “Local path” refers to the parent folder of your project folder. In my example above, I store all my Game Boy projects in a particular folder, so this is my path. The name we selected will then be the folder inside of that folder.
You can leave the rest of the options as-is, and click “Create repository.” The main screen of GitHub Desktop then pops up with a bunch of options, but there’s one specific thing we need to do before we get into anything else: “Publish repository.”
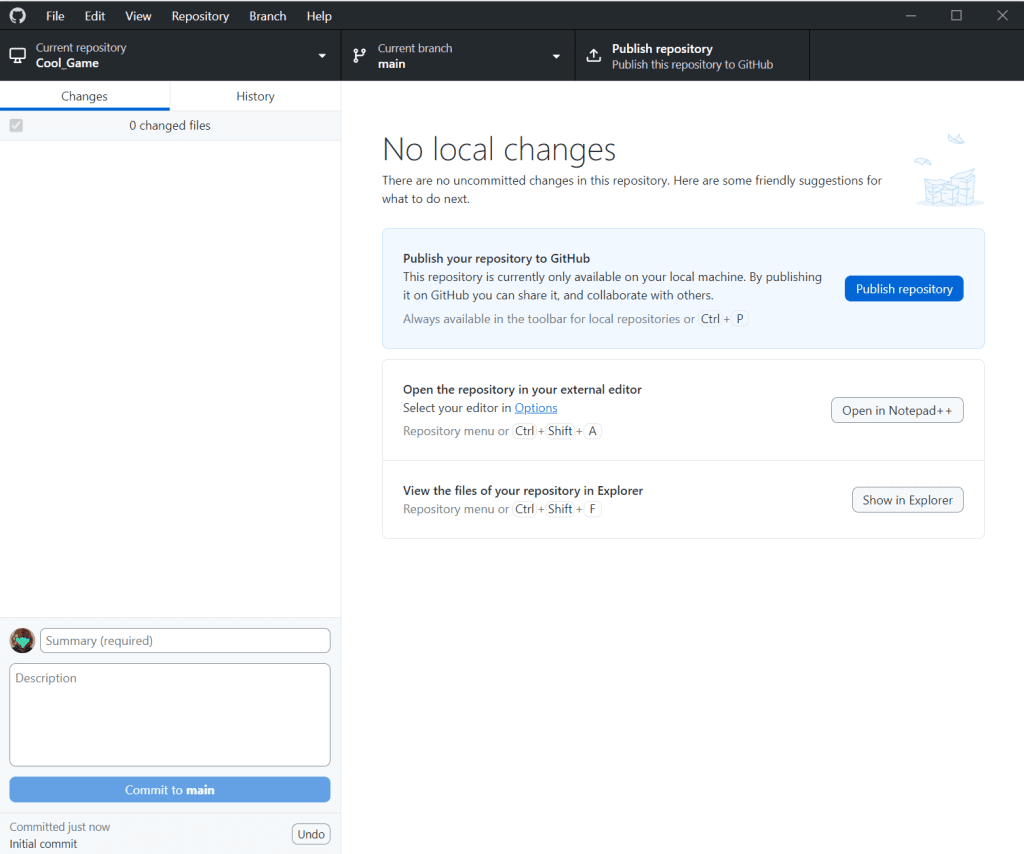
In order to publish, we can click either of the two “Publish repository” buttons on the screen, but it’s a good habit to use the one at the top, as that is where you push and pull updates from. Once you do that, you will see a couple of options on the next screen.
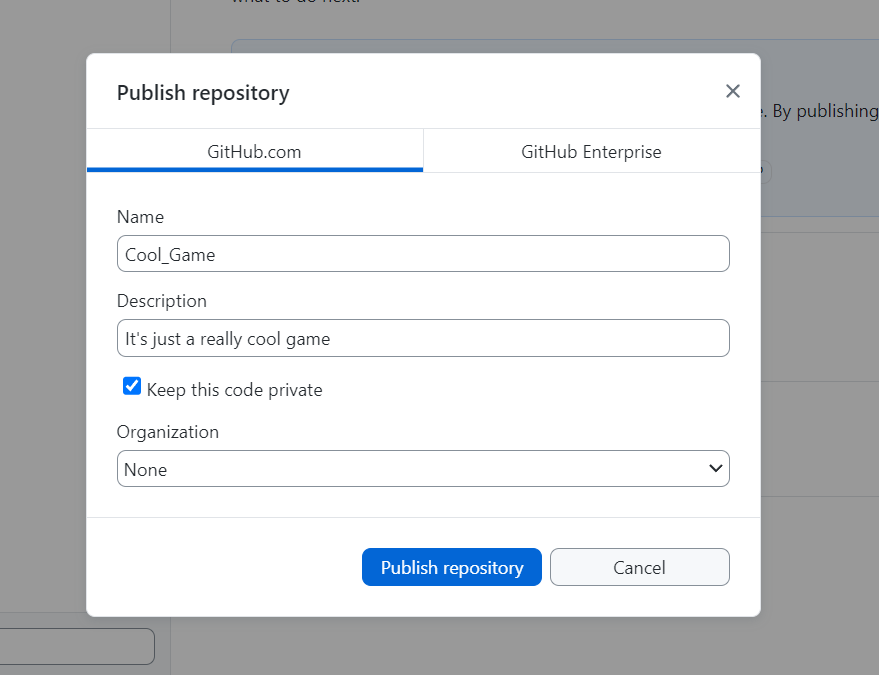
The name and description we have already decided upon, but you can edit the description here before publishing, if you prefer. The next option is important and is already set to private as default. The reason for deciding whether you want your code public or private is whether people will be able to see, access, commit to, and even download your project from GitHub.
I recommend leaving this set private if you don’t want others to access it, as you can always change it to public later. Keep in mind that just because it is set to private doesn’t mean that you can’t add other collaborators to it, it just keeps everyone from having access to your hard work!
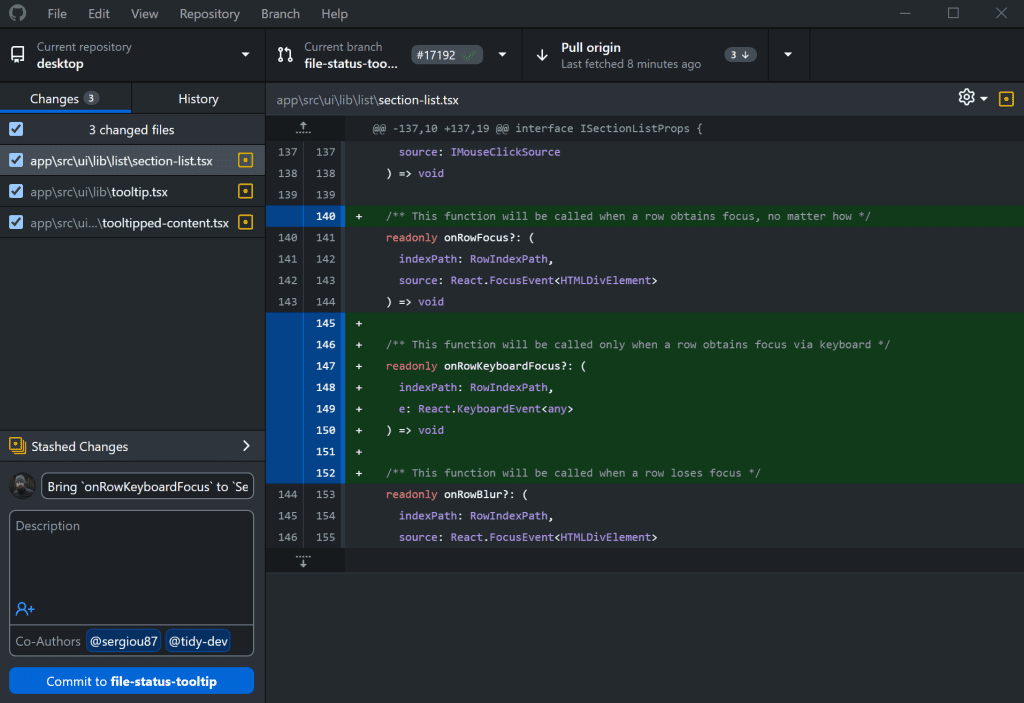
Making Changes
Once you start editing your project in GB Studio, every time you save, you modify the code of the files in your main folder. If you were to then open GitHub Desktop, you will see those changed files in the file list on the left. When you submit these changes to GitHub, it’s called a commit, which you can think of as a “save state” of your progress so far. Type in a good name for your commit that describes what has changed in the Summary section, write a description (use this guide to help you understand what to write), and click “Commit to main.” Each commit is something you can return to later if you make a mistake or need to download a deleted file from your project.
We’re not quite done yet, as we need to push these changes! If you don’t remember to push, you won’t actually be submitting the backup to GitHub’s servers. Again, you have two options to push: either the highlighted button in the summary section or the top of the screen:
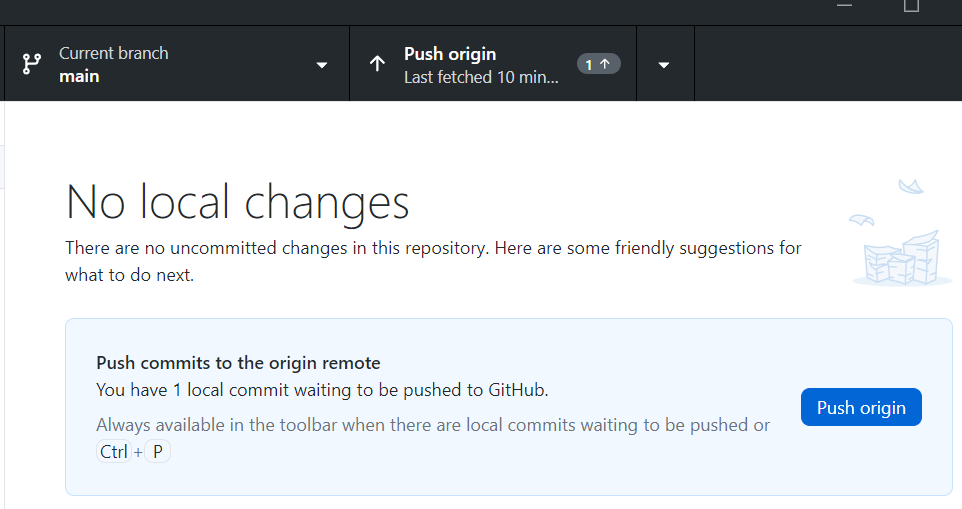
Now that we have a backup on the server, we are free to continue working on our project. You can also use the History tab on the left of the interface to see previous commits and you can even choose to go to GitHub.com to view the code and download the backup, if needed.
Works Well With Others
There are some disciplines involved with using a tool like this in a team setting with your collaborators. Thankfully, the recent releases of GB Studio (since 4.1) have a different file structure, where each scene and object have their own storable file type system.
Even with the files being broken down individually, knowing when each person is in the project and what they are editing could be the difference of having a mismatch on the project or not. If there is a mismatch, it typically means one of you is going to lose essential progress.
Communication is key, and just as important as it is to communicate efficiently to work together, using a tool like this requires utmost care to know who is “in” and who is “out.” When it’s time for you to pull their progress, you go to the same area at the top of the screen, but this time it will ask you to “Fetch origin.” Every time you open the application, you need to refresh to check for updates, and fetching does that. If there’s something to pull, you will see the option to “Pull origin,” if not, it will simply say “Fetch origin” again. If you were expecting an update to be there, check in with your collaborators to ensure they didn’t forget to push or see if they are still pushing the update, depending on size.
Working with version control is tricky, but having the peace of mind knowing your files are safely backed up is more than worth the extra work. This is useful especially in a team setting where passing .zip files is less than ideal. Working in tandem with a tool like GitHub Desktop can be a great practice in organization, patience, and camaraderie.
Good luck, and may all your backups be saved!

Writer, Game Designer, Engine Bender, Retro Enthusiast. Co-creator of In The Dark. (He/Him)
