
Note: This is an updated version of a previous article released with changes to the code needed to work with GB Studio 3.1. If you’re using Version 3.0.3, please follow this article’s guide instead.
This tutorial is based on NalaFala (Yousurname)’s Background Tile Swapping Guide for GB Studio 3. Many thanks for providing the basis.
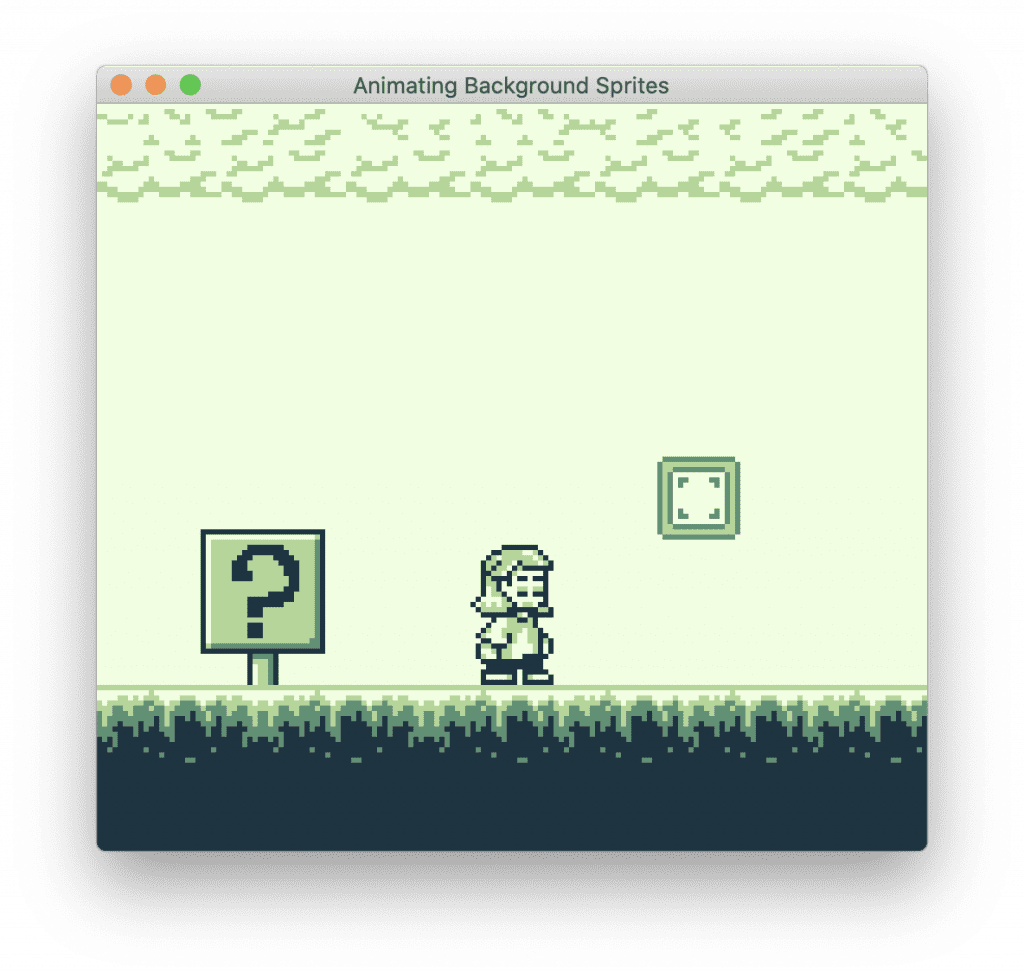
To set up what we’re going to try and achieve in this article, let’s take a look at DuckTales 2’s Niagara level. It features multiple large animated waterfalls that go far beyond the sprite limit. The Game Boy has some neat tricks, so how did they achieve this? Knowing that, how can we recreate it in GB Studio?
Let’s start by breaking down the effect:
- There are multiple animated waterfalls concurrently on screen.
- The player character renders in front of the waterfall without flickering.
- Given it is not possible with sprites, then it must be using background tiles.
- What GB Studio features can we use to animate background tiles?
With this in mind I’ll jump right to it: The animation is created by swapping background tiles for another in memory, and I’ll explain how you can do this in GB Studio.
They are 5 basic aspects of tile swapping I’ll be covering:
- The function used to swap a tile.
- How to create a simple animation.
- The impact and limitations of replacing a tile.
- How to replace a single tile.
- Replacing multiple unique tiles.
Additionally these GBVM Script features:
- Accessing global variables.
GBVM Script Event
While this might be considered a given to write code using GBVM add the [Miscellaneous: GBVM Script] event.
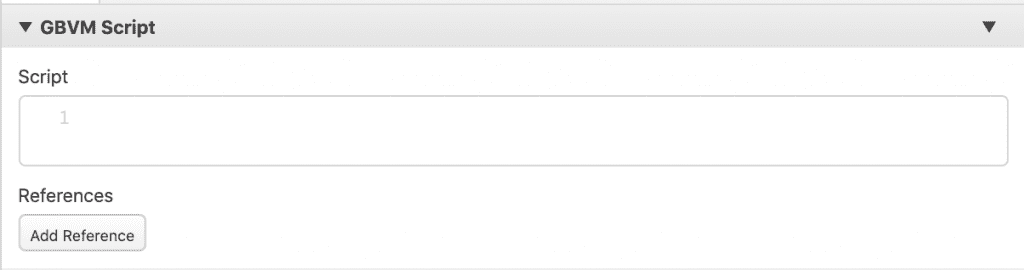
The event interface is basic (not the language), all you get is a text box where you can write whatever GBVM commands you need, and an Add References button (more on that later). I would love to see future versions implement code auto complete, otherwise known as intellisense in a traditional IDE. GB Studio 3.1 does now offer some quality of life features like syntax highlighting (the text changes color according to what is being written to make it easier to read), and line numbers.
GB Studio Central has a great primer Understanding GBVM and it is worth reading the GBVM Operations reference in the official docs, as it provides information not present in the GBVM source file.
For this tutorial we will be using these GBVM commands
I won’t be explaining all of them in detail for this article, but if you have more questions about them it’s best to asked them in the #gbvm-help Discord channel. The GB Studio Discord is full of helpful members, and it’s a great resource and you’ll see me there often asking question after question.
Tile Swapping Functions
There are two functions within GBVM that can be used to swap a tile for another in-memory:
- VM_REPLACE_TILE
- VM_REPLACE_TILE_XY
Of the two, I prefer to use VM_REPLACE_TILE_XY, since it partially solves one of the challenges, locating and defining the target tile to swap. The syntax, or “way to write” the command is as follows, which each part explained. For this tutorial, I refer to the tile currently on screen as the “target”, and the tile which will be replacing it as the “source”.
VM_REPLACE_TILE_XY X, Y, TILEDATA_BANK, TILEDATA, START_IDX| X | The X position of the target tile to be swapped, e.g. 3 |
| Y | The Y position of the target tile to be swapped, e.g. 8 |
| TILEDATA_BANK | TILEDATA_BANK is a ROM bank label where the source tile is stored in the ROM’s memory, e.g. ___bank_bg_room_tileset |
| TILEDATA | TILEDATA is a label where the source tile is addressed from, e.g. _bg_room_tileset |
| START_IDX | The index location of the source tile. Must be value between 0 to 255 |
Tilesets
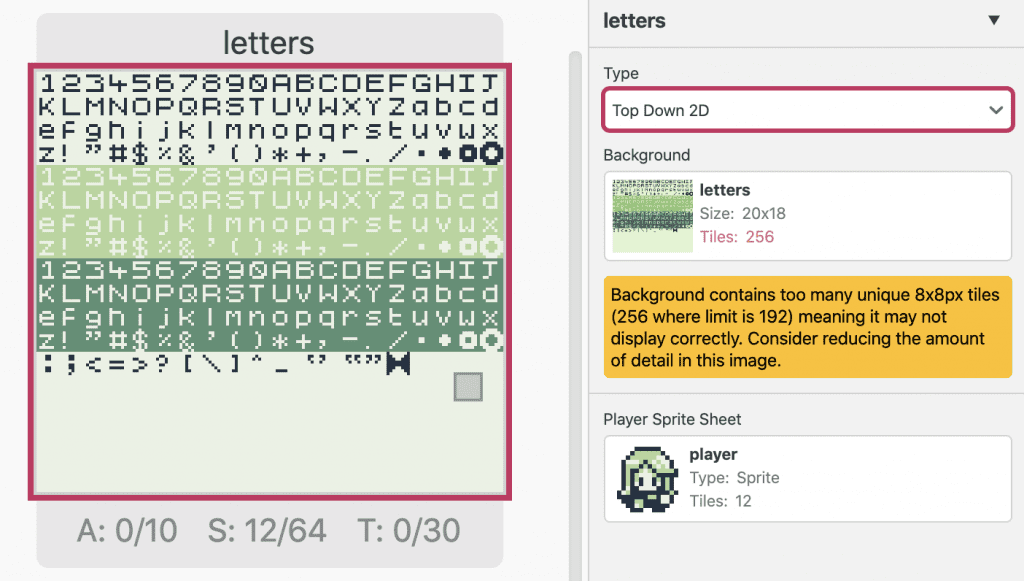
Tilesets are created automatically by GB Studio when your game is built. To make one that can be easily used for a tile swap command, create a scene containing only unique background tiles you want available for swapping. The same rules for a regular scene applies, only unique tiles count to the tile limit, and GB Studio will optimize repeating tiles, which will make it harder to determine a tile’s index – so it’s best to avoid that. Don’t worry about the scene’s “look”, it’s purely being used for reference by the GBVM tile swapping script. If using more than 192 tiles, I opt to use the logo mode so I don’t get the warning when compiling.
Tilesets are assigned a reference name according to their filename. If there is duplicate filename, a number will be appended to the reference name automatically. The name convention for TILEDATA_BANK is ___bank_bg_filename_tileset, and the TILEDATA is _bg_filename_tileset. To find out what background reference is, click the “Add Reference” button at the bottom of GBVM event. You will first see all the different parts of your game that can be referenced by GBVM script. Since we are interested in the background tiledata, click “Backgrounds” to see them listed, and select the file you are interested in working with. Alternatively, type in the file name to search it at the top of the list.
Examples of Multiple Tilesets
| Image |  |  |
| Background Name | letters | waterfall |
| TILEDATA_BANK | ___bank_bg_letters_tileset | ___bank_bg_waterfall_tileset |
| TILEDATA | _bg_letters_tileset | _bg_waterfall_tileset |
Take the two background images above: letters.png and waterfall.png. These are referenced in GBVM TILEDATA_BANK as ___bank_bg_letters_tileset and its TILEDATA is ___bank_bg_waterfall_tileset. You can also click the pencil next to the references when added in a GBVM event to rename them to whatever you want. Finally, since you’ll need to use these references in a GBVM script, you can click on the tileset name under the references (float your cursor on top of the reference to bring it up), and this will copy the TILEDATA_BANK and TILEDATA to the clipboard to be pasted later.
Tile Indexes
Each unique tile within the set is assigned an index. To determine a tile’s index, imagine putting all the unique tiles within the set on a single row.

Like most programming languages GB Studio uses zero based numbering for its indexes.
The first tile has an index of 0, the second 1, third 2 and so on. If you go to index position 35 for example, you will find the first lowercase ‘a’ tile, located at position X=15 Y=1 in the letters scene.
If you want a more “hands on” visual way of finding a tile’s index, try using the VRAM viewer in bgb, it’s come in handy many times.
The Math
The logic for calculating a tile’s index is rather simple if all tiles are unique:
(TileY * BackgroundWidth) + TileX = TileIndex
- The TileX and TileY can be found within the scene editor, showing up as a popup in the bottom left.
- BackgroundWidth is the number of tiles your scene is wide, the “letters” background is 20 tiles wide.
Examples
- Letter ‘a’ is at position 15,1 so: (1 * 20) + 15 = 35
- Letter ‘v’ is at position 17,2 so: (2 * 20) + 17 = 57
Let’s Swap A Tile
Now you know the command and its parameters, let’s try swapping a tile in the box in the scene below.
The box is located at X=14, Y=9, and we’ll swap it with the tile in ___bank_bg_letters_tileset at index 57 (letter ‘v’ in the letters scene).
GBVM Script Example
; start of GBVM script; lines starting with ; are comments and are ignored by the compiler

; Use VM_PUSH_CONST to store value we want to be called by START_IDX onto the stack, it can be accessed by the alias .ARG0 in the command.

VM_PUSH_CONST 57

; call the swap function by passing the START_IDX using .ARG0 alias

VM_REPLACE_TILE_XY 14, 9, ___bank_bg_letters_tileset, _bg_letters_tileset, .ARG0

; free memory assigned to .ARG0 with VM_POP

VM_POP 1

; end of GBVM script
Number values cannot be directly used by the Replace Tile command and need to be stored to the Stack first with a VM_PUSH command. This is accessed with the alias .ARG0. And just like that we have swapped the tile!
Now let’s try replacing the same tile with a tile in waterfall tileset at index 2.
GBVM Script Example
; start of GBVM script
VM_PUSH_CONST 2
VM_REPLACE_TILE_XY 14, 9, ___bank_bg_waterfall_tileset, _bg_waterfall_tileset, .ARG0
VM_POP 1
; end of GBVM script
As you can see the above script uses very similar code. The first command loads a value of “2” to the stack. It then uses the same VM_REPLACE_TILE_XY command, but references the waterfall bank and tileset, and then finally “pops” the stack 1 “level” to clear the memory used.
Using Global Variables in GBVM Scripts
It’s okay to use hardcoded values in GBVM scripts, but there may be times where you will need access to variables for more flexibility. To use global variables within GBVM Script you must prefix VAR_ to your variable name and replace spaces with underscores. Calls to global variables are also in ALL CAPS.
For example if we have a global variable called “Loop Index”, to reference it in a GBVM Script we would write it as:
; Loop Index is referenced in GBVM via:
VAR_LOOP_INDEX
GBVM Script Example
To you use the Loop Index in VM_REPLACE_TILE_XY, we reference it like so:
VM_REPLACE_TILE_XY 14, 9, ___bank_bg_letters_tileset, _bg_letters_tileset, VAR_LOOP_INDEXAnimating A Tile
Now that you know how to swap a tile, the next logical thing you might want to try is animating a tile. You can do this by looping a variable’s value and referencing it with a swap tile script.
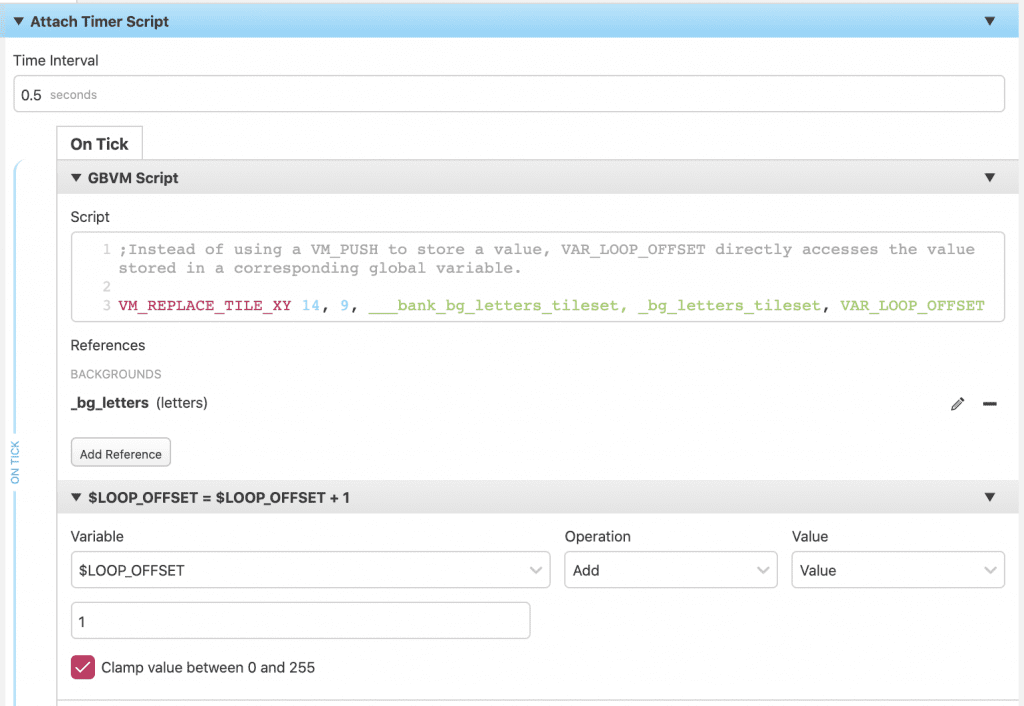
In the above example, the variable to track the animation state will be stored in the global variable Loop Index. Each time we loop, it will add the Loop Index by 1. When Loop Index becomes greater than 255 it will wrap back to 0 since the clamp value option is checked. Normally we would need to check if an animation index is too large for the bounds of the animation, but as there are 256 tiles in letters, this works fine for this example.
Animating Through A Specific Sequence of Tiles
So how do you handle animating over a range of tiles? Providing that all the tiles are in a sequence, it’s just a matter of defining the upper and lower values of the animation’s range, then use logic to set the value to the lower one if it exceeds the upper value.
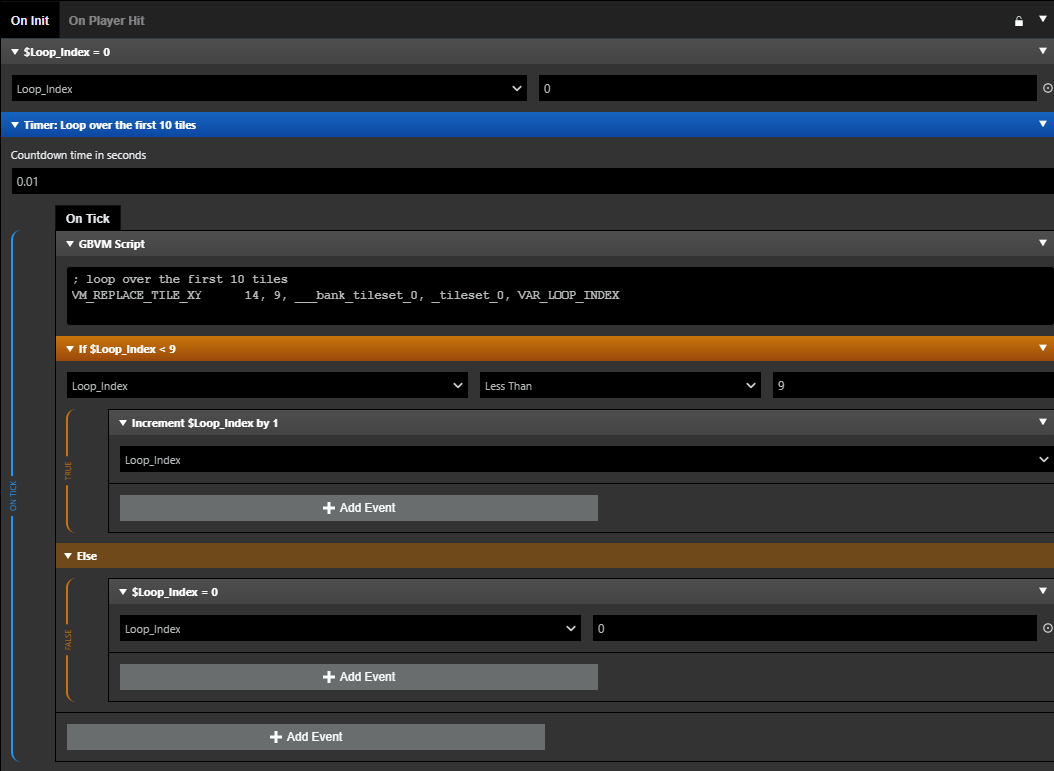
The above Timer Event loops over the first 10 tiles, once the Loop Index is greater than 10, it resets to 0. Simply vary the upper and lower values to your desired tile indexes as needed. If your tiles are not in sequence, then your logic for calculating the next tile will need to reflect that. For your sanity though, simplest is best and the fastest for a Game Boy to calculate, so try using tiles in sequence.
Replacing a Single Tile
If you want to change a single tile, it must be unique in the target artwork. The tile drawn in the above example that’s cycling between 1, 2 and 3 is unique for that scene. Even if tile 1 is replaced with 2 or 3 from the tileset, since it started with a different memory address it will remain unique after the swap (handy!).
Updating Multiple Unique Tiles

If you want to animate more than 1 unique tile, you need to replace each individually. You will have to use multiple GBVM scripts, but multiple scripts can be written in a single GBVM Script command.
Closing thoughts
A GB Studio Project with examples of the code used in this tutorial is available on our Itch Page. Go ahead and download the files and play with them yourself to see everything in action. We glossed over a lot of how GBVM works in this article, so look forward to another article going over how to understand GBVM’s uses. With such a robust toolset, it’s possible to write entire animations entirely in GBVM.
Tile swapping is also the basis on more advanced UI and menuing – so we’ll be looking at that soon.

Aussie software developer, retro game collector, chiptune vinyl enthusiast, did someone say reinvent the wheel but buggier with less features?
