
The wave channel is the most distinctive and versatile part of the Game Boy’s sound chip. It can go an octave lower than the duty channels, and can be configured to produce a wide variety of sounds such as bass notes, kick drums, crunchy guitars, and even recorded wav samples. It can also make very unique higher octave notes that sound like flutes or bells.
In this lesson we are going to talk about the basics of making a bass line for our song. The bass is the lower end of a song and in non-chip music it usually comes from a bass guitar, but can also be from keyboards or synths. The Game Boy chip’s bass is crunchy and has lots of character. You can configure it to be quieter and smoother, but its lower octaves will also get quieter. So a strong bass line is usually the job of the wave channel.
Effects are very important in controlling the wave channel. We are going to keep it simple for today and look at setting up a wave instrument and putting it into our sample song. We will come back later once we learn about effects to learn how to do more fancy tricks like bass kick drums.
Making a Wave Instrument
Much like the noise and duty instruments, there are a wide variety of premade wave instruments. We are going to make one from scratch to learn how it all works.
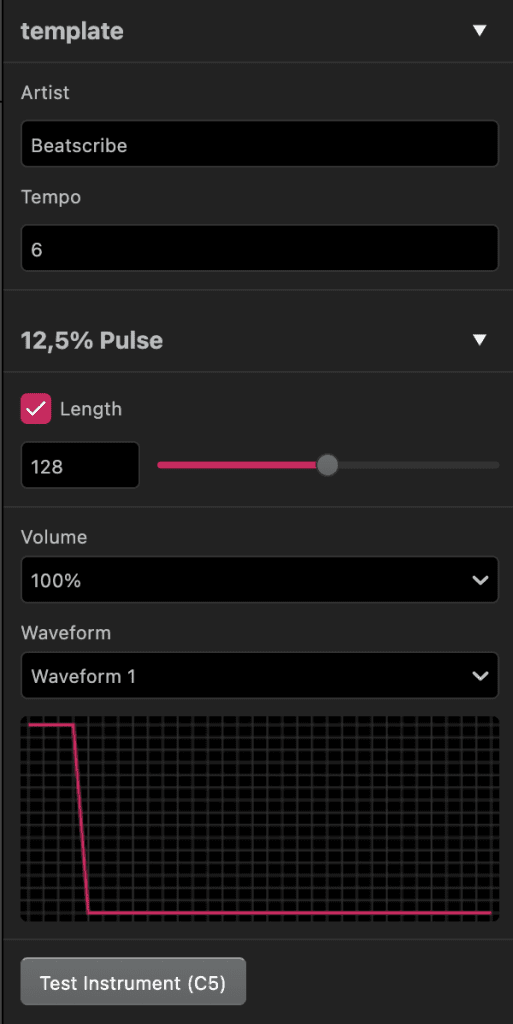
Click wave1 in the side panel. You’ll see that the instrument panel has similar settings to the duty channel. You can’t make an envelope, but you can set a length and choose one of four volume levels. Make sure ours is at 100% volume and has no length (meaning it plays indefinitely).
Unique to the wave channel is the wave option. Below the volume area (where you’d see sweep settings for duty), you’ll see a grid set up to modify the wave itself. The waves are not tied to instruments, you can click the waveform drop down and pick a different one. For now let’s leave it at wave 0. Click the Test Instrument button to hear how it sounds now. Now click around on the grid, make some mountains and valleys, just for fun. Now press “Test Instrument” again. You’ll be able to hear the difference as you edit and test the wave. For now, let’s take a look at a few things to learn how it works.
Draw this next shape or select waveform 11 from the dropdown menu.
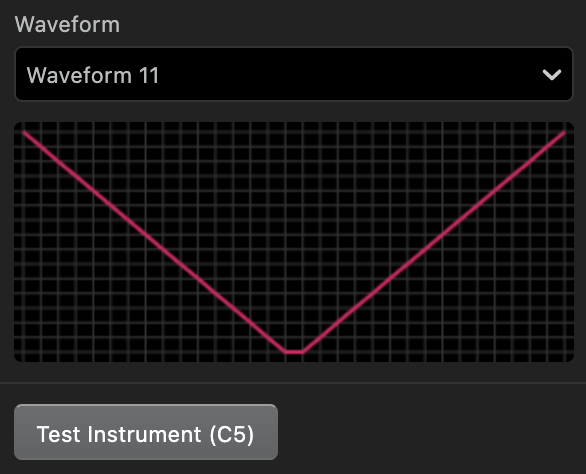
Remind you of another Nintendo system? Now it sounds like the NES triangle channel. It makes for a soft bass (too soft for GB hardware honestly) or a flute-like sound at higher octaves. Now, change it to the following form:
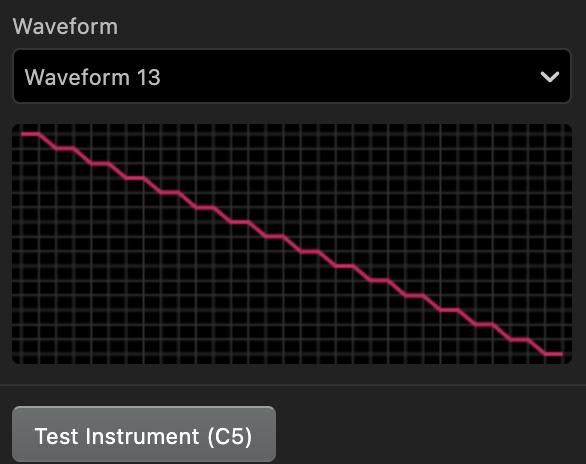
This shape creates a common synth waveform called a saw tooth. As you can hear, it has a slightly harsher tone compared to the “smooth” triangle. It makes a great bass for a high-energy song.
Another softer waveform is the sine wave:
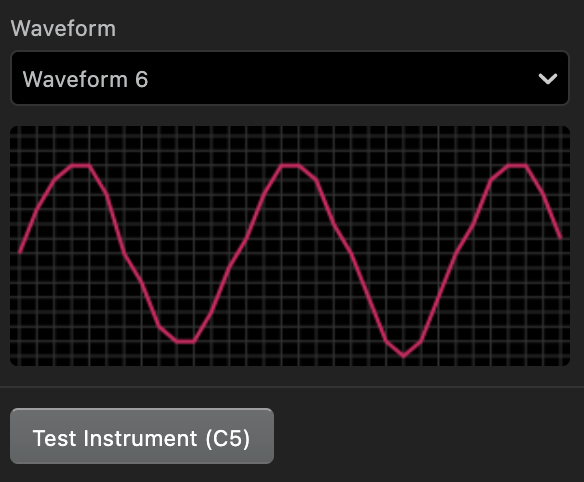
The sine wave isn’t super exciting as a bass instrument, but if you put it on higher octaves, you can get some softer piano or bell-like tones.
You can see how powerful the wave channel can be. For our sample song we are going to use the waveform 2 that comes with GB Studio, or you can design your own! You can edit the wave after putting down notes and the sound will change automatically.
Composing Notes
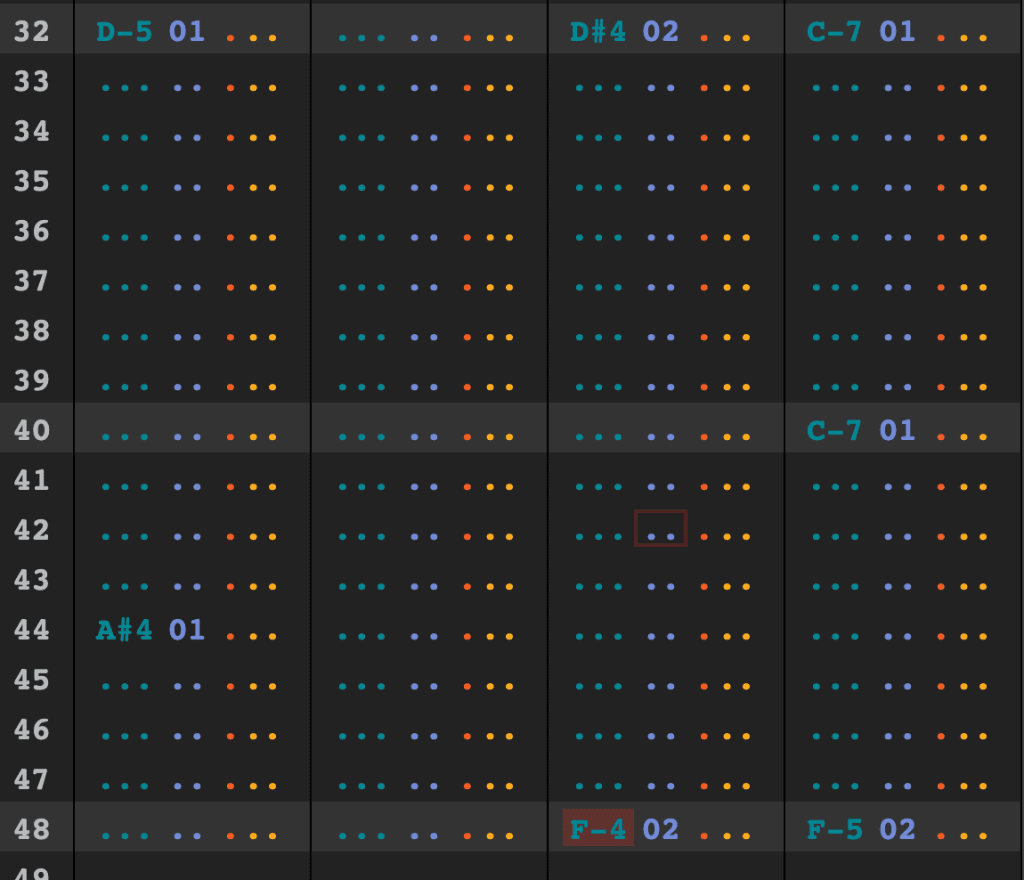
We’re going to lay down notes just like we did for duty channels. Lower the octave down to 3. Select the Wave 1 instrument and enter the notes as shown, only three note for now. Put a C4 on row 1 by pressing Q on your keyboard. Next, on line 32 a D#4 by pressing 3, then lastly on line 48, press R for an F4.
Now it’s got some good bass!
When we play the song back we can see it’s starting to sound like the final piece. Right now the notes keep playing unlike in the final, but we will come back and learn what to do about that after we understand how to use effects, which is what we cover in our next article!

Beatscribe has composed and produced soundtracks for games on Nintendo DS, Nintendo Switch, PS4, Xbox1, Sega Genesis and numerous iOs and Android games for over a decade, but his true passion is creating epic moods on ancient hardware like the Game Boy and NES.
