
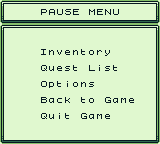
As you continue to develop your game in GB Studio, you will likely be creating menus for your player to check inventory, review a quest log, or edit settings. Although GB Studio has a built in [Display: Menu] event, you may find that it is too limiting for what you’d like to create. The Display: Menu event is limited to 8 options, and can only display 6 characters per item. Instead of trying to force this event to fit your needs, you can create scenes to function as your menu. In this tutorial, we’ll cover how to create a Pause Menu within a scene that allows the player to navigate between 5 options. This will also go over how the Stack works for saving your player’s position and returning to it. For this tutorial, we’ll be using the “Top-Down 2D” scene Type, although it should also work for “Point and Click” style scenes as well.
Step 1: Creating a Menu Scene
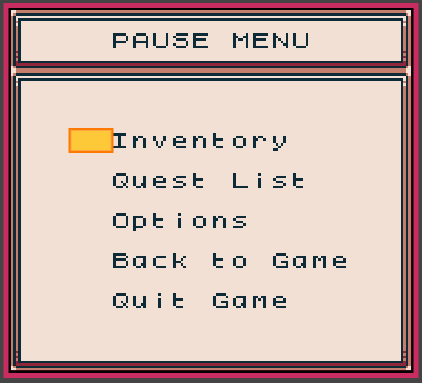
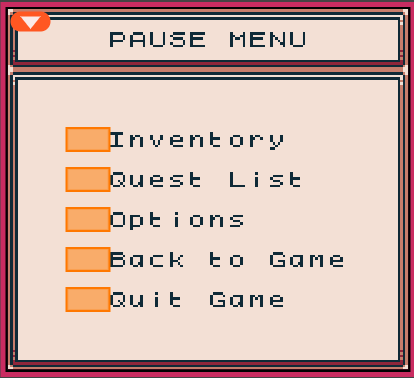
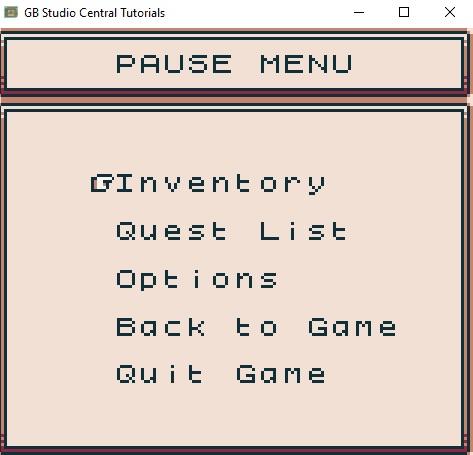
When making a trigger based menu, the majority of the menu information will be built into the scene’s background itself. Creating your menu with a background has many benefits: you can create more than 8 options for the player, and you can change how you display this information. The example background in this tutorial may only have 5 choices, but the text displayed for each option is much longer than a [Display: Menu]’s character limits. With a background based menu, you can even choose to use icons or pictures instead of text for your choices.
When creating your options, leave at least an 8×8 space between choices at minimum, since you don’t want the triggers to overlap.
Step 2: Create a Cursor & Set Its Position
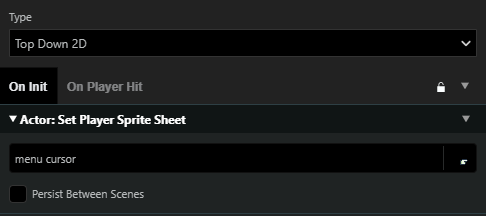
In order to interact with the menu, you’ll be treating the player like a cursor (👉). Whenever your player enters the menu scene, change them into a cursor using the [Set Player Sprite Sheet] event.
In this example, since the background text is aligned to an 8×8 grid, we’ve created a cursor sprite that aligns to the text.
After changing the player’s sprite On Init, use a [Set Position] event to place the cursor in the location where they’ll begin in the menu. This position is where our first trigger will be, starting the navigation loop.
Step 3: Creating the Triggers
A trigger based menu works by moving the player’s position in between different triggers. Each trigger will check for the player’s inputs to determine what to do next. This is accomplished using the [Joypad Input: Pause Script Until Pressed] event.
First, create a trigger and place it where the cursor will be positioned. Then, in the Trigger’s “On Trigger” menu, place a [Joypad Input: Pause Script Until Pressed] event.
When this event fires, our game will pause until the selected buttons are pressed. If we combine this with [If Joypad Input Pressed] events, we can control what happens based on the player’s input.
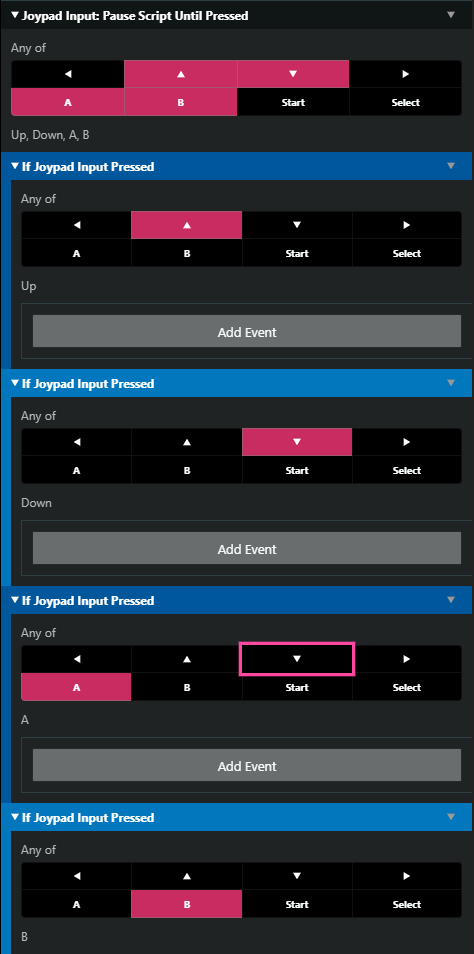
In this menu, our players can use Up and Down on the D-Pad to navigate, the B button to close the Menu, and the A button to interact with the menu option they’ve reached. With that in mind we’ll need to create checks for those 4 inputs. After the Pause event, we’ll create an event to control which scripts run based on which input was pressed:
To create the navigation, send the player to the position of the next menu choice using a [Set Position] event.
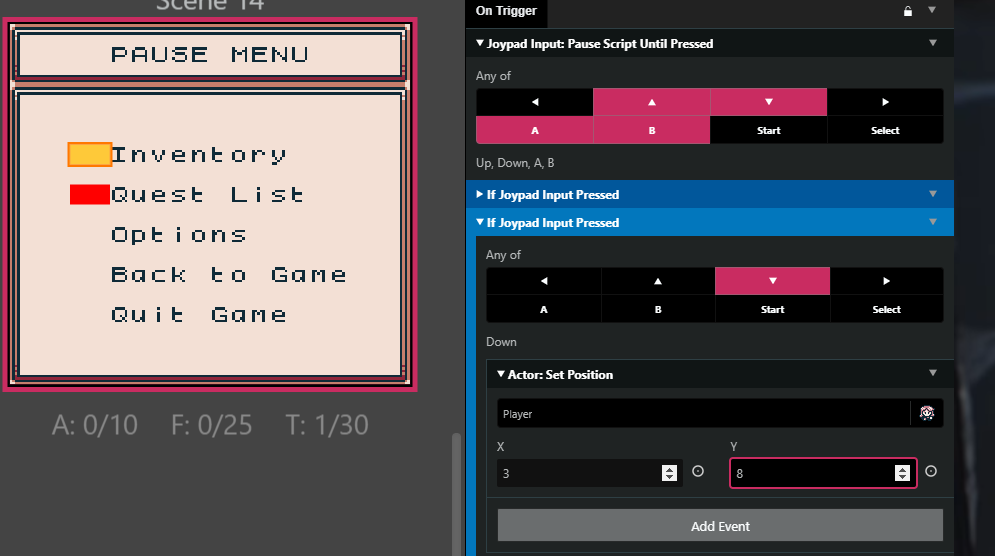
By entering the coordinates of where the next trigger will be, you’ve now made it so that when the player presses Down, they’ll move to the next trigger. Then, the trigger will engage, pausing the game again and waiting for the next input.
If you copy+paste the trigger, and change the [Set Position] events for each new position, you can now move your cursor across multiple items:
Step 4: Interacting with the Menu
Selecting options in the menu uses the same concepts as navigation. Within each trigger after the [Joypad Input: Pause Script Until Pressed] event, create an [If Joypad Input Pressed] event that checks for a press of the A button. In that event, you can then create a script to send players deeper into the menu (to check a quest list, for example) by using a [Change Scene] event. You can also use a scene change to send them back to the Title Screen for a “Quit Game” option.

Step 5: Attaching the Menu
Now that we can navigate around the menu and use options, you’ll need to give the player a way to enter and exit the menu on command.
To create a “Start” menu, use the [Attach Script to Button] event to allow the player to press the Start Button and be sent to the menu scene.
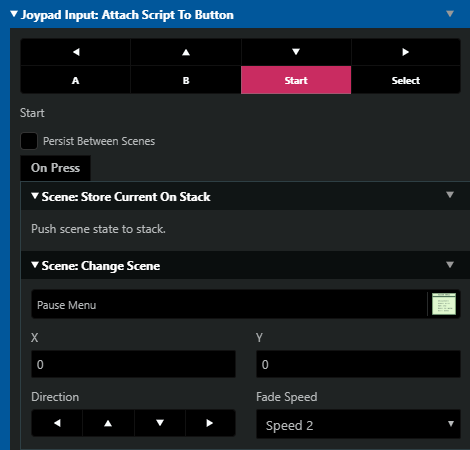
Before we change the scene to the Menu, we want to save the player’s current scene and position so that they can return to that location after. This is accomplished by using the Scene Stack. By using the [Scene: Store Current on Stack] event before a scene change, we’ll be able to return to this point later on.
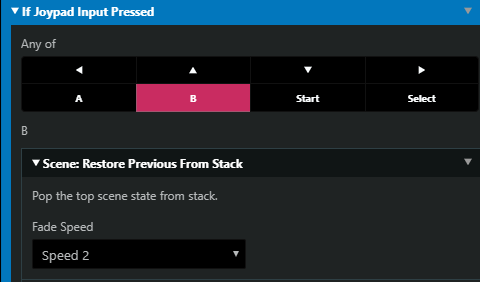
Back in the Menu Scene, you’ll want to give the player the option to back out of the menu. In each of our menu trigger’s, when the B Button press is checked, add a [Restore Previous Scene from Stack] event. By using the scene stack, this will allow the menu to send the player back to whichever scene they entered from instead of returning to a specific scene like when using the Change Scene event.
This will allow the player to return from the menu to the point where they paused in the game, regardless of which option they are currently hovering over. Now, with all these events and triggers set up, you’ll have a trigger based pause menu that you can access by pressing Start during your game, navigate multiple options and pages, and then return to where you left off in the game from the Menu scene.
If you’re unfamiliar with the Scene Stack, keep reading.
Quick Concepts: Scene Stacks
Scene Stacks, as mentioned above, are useful for transitioning your player between scenes that you may want to return from later. There are 4 events that directly interact with the scene stack.
- Scene: Store Current on Stack
- Scene: Restore Previous from Stack
- Scene: Restore First from Stack
- Scene: Empty Scene Stack
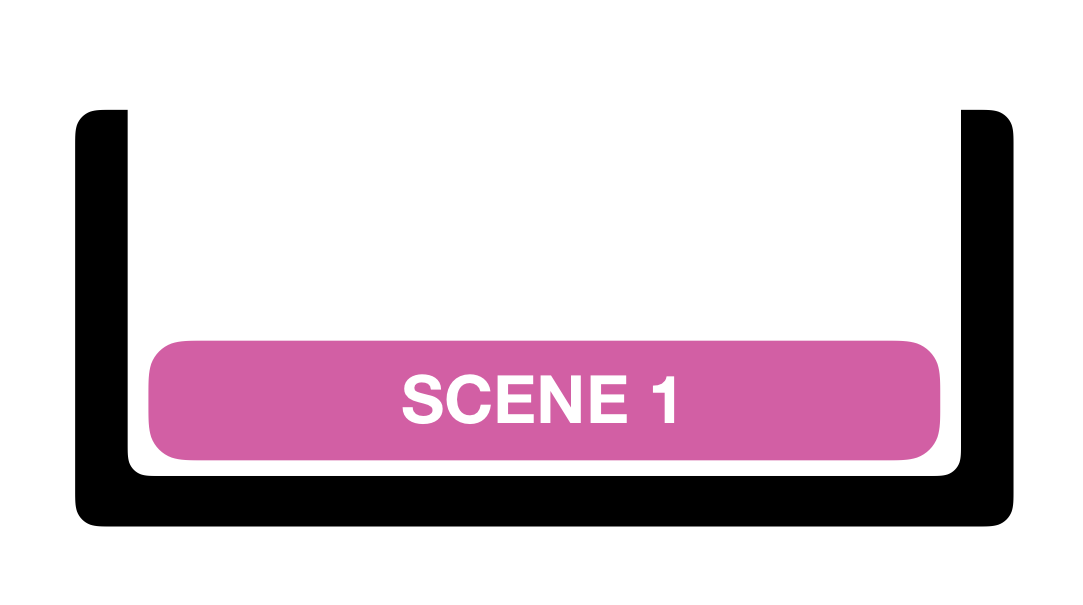
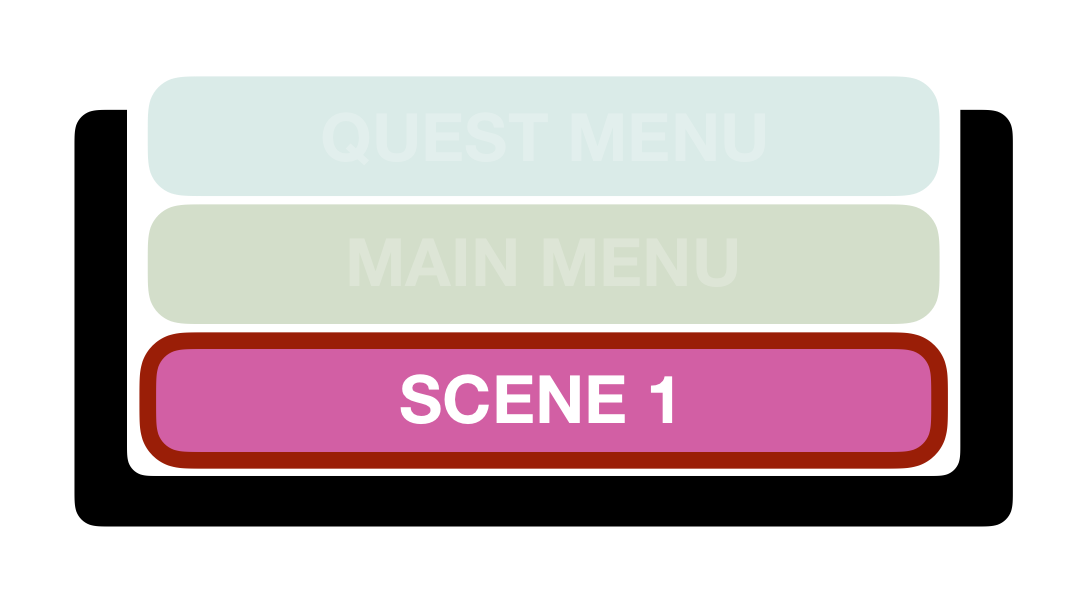
To demonstrate how it works, let’s look at our example menu system focusing on three scenes. Scene 1, Main Menu and Quest Menu
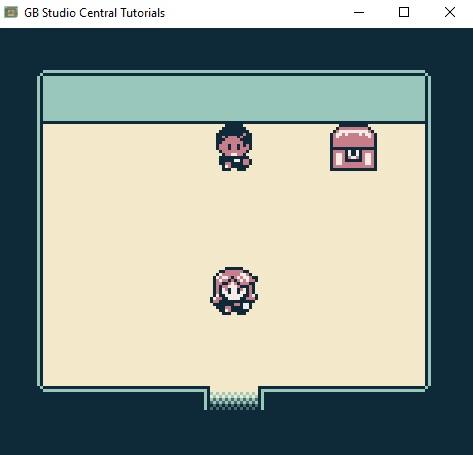
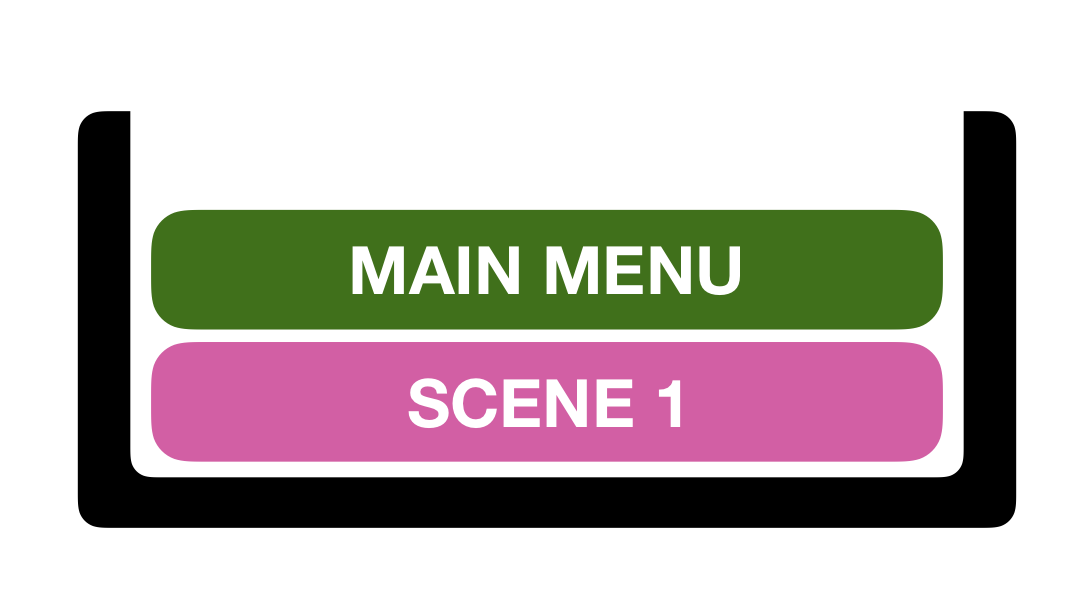
The player begins in Scene 1. If they press Start, Scene 1 is loaded to the “Stack” using the [Scene: Store Current on Stack] event.
Then a Change Scene event is called and the Main Menu Scene is loaded:
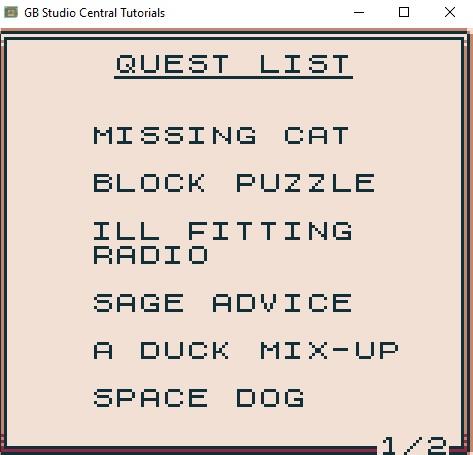
If the player selects “Quest List” from the menu, then “Main Menu” would be added to this stack using the [Scene: Store Current on Stack] before changing the scene to the Quest Menu:
With our example, if the player presses the “B” button from within this menu, then it will use the [Scene: Restore Previous from Stack] to return to the Main Menu, since it is in the top most location of the stack:
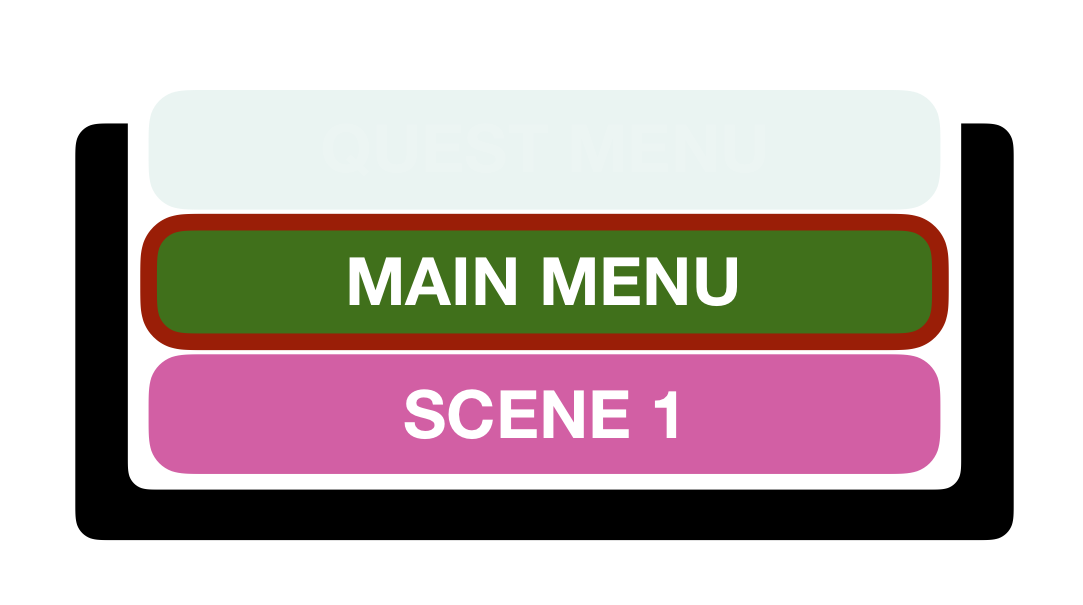
When this happens, it will not only change the scene to Main Menu, but remove “Main Menu” from the stack, bringing it back to the previous state.
Now let’s go back to the Quest Menu and add one more check for input. If a player presses Start, instead of Restoring Previous from Stack, it will call the [Scene: Restore First from Stack] event. This time, instead of restoring the scene from the top of the stack, it will load the one on the bottom, in this case the Scene 1 location:
Scene Stacking can be quite useful for creating menus that have sub menus or books with multiple pages. The Quest Menu in this example has multiple pages across separate scenes, but it will always remember the menu prior since it is saved in the stack.
It’s important to keep in mind that a scene stack doesn’t automatically add scenes. If Scene 1 is stored to the stack and then the player moves to another Scene, using a restore event would take them back to Scene 1. To prevent this, use the [Scene: Empty Scene Stack] event on Init of an “in-game” scene.

Friendly Neighborhood Game Designer, Podcaster, and (ex)Librarian (he/him)
GB Studio Games | Tabletop Games
