
When displaying dialogue in GBStudio, you have a few options to indicate which character is talking. You could use an emote event to give a visual marker on screen above the character in question. You could simply put the character’s name at the start of the text box. GBStudio also provides the ability to use avatars for dialogue to give a visual representation of who’s talking right in the text box like in many conventional games at the cost of taking up space for text.
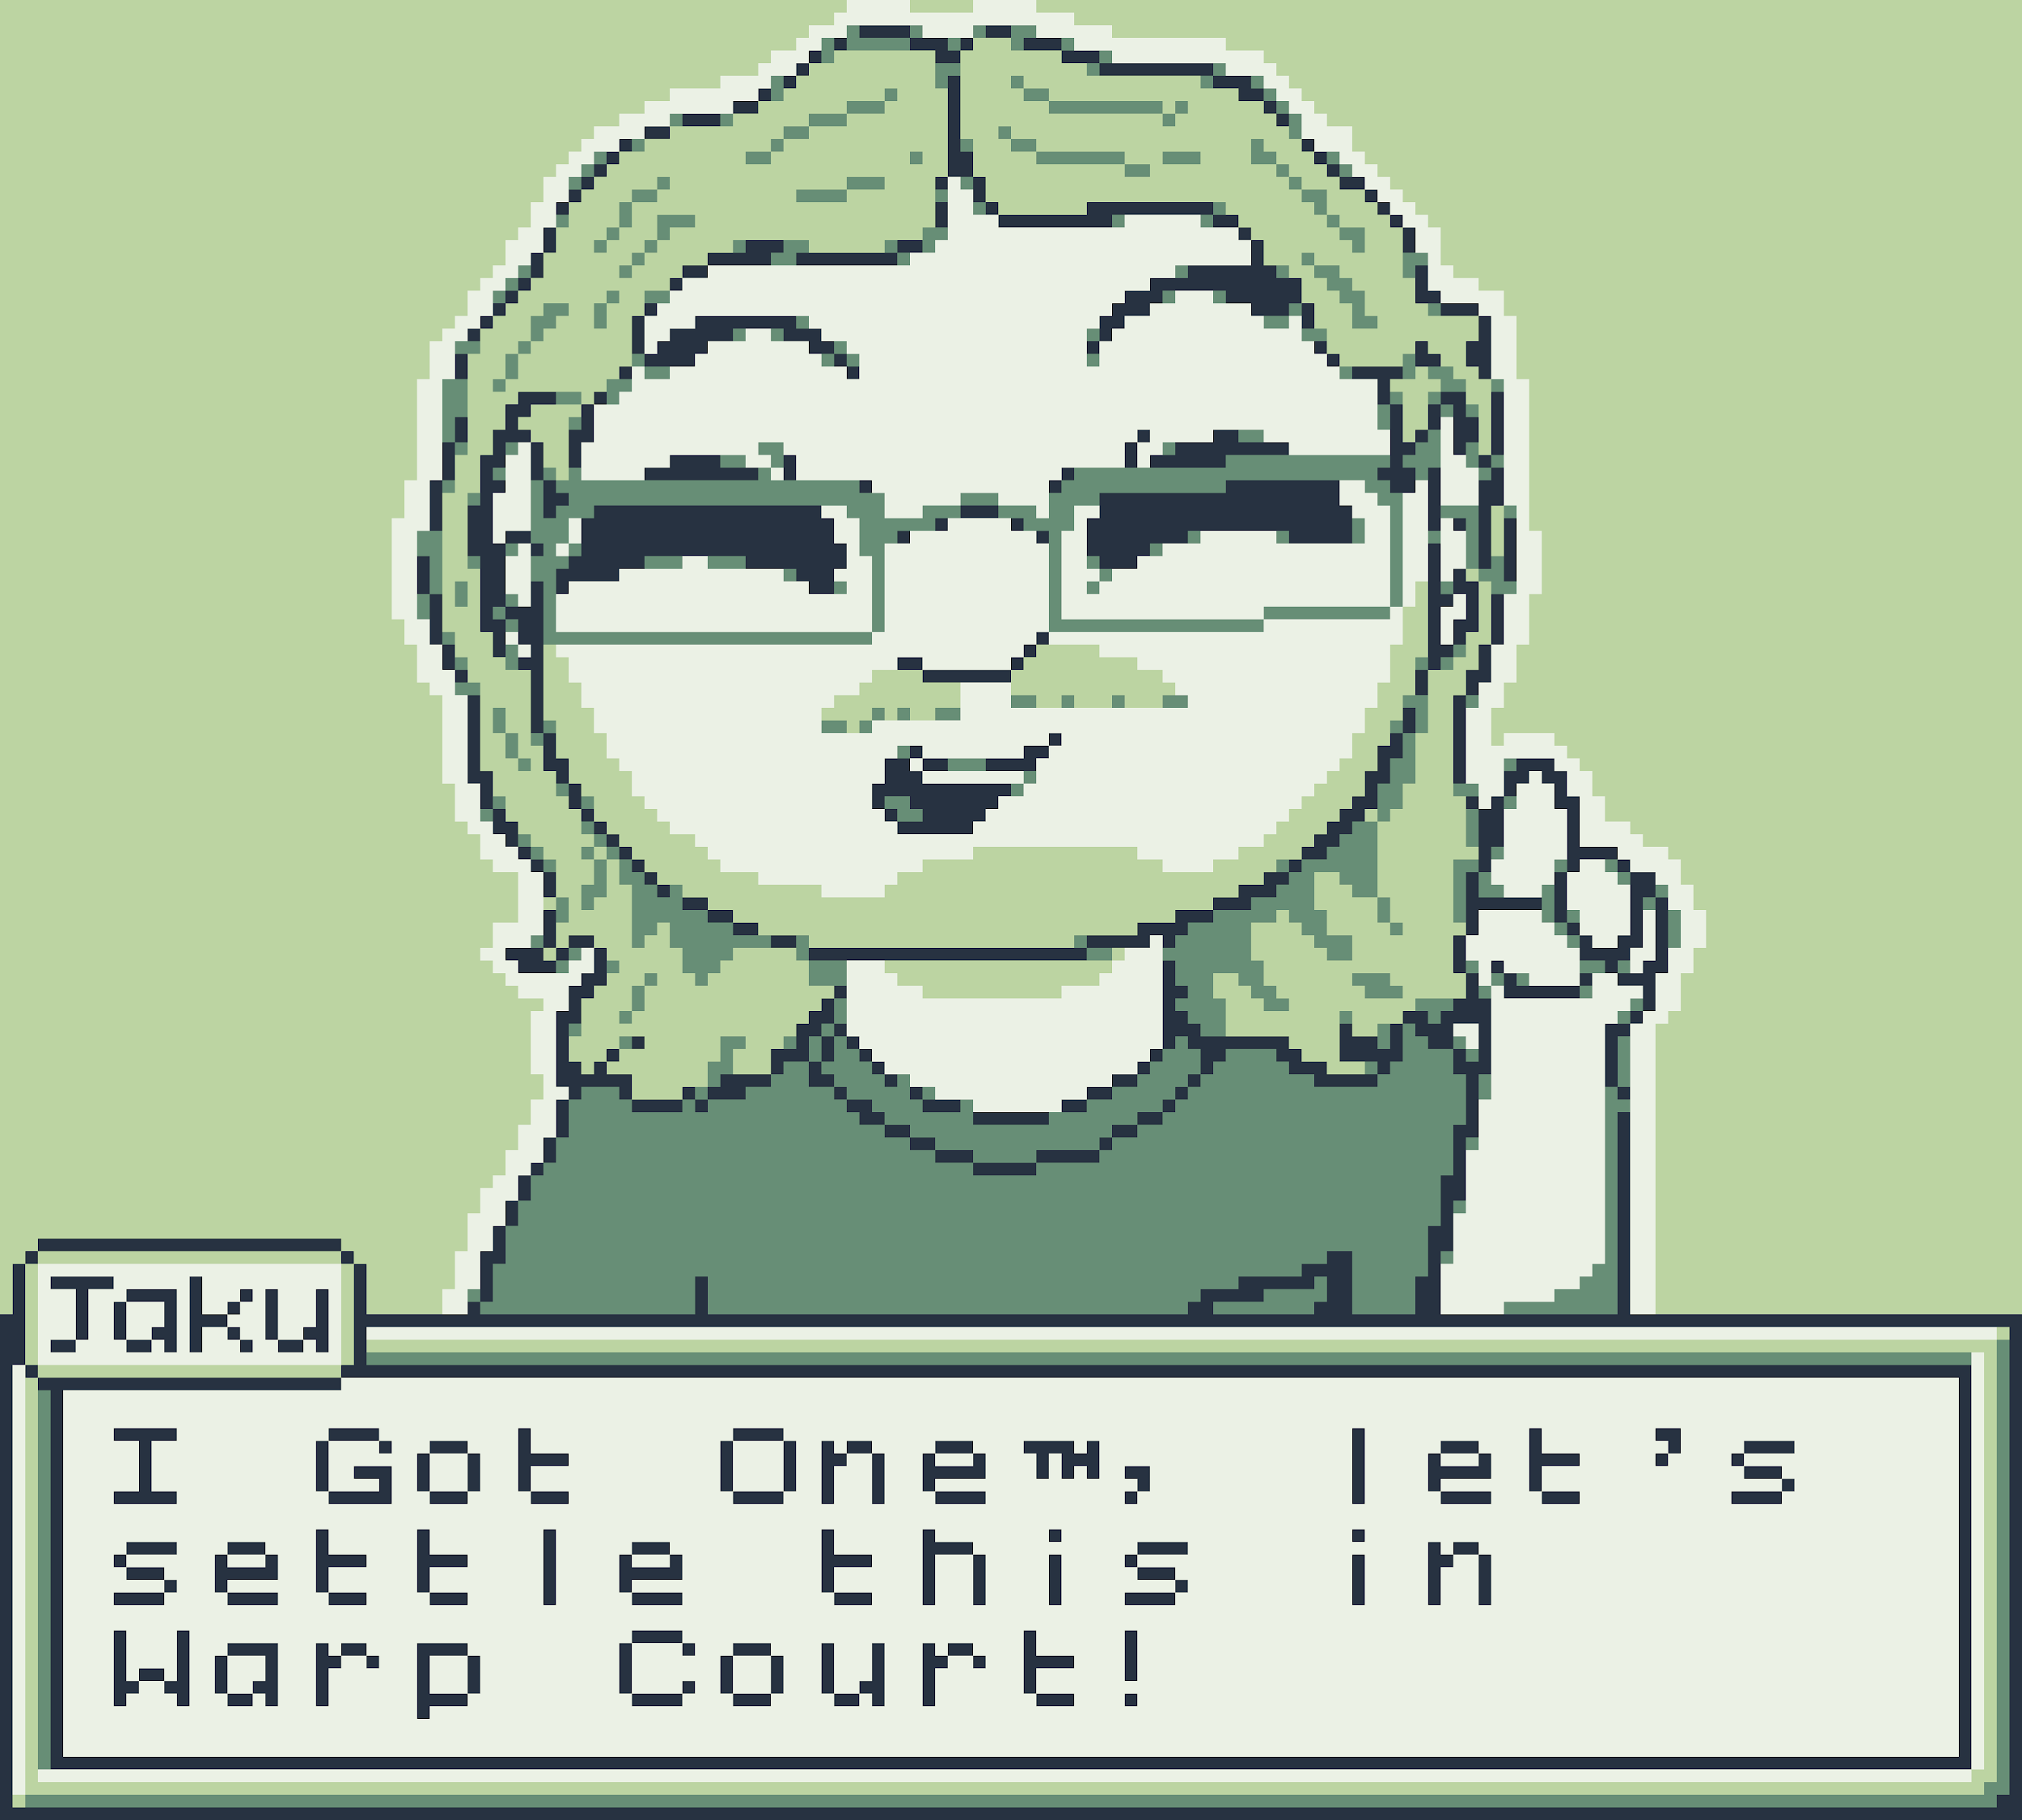
Here’s one more method for showing names using sprites that’s especially useful for interactive fiction games. This was employed for my Ace Attorney style game, “The Warp Coin Catastrophe” Note: I took advantage of a limitation with the 1.2 version of GBStudio that made sprites overlay dialogue boxes, this has since been patched.
This works best when the text box height is consistent, so I always made sure three lines were used by adding a blank line when needed. The default text box behaviour also moves the dialogue box into frame from the bottom. This results in better CPU usage on an original GameBoy, but means that your name label will appear before your text does. If you’re okay with that, leave it, but if you want a “cleaner” look use the “Text: Set Animation Speed” event on the first scene in your game and set the Text Open Speed and Text Close Speed to “Instant“. If your game is using Color Mode, then there shouldn’t be any noticeable lag.
An example project with all the source material is available to download at the end of this guide.
Step 1: Make a wide sprite sheet and create multiple labels on it.
It should be 16 pixels high and the width will be determined by how many names you need to show in a scene. Keep in mind that a scene can can have a maximum of 25 frames referenced besides the player sprite (as of V2 beta 4). Your name label art does not need to be the full height of the sprite, but in most cases the bottom of the edge should line up with the bottom of the sprite sheet. I also include one completely blank frame for the first frame (just solid bright green for transparency) to make it easier for name transitions later.
There is a limit of 5 sprites per line and 10 actors on screen total, so make sure the combination of labels and on screen actors doesn’t exceed that. I named my sprite sheet “nameLable.png” for simplicity. If you have different scenes with different combinations of characters, you could give them sequential names, or even include them in the filename for ease of use (for example, “nameLabel_JS_XW_DB.png” or “nameLabel_Scene1.png”).
This is what an example of what this could look like (guides are to show the different frames):

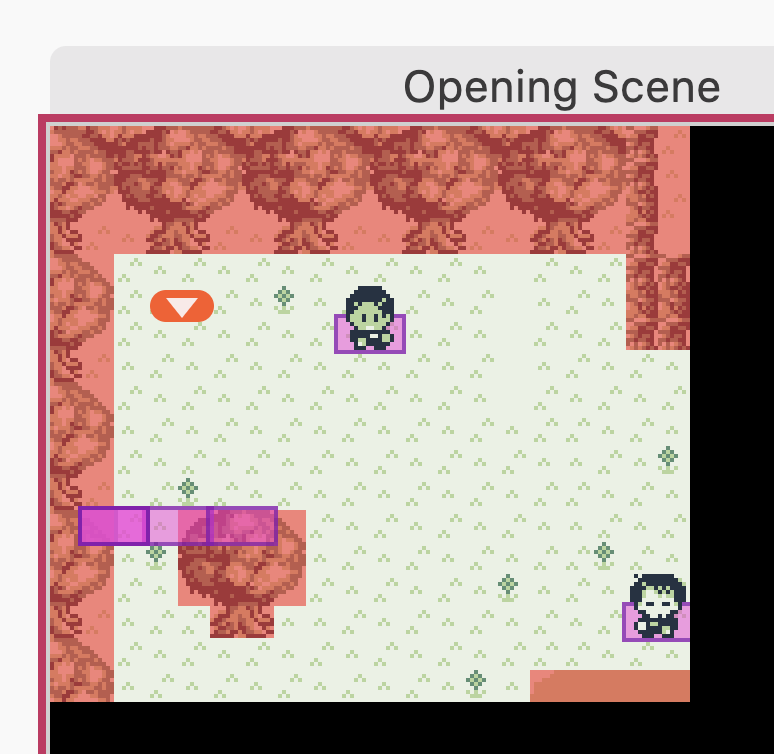
Step 2: Place your sprites into a scene.
The location of where you place the actors for your name label can be anywhere, but if you want to follow the “conventional” location, this will be right above where the dialogue box will go, or 12 for the actor’s “Y” value. Depending on the size of your labels, place 2 or 3 actors next to each other using the nameLabel sprite sheet. If you followed the spritesheet example above, these will show as blank since the first frame is all bright green. It’s a good idea to name these actors to make the next steps easier. I suggest “Name Label 1”, “Name Label 2”, etc going left to right. Make sure these are set to “Static” type sprites, and also enable the “Pin To Screen” checkbox. With it enabled, no matter where your character or camera moves they will stay in the same position relative to the camera.
3. Setup the scripts.
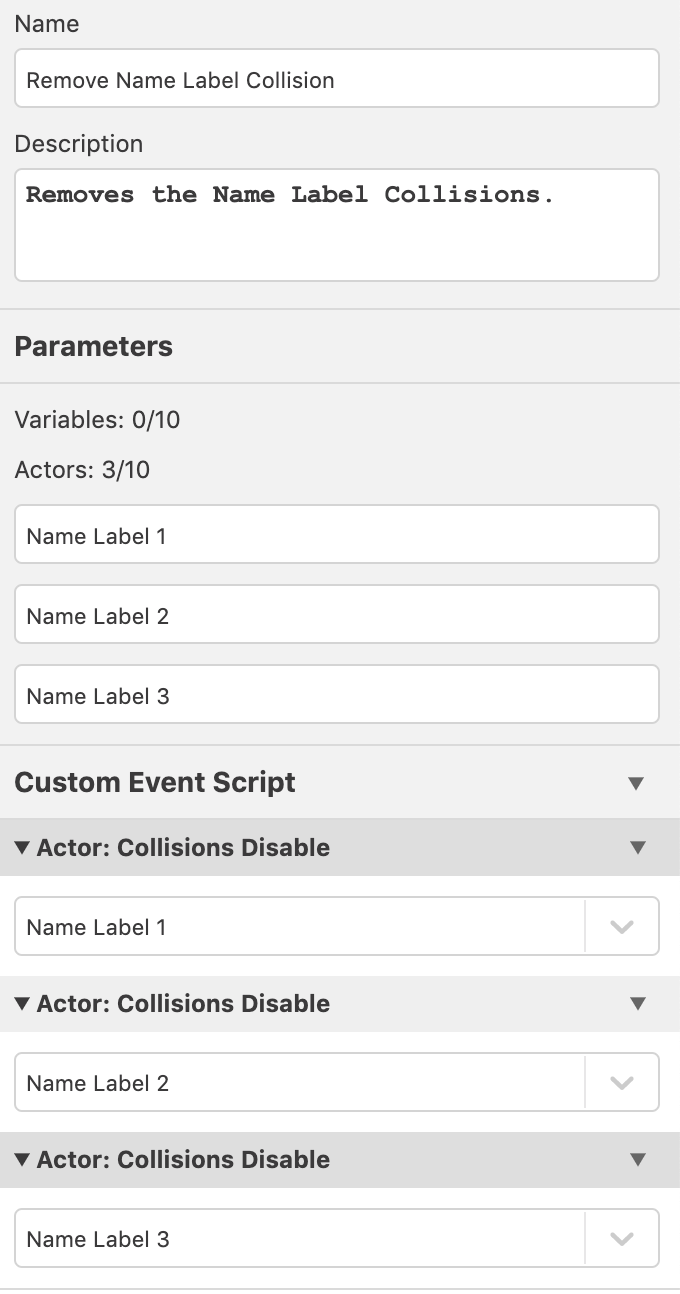
Custom Events are the easiest way to perform repetitive tasks and I’ll be showing how to use them here. Click anywhere in an empty area of the Game World to bring up the Project window. Click Create Custom Event to bring up the Custom Event window. We don’t want these actors to have any collisions, so our first Custom Event should take care of that. Name the Custom Event “Remove Name Label Collision” and add an “Actor: Collisions Disable” for as many actors as you are using. Make sure each one is unique (Actor A, Actor B, etc) and you should see an area within Parameters that can be used to rename them. I suggest Name Label 1, Name Label 2, etc to keep it consistent and easier for later. Note: Parameters only become available when unique items are selected in the events, hence the need to differentiate them first.
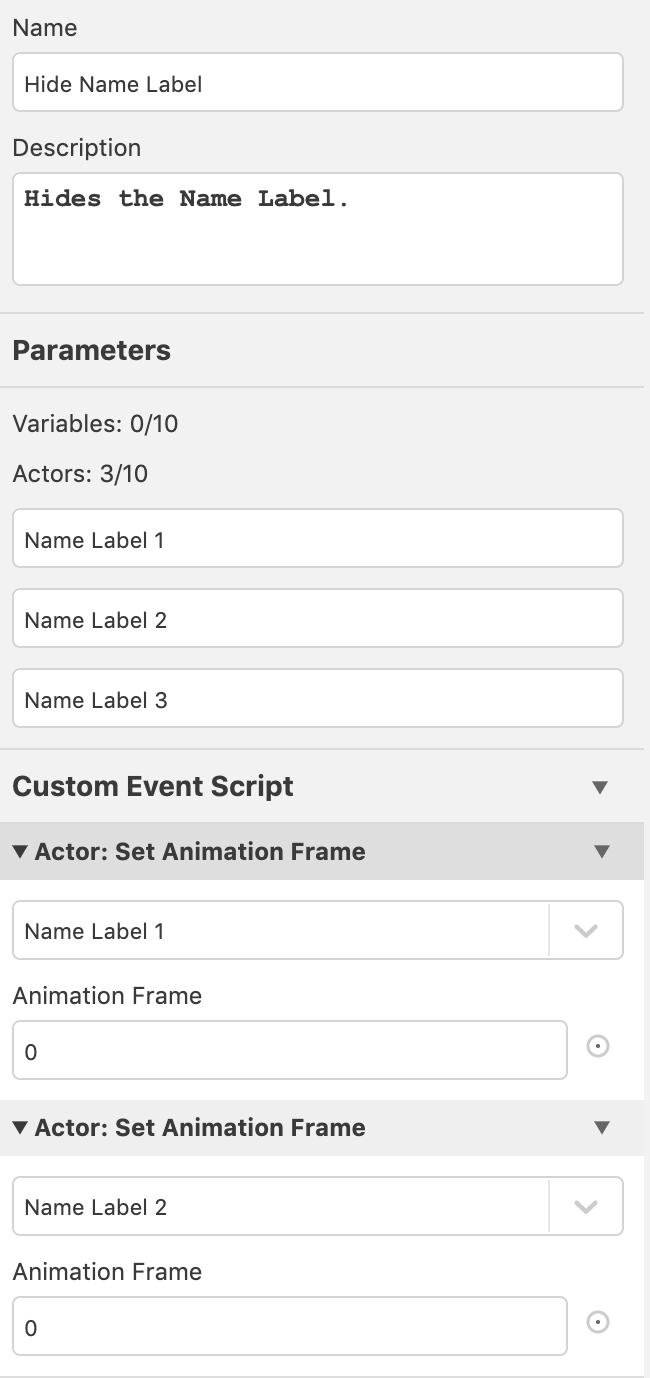
Next, let’s make a custom event to hide the actors. You could use the “Actor: Hide” event, but this would mean every time you wanted the labels to appear, you would have to then use the “Actor: Show” event. Instead, if we simply set all frames to the first blank frame, (frame 0) then it will essentially be not visible and make it easier later. Create another Custom Event and call it “Hide Name Label”. Add a “Actor: Set Animation Frame” event for each of your name label actors. Just like before, make sure you have 3 unique Actor Assignments and name them accordingly. Set all the frames to 0, and this script is done.
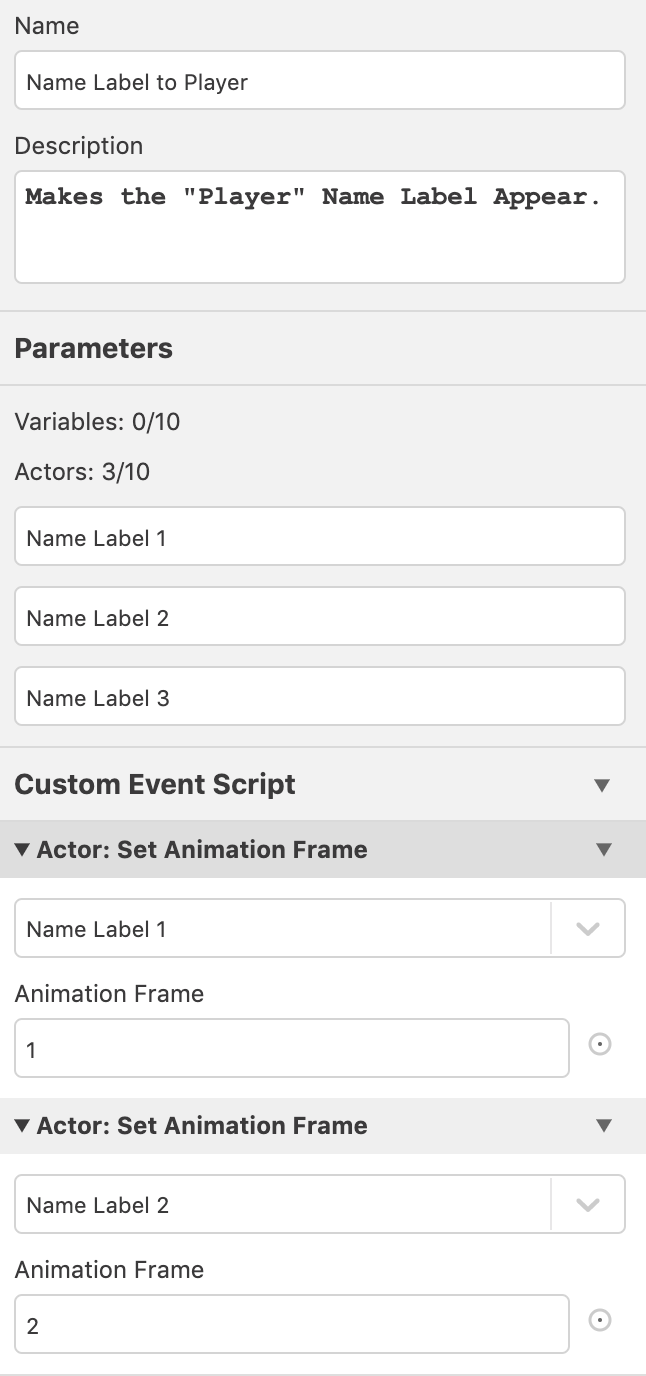
Finally, time to make the names appear! Remember our Sprite Sheet? The first name, “Player” starts on the second frame on that sheet. Keeping in mind that GBStudio works on a 0 index, this means that in order for the name label to appear correctly, Name Label 1 must be set to frame 1, Name Label 2 must be set to frame 2 and Name Label 3 to frame 3. An easy way to set this up is to copy the script from the Hide Name Label and use the “Replace Script” option in a new Custom Event (calling this one Name Label to Player).
For every Name Label, you’ll want to create a new Custom Event and assign the values for the Set Animation Frame accordingly. If there is a label that doesn’t use all your actors (like my “NPC” example) set those empty frames to 0. Now let’s put it all together.
4. Implementing the script.
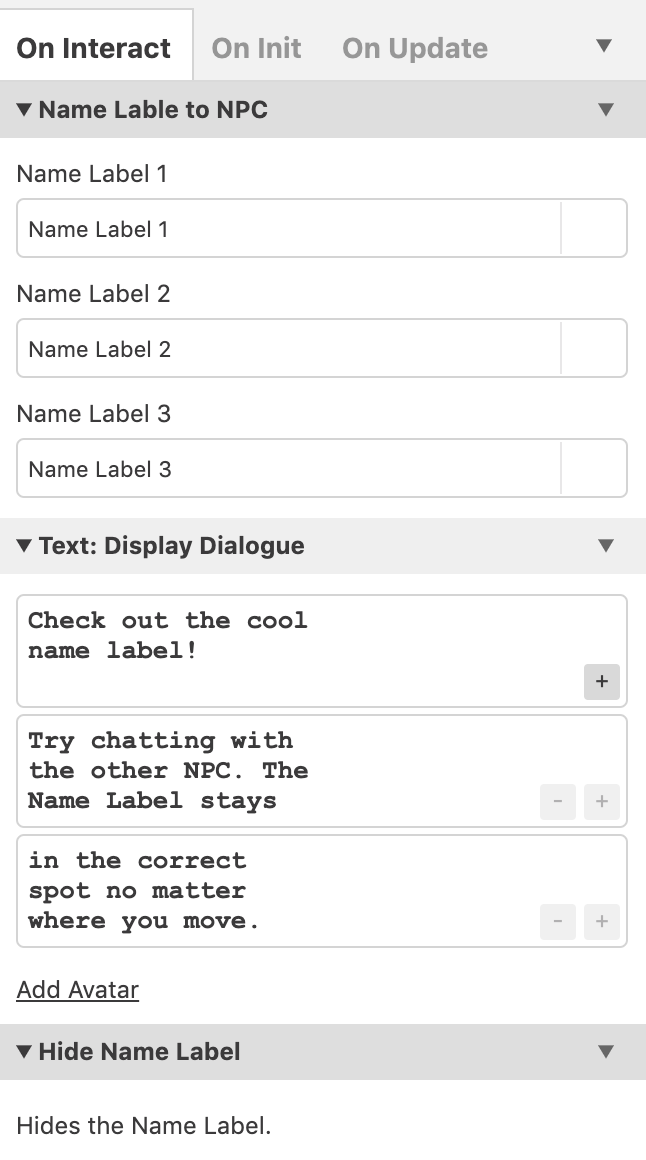
Head back to your scene and select anywhere outside of an actor to bring up the Scene window. Click Add Event and search for the “Remove Name Label Collision” event. You will see that all the parameters are set to the player by default, select the appropriate name label for each parameter (Name Label 1 = Name Label 1, etc). It’s good practice to start every scene with the remove collision script and to hide the label, so go ahead and add that now. As for when the name label shows up? That’s up to you. You could have the label appear as part of an Actor’s “On Interact” or time it out for a dialogue cut scene. All you have to do is add the “Name to …” Custom Event before you call a text box, and then call the “Hide Name Label” when the text is over. If your scene has a lot of back and forth dialogue, you can simply copy and paste the event within the scene to save on having to set the actor parameter every time.
There’s a few ways you could play with these text box labels depending on the type of game you’re making. Have characters off screen or to one side of the screen? Why not try a “Actor: Set Relative Position” Custom Event to move them left or right. Perhaps you are wanting to show the name of spells? Maybe put it in the middle of the frame or on top of a character in combination with the “Store Position in Variables” event. What other creative ways can you use Actors and Animation Frames to relay information?
Here’s an example project you can download to see this in action (using Version 2 Beta 4).

Audio Engineer, Mac Technologist and Video Game Developer. Managing Editor of GBStudio Central. (he/him)
