
This article is a part 3 of a series, if you haven’t already check out Parts 1 and Part 2 first.
Now we’ve come to making actual music notes with the two Duty channels in GB Studio’s tracker. The Duty channels are very versatile and usually make up the rhythm or melodies of a song. Things will start to get a little more complex here, but you’ll see how new things build on what we’ve already learned.
Making a Duty Instrument
The good news is that making a Duty instrument works almost exactly like making a Noise instrument as we did in the previous lesson. There are a few small differences, which we will highlight when we make the lead instrument for our sample song. The instruments we make for Duty channels can play in both channels at the same time or in conjunction with different Duty instruments.
Much like you did with the Noise instrument, select the first Duty instrument by double clicking it on the left.
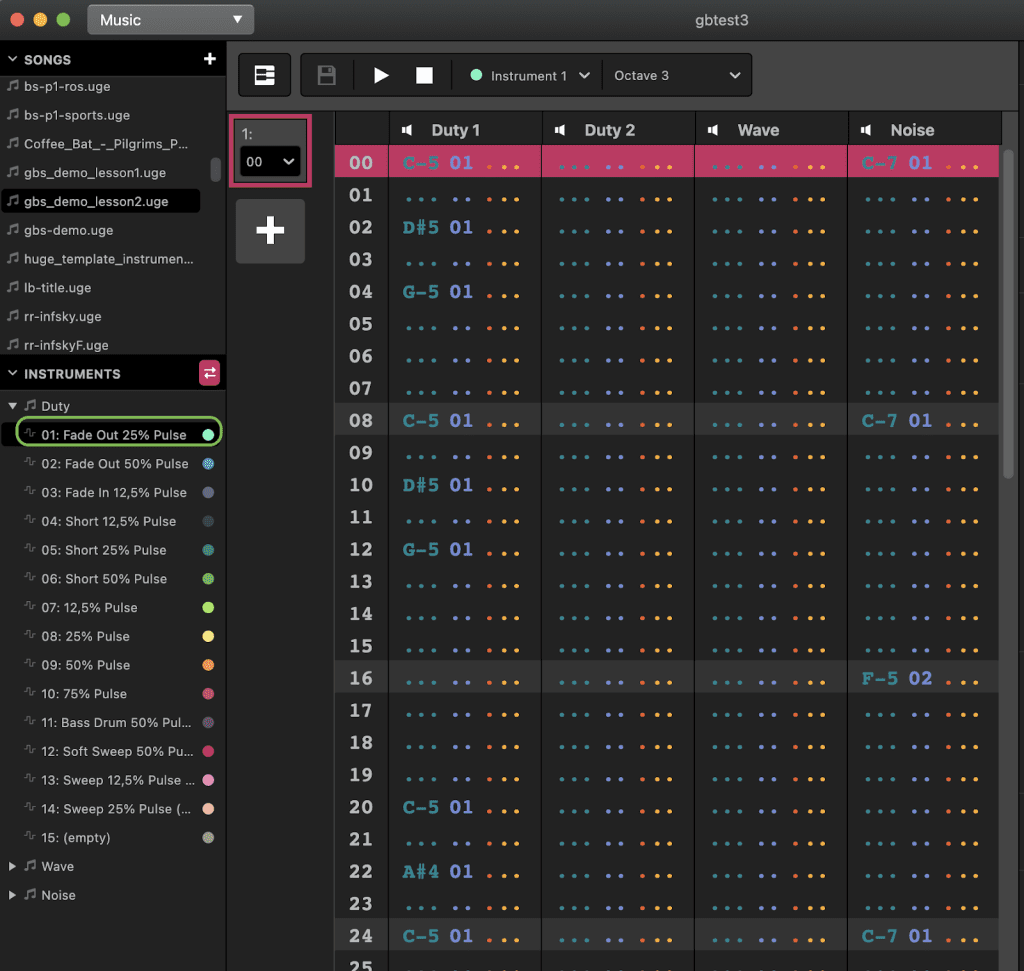
You will see the following settings for the instrument. Your settings may not fully match this. That’s ok. We will adjust it in a minute. First, let’s learn what’s new compared to the Noise channel.

The first few settings are just like the Noise channel. You can set an optional length. Initial Volume and Sweep Change let you design your volume envelope, just like you did when you made a high hat.
However, there are a few new settings here. Sweep Time and Sweep Shift allow you to produce a note that rises or falls in pitch over a certain period of time. Think of a bomb dropping in a cartoon, that kind of sound. Only the Duty 1 channel has this ability. If you use an instrument with a sweep on Duty 2, it simply won’t bend in pitch. We will use this setting more later on.
The last new thing is the Duty setting. This changes the “thickness” of the note. Try changing it and hitting Test Instrument. You will hear it sounds like a thin, reedy instrument when it’s on 12.5%, like a synthesizer at 25% and 75%, and at 50% it sounds more like a flute.
For now let’s set it to 25% and set up the envelope as shown above.
Now we can lay down our notes just like we did for the high hat.
This will be the first time you have to build a complex melody in the tracker. So let’s learn a little bit about how to put down actual music notes.
Your computer’s keyboard basically becomes a musical keyboard in a tracker. Here’s how the notes are laid out.
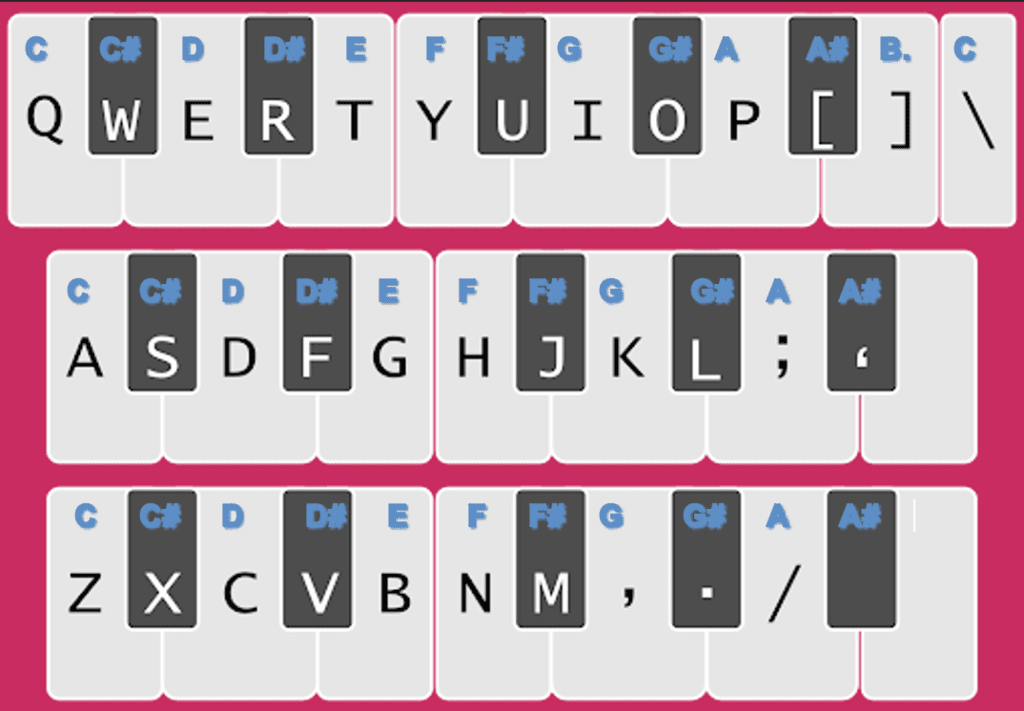
Depending on the selected octave, the notes will be different pitches, highest on the top level and lowest on the bottom row.
Time to enter notes. It will not be an easy first experience. Laying down a melody is probably the most tedious part of working with a tracker. Use the keyboard to find the right notes as shown here. Here’s some other shortcuts that might help:
- Del – Erase the note under the cursor.
- Backspace – Erase the note under the cursor and shift notes under it up one.
- Cut/Copy/Paste – You can also cut and paste just like you would in an Excel spreadsheet. The keys differ if you are on a Mac or a PC, but you can google it if you don’t know how to copy/paste.
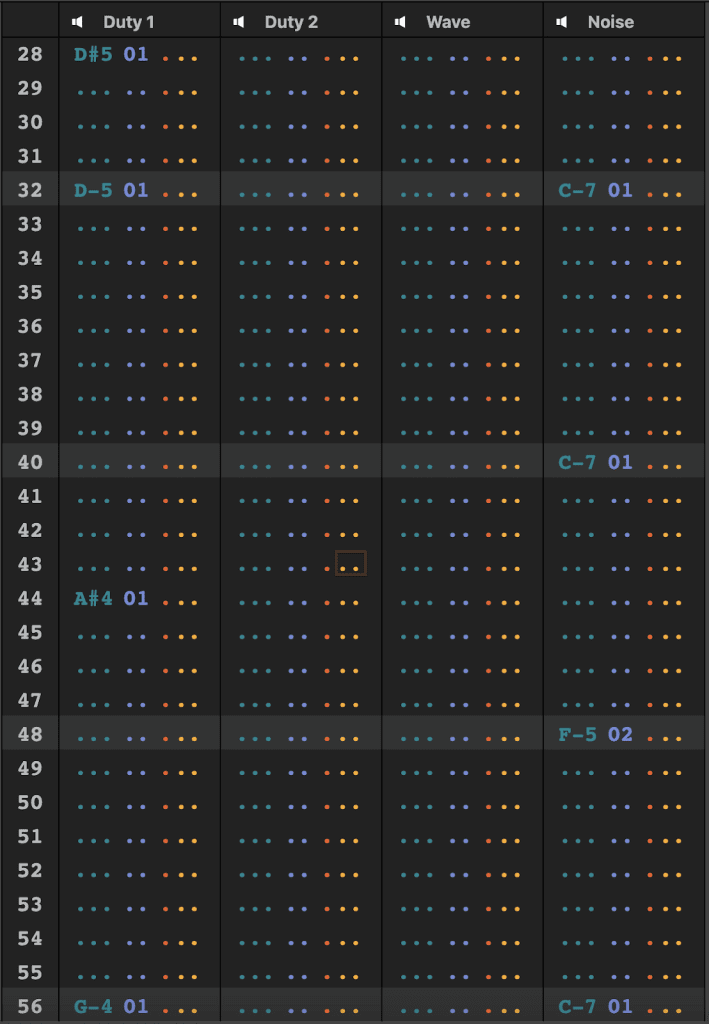
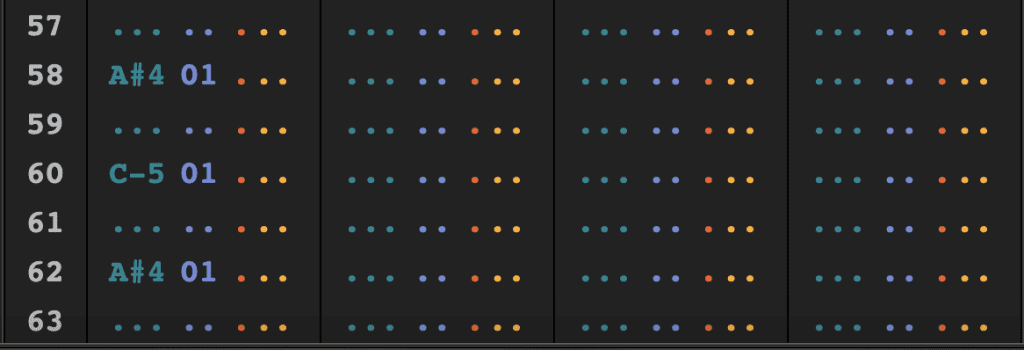
Add the notes as shown here. Unfortunately it takes 3 screenshots to show them all.
Now press play. We are still a long way from the finished demo song we heard in lesson 1. It is slower, it lacks some elements, but the song is starting to take shape. Since we did the drums first we have a clear structure and beat. Try fiddling with Duty 1 instrument settings to see how it impacts the sound of the song.
For now, we will leave Duty 2 alone. We will come back to it once we’ve learned some more tricks in a future lesson. Now our song is still lacking one major element, the bass! We will learn how to make some beefy bass with the wave channel next!

Beatscribe has composed and produced soundtracks for games on Nintendo DS, Nintendo Switch, PS4, Xbox1, Sega Genesis and numerous iOs and Android games for over a decade, but his true passion is creating epic moods on ancient hardware like the Game Boy and NES.
