
Can we make GB Studio games using traditional text programming? Yes we can! Let’s find out how….
There is no need for the fifth language in GB Studio in addition to the
– toxa, GBVM’s creator
visual scripting, GBVM, C, and Assembly.
Sometimes experienced game developers shy away from GB Studio due to the perception that it cannot be worked with in a text-only fashion. After all, GB Studio is designed around its visual scripting system.
I’m a big fan of visual scripting but I won’t deny that it does have shortcomings. For those who prefer plain text, I’m happy to say that GB Studio games can and regularly are developed in non-visual ways: using GBVM, C, and Assembly.
Each of these development techniques is equally valid. To introduce them, let’s write the classic “Hello World” program in each one.
Note that this article won’t teach you GBVM, C, or Assembly, but I have commented on the code heavily, so hopefully everyone can follow along!
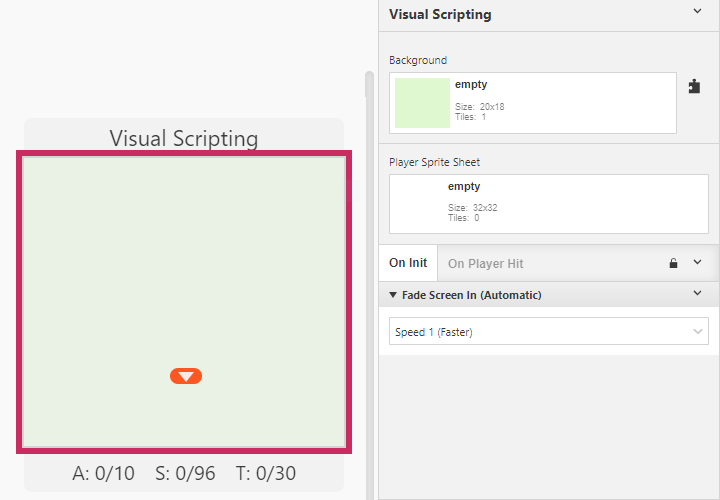
Visual Scripting
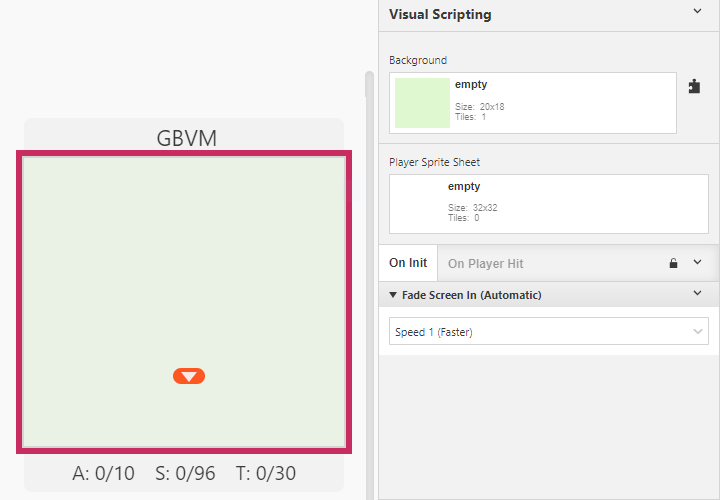
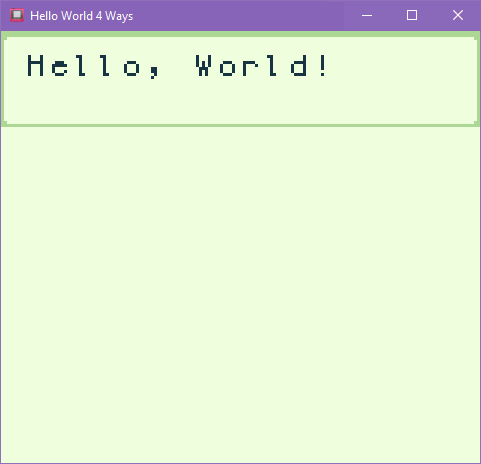
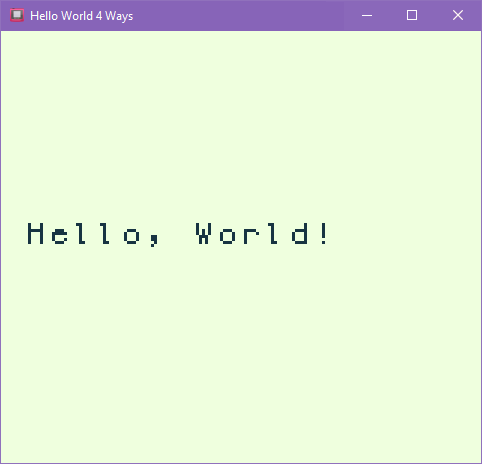
The baseline implementation uses the visual scripting system, and it’s quite simple:
1. Create a blank, empty Scene and add the player start location.
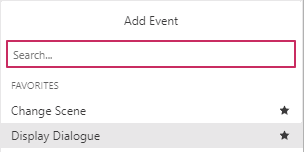
2. Now add a single Event block, [Display Dialogue].
3. And we enter the text “Hello, World!”.
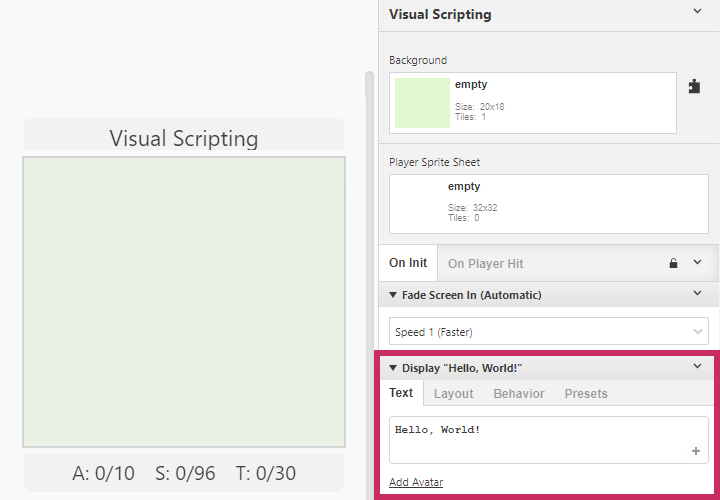
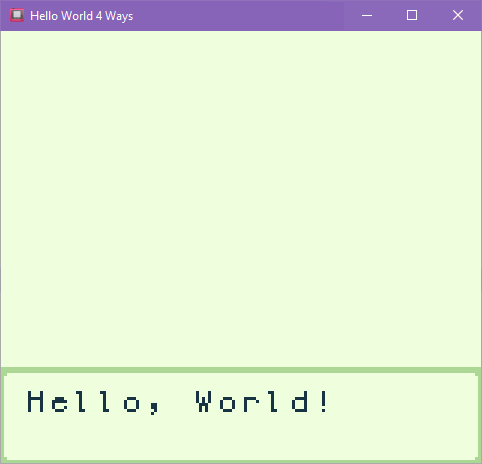
4. And there we have it!
Before We Move On
What Just Happened?
It may not look it at first glance, but that one Event block just caused many things to happen.
Some text was defined and passed into an internal buffer. A dialogue box was drawn onto a visual layer above the background. The dialogue box was scrolled slowly into view. The text in the buffer was written into the dialogue box character by character. And the program paused, waiting for a button press before removing the dialogue box.
That’s a lot more than in a typical Hello World program! But we’re not just exploring a language here, we’re exploring an entire game engine, and that’s the most basic way to display a message in GB Studio.
We’re going to have to recreate many of these steps in our other implementations. In particular, each implementation will have to do all of these things:
- Define the message.
- Copy the message to the buffer.
- Show the visual layer used for writing — the Game Boy’s overlay window.
- Tell the engine to write the text in the buffer.
Furthermore, each of the languages we’ll use exists on a different level of abstraction within GB Studio. To achieve each of these steps at each abstraction level, it helps to understand a little about GB Studio’s tech stack and tool chain.
GB Studio’s Tech Stack
Here’s the technology that GB Studio is made of. In this illustration, every layer of text represents a layer of technology, and each layer depends upon the layer directly beneath it.
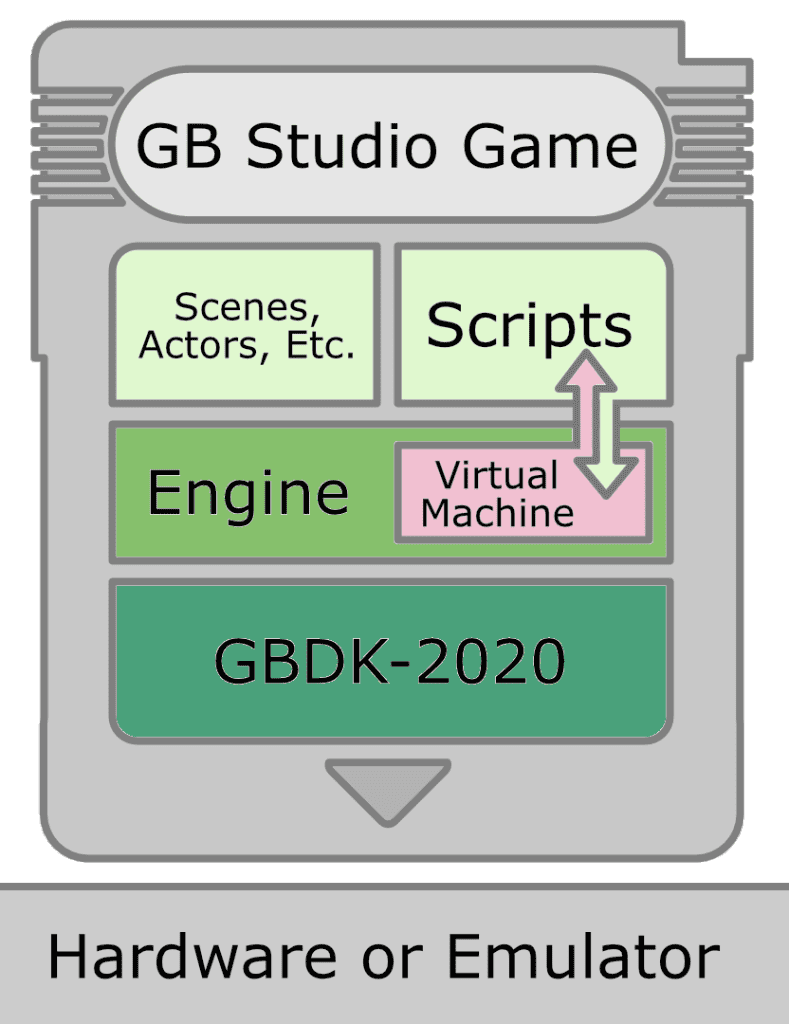
Conceptually, the implementation of GB Studio games consists of two elements: engine features, and the scripts that give these features their unique behavior.
The engine features are presented in the editor as Scenes, Actors, Triggers, and so forth. The scripts are written by the game developer.
Both Visual Scripts and GBVM rely on a virtual machine embedded in the engine. Both the virtual machine and the rest of the engine are implemented in C using GBDK-2020, a software library for developing games for retro platforms.
Games produced in this way run directly on original hardware, or on any compatible emulator or hardware reimplementation.
GB Studio’s Tool Chain
Here are the tools that make this technology possible. In this illustration, the game developer writes the programs at the top and the tools process them, passing their output to other tools further down the chain until a finished game results at the bottom.

Let’s break this down:
The virtual machine executes GBVM code. As a result, Visual Scripts must be transpiled into GBVM as part of the build process.
GBVM itself is implemented as Assembly language macros. Assembly is the lowest level human-readable programming language. GBVM scripts are assembled into machine code by GBDK-2020’s assembler, sdasgb.
Meanwhile, the GB Studio engine is compiled by GBDK-2020’s C compiler, sdcc.
Once the GBVM has been assembled and the C has been compiled, they both exist as object code. This object code is assigned to memory banks by gbspack (for historical reasons GBDK-2020’s own autobanker, bankpack, is not used).
Finally, all object code is linked together into a playable ROM image by GBDK-2020’s linker, lcc.
In this discussion we’re ignoring audio and visual assets as well as the extra complications introduced by plug-ins and ejected engines. However, the basic outline stays the same if we include those details.
Inspecting Transpiled Code
We can see some of this process in action by inspecting the GBVM produced by any visual script Event, such as the [Display Dialogue] block we used above. This is most easily done in GB Studio 4.x by activating the script debugger on a running game.
1. Select the Visual Scripting Scene.
2. Select the DEBUGGER panel at the bottom of the GB Studio editor window.
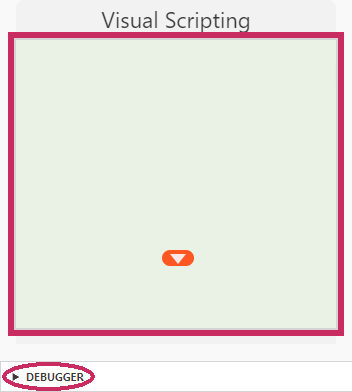
3. Click the Start Debugger button in the debugger panel.

4. The visual scripted Hello World will run, updating the display in the Debugger panel. Click on the Pause button.
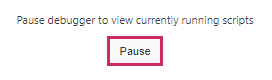
5. As soon as we pause, the Debugger shows us the GBVM that was automatically generated by our visual script!
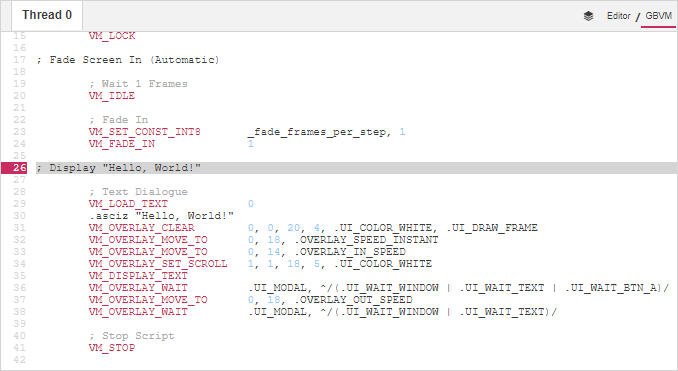
A lot can be learned about GBVM using this inspection method!
The tool chain we’ve examined here provides considerable flexibility, which GB Studio exposes to us in a surprising number of ways. Let’s look at some of these as we get back to our Hello World implementations.
GBVM
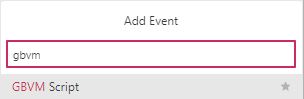
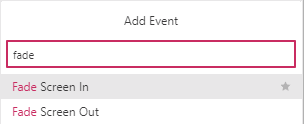
The easiest way to code directly in GBVM is to use a [GBVM Script] block.
1. To do this, we go back to a blank, empty Scene.
2. Then, we add the [GBVM Script] Event block.
3. Next, we add the following GBVM code.

I’ve added an explanatory comment before each GBVM instruction; comments begin with a semicolon (;) and are ignored by the assembler.
; The first line loads the next line as text.
VM_LOAD_TEXT 0
; ".asciz" indicates that we are using plain ASCII characters
; terminated by a null character.
.asciz "Hello, World!"
; Clear the overlay window, which GB Studio uses for dialogue boxes.
VM_OVERLAY_CLEAR 0, 0, 20, 4, .UI_COLOR_WHITE, .UI_DRAW_FRAME
; Instantly move the overlay to the upper-left.
VM_OVERLAY_MOVE_TO 0, 0, .OVERLAY_SPEED_INSTANT
; Render the text.
VM_DISPLAY_TEXT_EX .DISPLAY_DEFAULT, 0
; Tell the engine to wait until the window is fully in position
; and all text has finished printing.
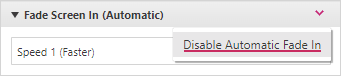
VM_OVERLAY_WAIT .UI_MODAL, ^/(.UI_WAIT_WINDOW | .UI_WAIT_TEXT)/4. If you look closely, you’ll notice that by default GB Studio runs GBVM scripts before fading in the screen. That’s not what we want, as it would leave our Hello World message invisible!
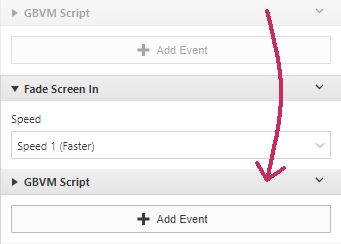
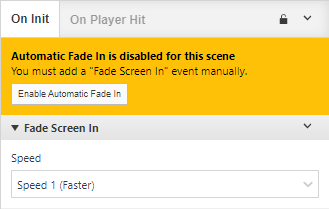
5. There are several ways to deal with this. For now, let’s disable automatic fade in…
6. …and then add a manual [Fade Screen In] block.
7. We have to drag the [GBVM Script] block after the [Fade Screen In] block.
8. And again, there we have it!
C
Unlike GBVM, there is no way to enter C code directly into the GB Studio editor. Yet, GB Studio does support directly coding in C.
I suspect that in the future, Script Event Plug-Ins will allow an uncomplicated approach to C coding, but as of this writing there are several cumbersome steps in that process.
So instead, we’ll leverage one of the most powerful GB Studio features: the ability to add our own files directly to the engine.
This is similar to ejecting the engine, but allows us to inject new files into the build process without touching existing engine code.
1. First, we need to create a new set of folders starting at the project’s root folder: assets/engine/src/
- 📂project root
- 📂assets
- 📂engine
- 📂src
- 📂engine
- 📂assets
2. Next, we go to assets/engine/src/ and create the file hello_world_c.c.
3. Now we write our code. Open hello_world_c.c and add the following Hello World program:
/ Let gbspack put this wherever it fits.

#pragma bank 255


// Include the UI routines.

#include "vm_ui.h"


// Reference the text buffer defined by the engine.

extern unsigned char ui_text_data[255];


void hello_world_c(SCRIPT_CTX * THIS) OLDCALL BANKED {


           // Define the message.

            const char * hello = "Hello, World!";


            // Copy the message into the text buffer.

            char idx = 0;

            while (hello[idx] != 0) {

                ui_text_data[idx] = hello[idx++];

            }


            // Display the message…

            vm_display_text(THIS,

                            // ...using default options…

                            0,

                            // ...at the default location.

                            0xFF);


            // Show the overlay window, where the text was displayed…

            vm_overlay_move_to(THIS,

                               // ...halfway down the screen…

                               0, 7,

                               // ...instantly.

                               -3);

}
This Hello World is written close to the way we wrote it in GBVM, and therefore also close to the way the Visual Script handles it. Quite a bit more complex than a typical C Hello World!
Although GBDK-2020 provides several printf variants, including some designed to be small, I was unable to fit any of them alongside GB Studio’s engine code.
4. Now, back in the editor create another new, blank Scene and add the player start location.
5. Set up Scene fading as we did with GBVM to ensure the screen is visible before our code runs.
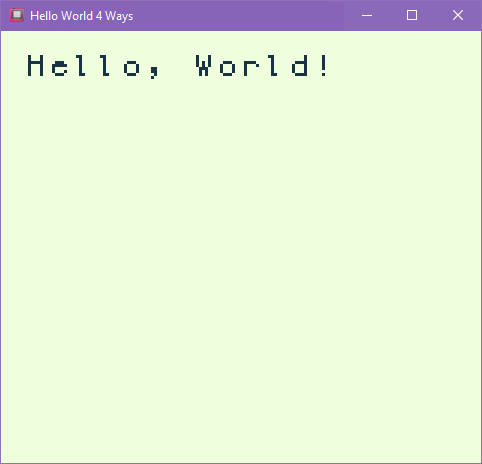
6. Finally, add another [GBVM Script] Event block and write the single following line:VM_CALL_NATIVE b_hello_world_c _hello_world_c
This GBVM operation VM_CALL_NATIVE jumps to the C code we wrote via a far pointer. To create that far pointer it needs to know two things: the memory bank that the function is stored in and the address of the function within that bank.
Fortunately, the GB Studio tool chain automatically creates symbols containing that information for us! The bank symbol begins with b_ and the address symbol begins with _ and both end with the name of the function being called.
7. Excellent!
Notice that this time there is no dialogue box drawn around the text. That’s because we didn’t call the vm_overlay_clear function with the UI_DRAW_FRAME option.
Assembly
The situation with Assembly is a lot like that with C.
GB Studio supports direct assembly coding but does not provide any in-editor facilities for it.
So we’ll use the technique we used for C.
1. Open the `assets/engine/src/` folder again.
2. Alongside our C program file, create the file `hello_world_asm.s`.
Why `_asm`? Because our assembly filename without extension needs to be distinct from the C file name without extension.
Why `.s`? Because that’s the extension GB Studio looks for when searching for assembly files, even though parts of the toolchain output assembly files with other extensions.
3. Now we write our code. Open `hello_world_asm.s` and add the following Hello World program:
; Let gbspack put this wherever it fits.

        .area _CODE_255


        ; Let GBVM know that this bank is managed by gbspack.

        ; The double equal sign causes this value to be made available to GBVM.

        b_hello_world_asm == 255


; Store our message in ROM alongside our code.

;

; Label the message's address.

_message:


        ; Define the message.

        .ascii "Hello, World!"


        ; Signal that '!' was the final character in the message by appending

        ; a null character.

        .db 0x00


; Define our routine.

;

; We'll use these registers:

;   A               The character being copied.

;   BC              Loop index.

;   HL              Memory addresses.

;   E               Bank index.

;

; Label the routine's address.  The double colon causes this label to be

; made available to GBVM.

hello_world_asm::


        ; Clear the index.

        ld bc, #0x0000


; Copy our message into the buffer.

copyloop:


        ; Load the address of the first character in "Hello, World!".

        ld hl, #_message


        ; Add BC to HL, offsetting the address by the number of times we've

        ; looped.

        add hl, bc


        ; Fetch the character from memory and load it into register A.

        ld a, (hl)


        ; If A is 0, set the Zero flag by comparing A with itself.

        or a, a


        ; If the Zero flag is set, we have nothing more to copy so jump to the

        ; end of the loop.

        jr Z, donecopying


        ; Otherwise, load the address of the ui_text_data buffer.

        ld hl, #_ui_text_data


        ; Add BC into HL, again offsetting the address by the times we've

        ; looped.

        add hl, bc


        ; Store the character we copied to the buffer.

        ld (hl), A


        ; Increment the index.

        inc bc


        ; Continue looping.

        jr copyloop


; Exit the loop.

donecopying:


        ; Next we need to position the overlay.


        ; Load the address of the overlay's Y position.

        ld hl, #_win_pos_y


        ; Store the screen's origin point to this memory location.

        ld (hl), #0x00


        ; Load the address of the overlay's Y destination position, used by the

        ; engine for opening and closing animations.

        ld hl, #_win_dest_pos_y


        ; Store the origin to this memory location, too.

        ld (hl), #0x00


        ; Load the address of the overlay's X position.

        ld hl, #_win_pos_x


        ; Store the origin to this location as well.

        ld (hl), #0x00


        ; Load the address of the overlay's X destination position, also used

        ; for opening and closing animations.

        ld hl, #_win_dest_pos_x


        ; Store the origin one last time.

        ld (hl), #0x00


        ; Last of all, we need to write the text.


        ; Load the index for the bank that holds the vm_display_text routine.

        ld e, #b_vm_display_text


        ; Load the address for vm_display_text.

        ld hl, #_vm_display_text


        ; Invoke the vm_display_text routine.

        call ___sdcc_bcall_ehl


        ; We're done!  Exit the hello_world_asm routine.

        ret
That’s a long one!
This Hello World program is the most distinct of the bunch. In it, we had to do many things manually which the language or engine took care of for us in prior versions.
4. Now back in the editor, create another new blank Scene and add the player start location.
5. Set up Scene fading once again as we did with GBVM and C, so that we can see our output.
6. Add a [GBVM Script] Event block and write this line:VM_CALL_NATIVE b_hello_world_asm hello_world_asm
This time GB Studio did not create these symbols for us, so we had to specify them ourselves at the beginning of the assembly routine.
7. And that’s it!
Summary
So, there we have Hello World four ways: in Assembly, C, GBVM, and Visual Scripting.
Notice how at every stage we moved lower down the abstraction layers, and so at each layer the length of our code grew. From the single Visual Scripted Event block to 6 lines of GBVM, 12 lines of C, and 31 lines of assembly.
Notice also how at each stage we relied less and less on the GB Studio engine. This was partly my decision. We could have drawn the dialogue box frame from C just as we could have invoked the vm_overlay_move_to function from Assembly, but doing so would have made the code more cumbersome without achieving anything meaningful for a Hello World program.
In general, the lower level your code, the more control you have and the more potential for efficiency. The trade off is, the lower level your code, the more esoteric it becomes and the more things you have to do for yourself.
This project is available to download or inspect on GitHub.
I hope this has been a helpful introduction of how to work with GB Studio using text. Perhaps next time we’ll have to look at setting up a usable C development environment and how to invoke the tool chain from the command line!
Thanks
Thanks to toxa and bbbbbr for helping me understand the tool chain and tech stack. Thanks to Chroma and Mint for reviewing early drafts. Thanks to Caidence for providing funding. And thanks to the GB Studio Central staff, the GB Studio discord volunteers, and Chris Maltby and the gang for creating a great space for game-making! You all rock!