
In the “Basics” series, we’ll be going over all the technical foundations needed to start building a GB Studio game. If you’re a GB Studio Beginner, then these articles are for you. Seasoned GB Studio devs may still find different ways to tackle challenges with these articles, so it should be worth the read.
As you develop your game and work with variables, you may have encountered situations where you’ll need to check a variable for specific values. In some cases, the [Compare Variable to Value] event works quite well – but when you need to check multiple values, you may find yourself stacking many Compare Variable events. Before long, your scripts start looking like this:
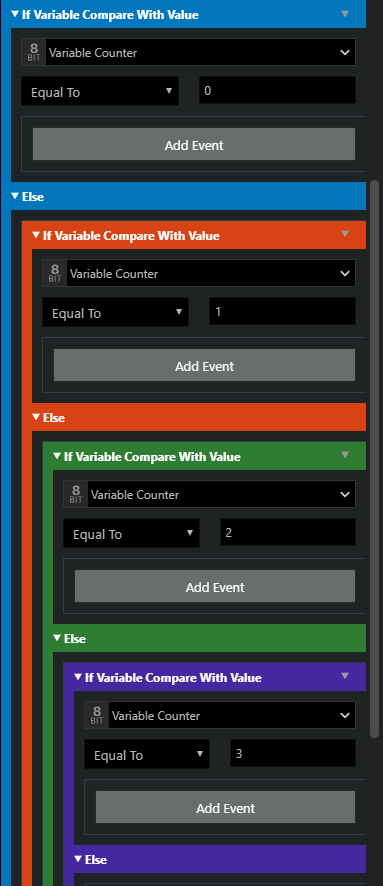
While there’s nothing wrong with stacking multiple compare events, this can quickly get out of hand. The more comparisons you need to make for specific values, the longer your script will become, creating more room for error and making your scripts harder to review. Luckily, an event exists specifically for this purpose!
Switches
A switch is a single event that checks the value of a variable, and then runs a script when the variable matches an specified value. You can think of a switch as a way to combine multiple [If Variable Equal to] events within a single event.
Before getting into use cases, let’s dissect a Switch.
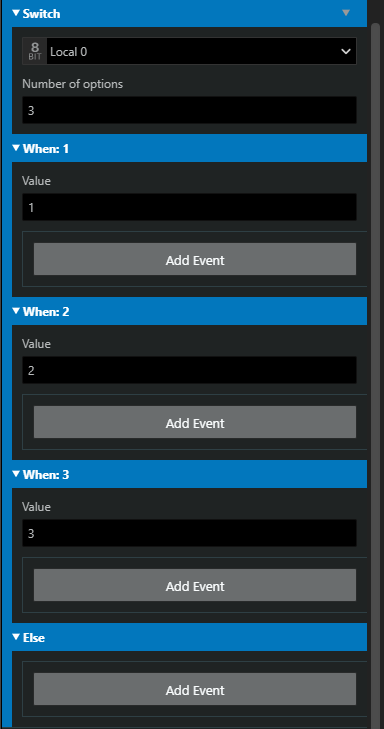
- Every Switch is connected to a single Variable.
- A switch can check for up to 16 specific values, which are set by its Number of Options sections.
- These 16 values start at 1 and increase in ascending order as you add additional options, but you are able to change the values to any number within variable limits (0-255), and place them in any order.
- A Switch also has an “Else” section, which you can use to check for values beyond these 16 options. Like other events, you can also disable the Else if you don’t need it.
- After setting your Variable and the number of Options, you will see sections labeled “When: X”. These are your Compare Events. Set a Value, and when the Variable is equal to that value, the switch will run the script contained in that group.
- Since switches are looking for an “Equal to” value, it will “break” and not check other values after it executes a script for a matched value. Using the “Else” section is useful for these situations.
Why Use a Switch?
Aside from consolidating your script, Switches are excellent events to use for common situations where you’ll be frequently checking a variable for specific values.
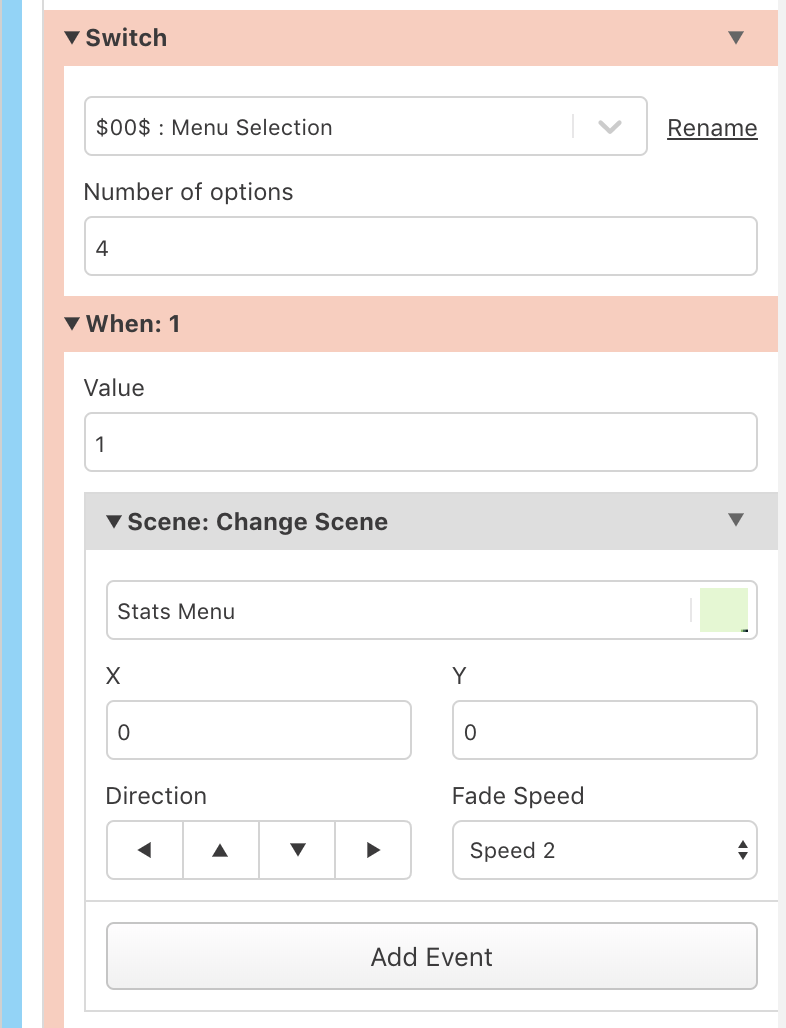
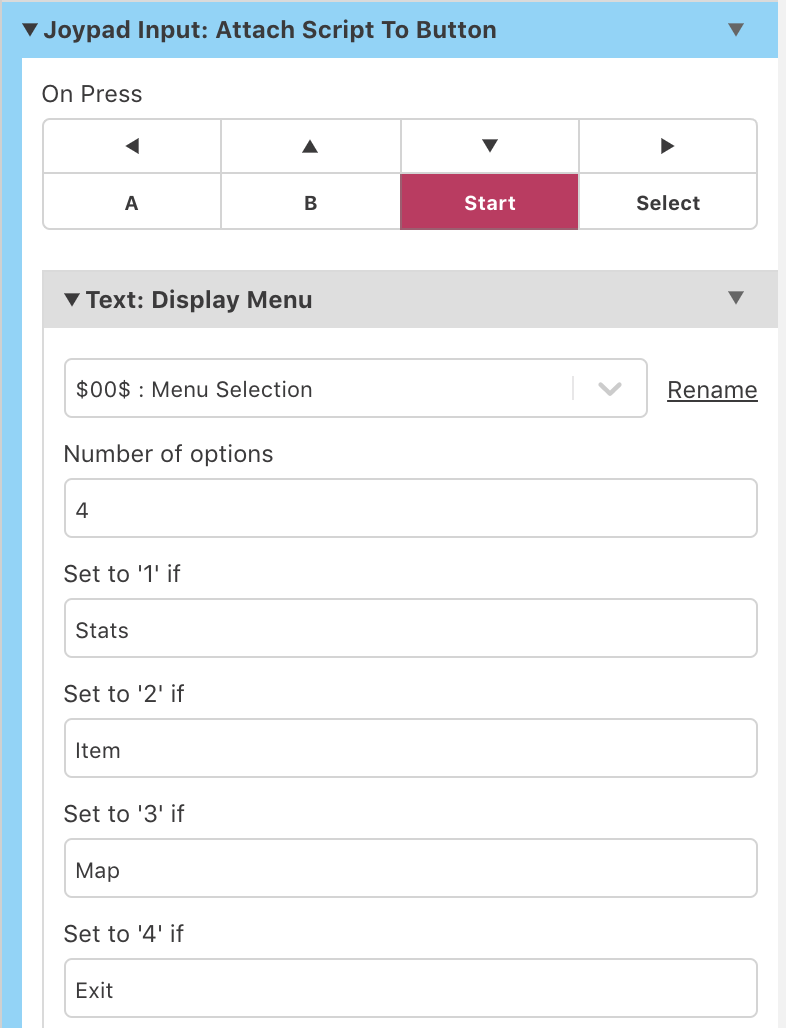
Simplify Menu Options
The [Text: Display Menu] event can have a maximum of 8 options, and each option is set with a connected variable to a specific value between 1 – 8 (or 0, if using that option). Using a switch with the same variable as your menu allows you to control all 8 options with a single event! For example:
Rotating Dialogue
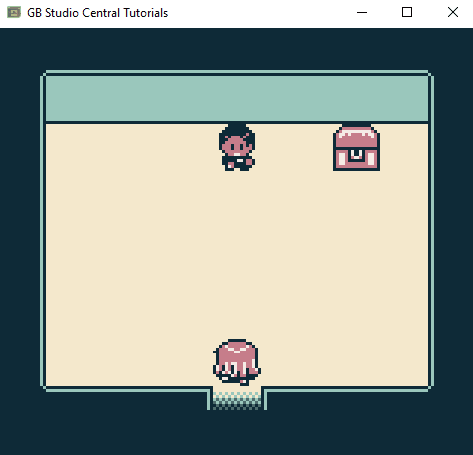
If you’d like your NPCs to rotate through dialogue options, you can use one of their Local Variables to count the number of times you’ve spoken to them. Then, using a switch connected to that variable, you can create different dialogue options.

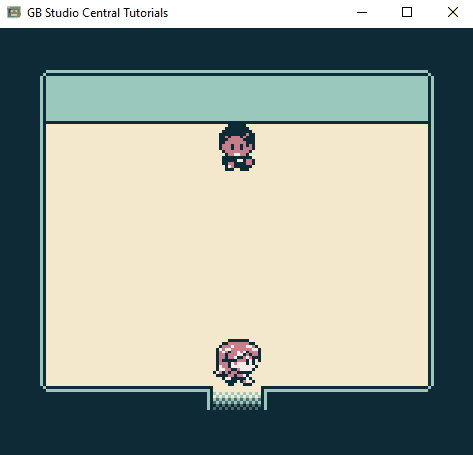
Whenever you interact with this NPC, it Increments its Local 0 variable by 1 (if you remember, variables start at 0 until set, so this will immediately set our variable to 1 the first time we talk to the NPC). Then, we use a Switch to check the same Local 0 variable. The first time we speak to the NPC, the variable will be 1, so it displays the first dialogue. The second time, the variable is increased again, so it will show the 2nd option. Each time after that, because we only have 2 options to check, it will run the dialogue in the “Else” section. You could expand this even more by adding more dialogue options, or by resetting the variable when you’ve reached your else.
Using Switches for dialogue can also be a great way to create branching dialogue. Creating switches based on the answers a player provides, or if other conditions are met, can allow you to create more engaging conversations with your characters.
Scene Changes
When changing scenes, you can use a Switch to create multiple options for where the player is sent. This can be as simple as using a switch to check if a player has found a key or completed an objective (much like a True/False check), or even randomizing the next room by using the Switch in combination with a [Math: Set Variable] to Random event with the range being your switch outcomes.
Controlling States
Much like controlling the dialogue an Actor displays, you can control their behavior using Switches. In our article on Enemy Movement, we cover an example on how to use a Switch in combination with other events to create an enemy movement pattern.
You can also use switches to check for other states on a scene’s Init. In this example, we can change our player’s sprite between 2 different styles. We can track what “Look” our player selected using a Global Variable, and then use a switch to set the player’s sprite sheet. To guarantee that the change persists between scenes, we can put the same switch on our Scene Inits, so this way when we change rooms, we still look the same.
You can even have this happen on a button press – in an adventure game, you may want your player to cycle through different weapons, but keep the attack action assigned to the same button. In the example below, the player can rotate their Blaster’s attack mode between a Close Attack and a Projectile Attack by pressing the Select Button. When the player presses the Attack button, (B), the script checks the variable for a mode using a switch, and performs the associated attack.
Wrapping Up
Switches are powerful events that can be helpful for consolidating your scripts, but they’re not a complete replacement for the Compare Variable event. Here are a few final tips for using switches:
- Switches only check for “Equal To” values, you’ll need to use Compare Variable events for “If Greater than” or “If Less Than” comparisons.
- Switches can only have 16 options and an Else – but you can still look for more values on the same variable by placing another switch in your Else section.
- Switch values do not need to be 1 – 16. Your “When: X” values can be any value between 0 – 255. I do recommend keeping them in a certain order just to make it easier to review.
- Combining switches within switches can be a great way to create varied Actor behavior!
Practice Challenge:
Using what you’ve learned about Switches, create an Elevator that takes your player between multiple scenes.

Friendly Neighborhood Game Designer (he/him)
GB Studio Games | Tabletop Games
