
(Editor’s Note: This tutorial is geared towards the 2.0 beta, most of the features listed won’t apply to earlier versions of GB Studio)
The player has set out on their quest to save the world, but oh no! An evil creature stands before them… and it’s just standing there. Not very exciting. With GB Studio 2.0 introducing new events better suited for Action Adventure/Zelda type games, or new game types available like Platformer and SHMUPs, creating dynamic enemies will be even more relevant to your games.
In this tutorial, we’ll cover how to make an enemy for the Top Down 2D scene type, but the events used here and workflow can be followed for Platformers and SHMUPs too. We’ll learn how to make an enemy move randomly, chase the player, and also change their behavior.
Creating Your Enemy & Scene
To get started, create a scene for your player and enemy.
An enemy is an Actor that has a Collision Group, which allows you to control what happens when this actor collides with other actors or the player.
In 2.0, Actors now have an “On Update” tab for events, which runs scripts every frame. To make an actor move, we’ll want to add our events there.
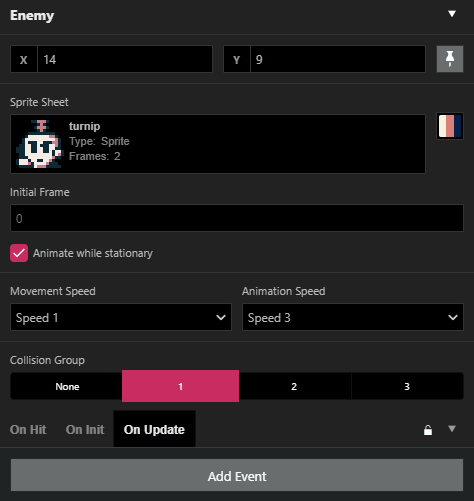
Once you’ve created an actor for your enemy, and found its on update tab, you can start working on making the enemy move.
Overview of Basic Movement Events
For this tutorial, we’ll be mainly using the events [Actor: Move To] and [Actor: Move Relative]. Before we go further, let’s quickly review what these events can do.
[Actor: Move Relative] is used to move an actor the set number of spaces (in the X and Y coordinate fields) relative to its current position. So, if you set your event to move X: 2, it will move 2 spaces to the right from its current position. The next time it runs the event, it will move 2 spaces to the right again.
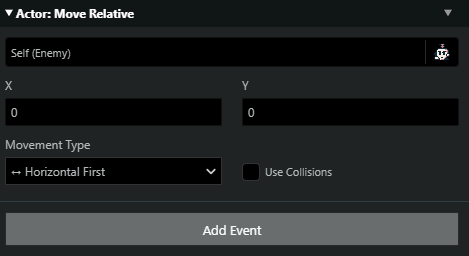
You can prioritize the direction it moves first (Horizontal, Vertical, or Diagonal) with the Movement Type field, and can even set it to Ignore Collisions (default) or use them by clicking the check box.
[Actor: Move To] is used to send an actor to a specific position. By default, the Move To event sends an actor to a specific position within the scene. You can also prioritize the Movement Type and manage your collisions, just like the Move Relative event. However, Move To events have one additional feature: in addition to moving to specific positions, you can also move actors to Variables and Properties by clicking the Circle Button next to each input field.
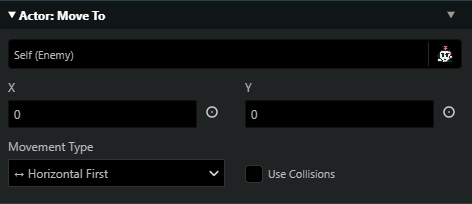
These options are:
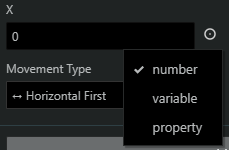
Number: the default setting. Sends actors to a coordinate.
Variable: Sends actor to a position based on a variable.
Property: Sends actor to a position based on a Property, such as another Actor or Player’s X/Y positions.
For our first movement type, let’s use [Actor: Move Relative].
Basic Movement: Back and Forth
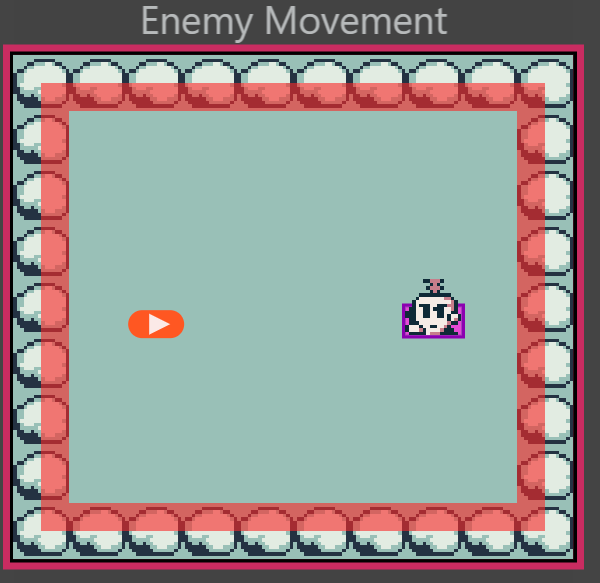
For starters, let’s get our enemy to move back and forth or side to side – basic enemy movement like a Goomba in Super Mario.
In your enemy’s On Update tab, create an [Actor: Move Relative] event. Let’s set this to move the enemy 4 spaces to the right. Then, since we want to move it back to its original position, we’ll create a second [Actor: Move Relative] event that moves it 4 spaces to the left.
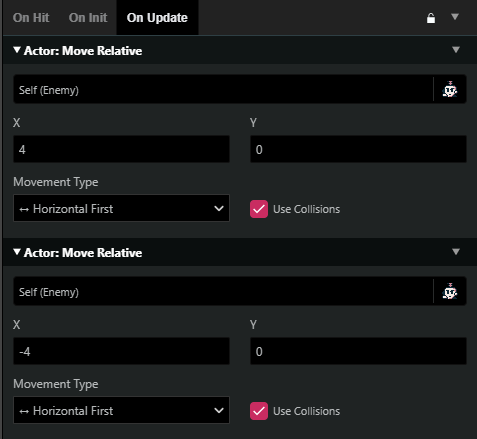
Looks great! This little guy is really booking it. But what if we wanted to have him cover a wider area, or move in a pattern?
Basic Movement: Patrolling
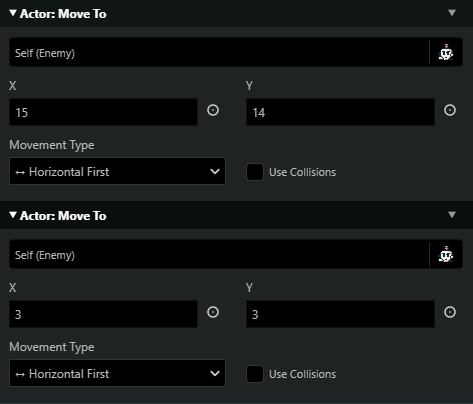
To give an enemy a longer path, we can use the [Actor: Move To] event and assign them coordinates to move towards. This creates a path for the enemy to follow.
Create a new enemy, or clear out the previous script. In your enemy’s On Update tab, create an [Actor: Move To] event, and set it’s coordinates to the first point you want to move. I’ve started our enemy in the top left corner, and set this to move to the bottom right corner first. Then, using a second [Actor: Move To] event, I’ve sent the enemy back to its starting position.
Since the On Update Tab will run its script every chance, this will loop and make the enemy appear to be on patrol.
Advanced Movement: Random
But both of these enemies are a little too predictable. What if we spiced things up and had our enemy move around randomly?
In 2.0, to make an actor move randomly, we’ll need to use a Variable and 2 more events: [Variable: Math] and [Switch].
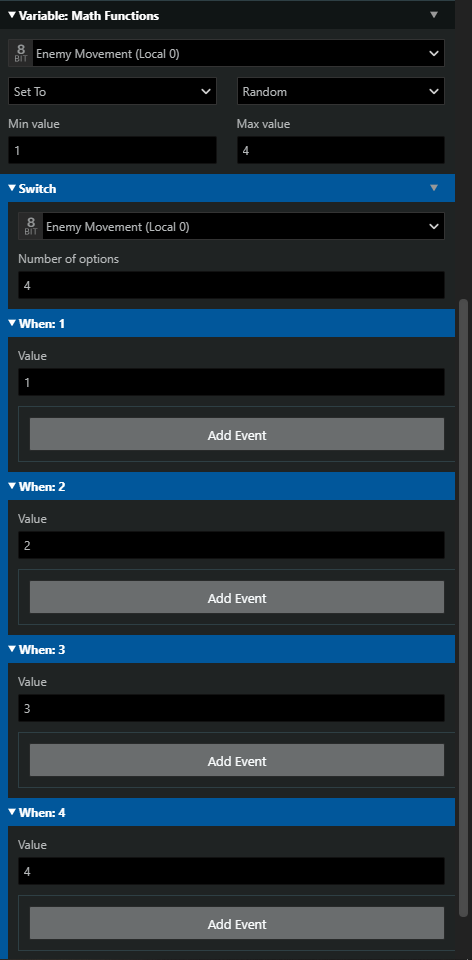
Clear out your enemy’s on update tab. Then, create a [Variable: Math] event, and Set one of the enemy’s local variables to Random. (we’ll use Local 0, renaming it “Movement Direction”). For our range, we’ll use 1 to 4, since the enemy can only move in four directions.
After that, create a [Switch], and assign it to our Enemy Movement variable (Local 0). If you’re unfamiliar with switches, think of them as a series of connected IF statements. Each group will check when a Variable is a certain value, and run its contained scripts only when the variable matches its value. So, when Enemy Movement is equal to 1, it will run Switch group “When 1”, etc.
In each Switch group, we’ll put an [Actor: Move Relative] event, and have the actor move 1 space in the chosen direction.
1: Up, so Y – 1
2: Down, so Y 1
3: Left, so X – 1
4: Right, so X 1
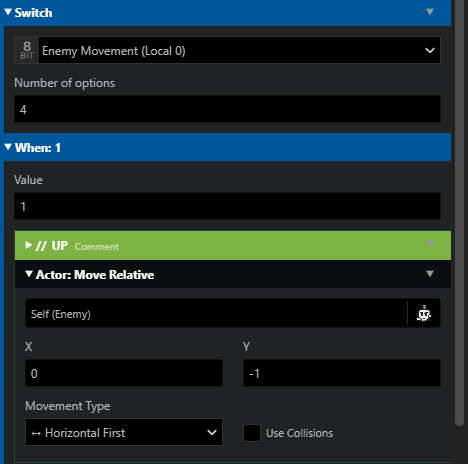
Tip: When using Switches, you can’t rename the “When: Value” part of the event, so use Comments to remind you which switch group is running which events. For example, I’ve placed a comment in each group to remind me which direction the enemy will move.
This works for randomizing movement, because the On Update tab will always run its script; since we randomize their variable at the start, it will run the math event each time the script starts, and then run the events in the switch group.
Switches and Randomizing are powerful tools, and can be used to control enemy behavior based on other inputs, too. We’ll cover more of that later.
Right now, let’s cover one more movement style – this guy is still pretty easy to avoid. What if we had him chase the player?
Advanced Movement: Chasing
Chasing the player will use the [Actor: Move To] event, but this time, we’ll be using Properties instead of Values.
Clear out your enemy’s On Update tab (or create a new enemy). Then, create a [Move To] event. Next to the input field, click the circle and select Property and scroll to find the Player properties, and select their X Position. Do the same for the Y position.
By selecting Property, we’re telling the engine to get the Player’s coordinates at the time the script is run. Since we’re running this On Update, we can constantly reference the player’s position, and send our enemy to those coordinates instead of manually setting a patrol point. This will simulate chasing the player.
If we add a wall between the enemy and the player, and tell our movement event to Use Collisions, the chasing enemy will stop at any collisions within their path, too.


Hmm… this turnip is pretty fast, but we can still trick him pretty easily with that wall.
Combining Movement Types
If you want to make more advanced enemies, you can combine everything we’ve used today to create more unique movement patterns. By using a Switch and a Randomized Variable, you can have the enemy carry out different movement events at random. You could also create longer patterns by using Move To events, or even have the enemy return to specific positions after chasing the player. The possibilities are endless!
Challenge: Create an Enemy Guard
If you’d like to test your skills, try creating an enemy that patrols a certain path, but changes their behavior to chase the player if they’ve stepped on a certain space. Everything you’d need for this script has been covered in this tutorial, except for creating a Trigger. Hint: If you remember your way around variables, you’ll want to use Global Variables for this challenge, since your Actor and Trigger will need to use the same variable.
Tips: Keep it simple – A longer enemy script is more likely to be interrupted by walls, other objects, or other less predictable factors. Shorter focused movement styles have less room for error.
Check your coordinates – don’t forget that negative values on the X axis go LEFT, and negative values on the Y axis go UP.
There is such a thing as too much – GB Studio can only run a few scripts at a time On Update, so don’t go crazy. After a certain point, some On Update events are skipped. Keep your scenes to just a few enemies.

Friendly Neighborhood Game Designer (he/him)
GB Studio Games | Tabletop Games
