
GB Studio offers lots of options for customizing your dialog frames, but one thing that you can’t do is have more than one. There is however a method of swapping the UI palettes to create different dialog frames using a single image. This can allow for simulating different interfaces like a computer terminal, an instant message, or even reading a book. It should be noted that because this method uses color palettes to switch the dialog frames, the effect won’t be viewable with any non-color Game Boys (though it is possible to check if the player is on a color compatible device with an [If Device Supports Color] event).
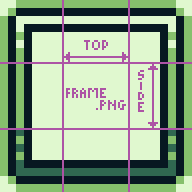
When you create a new game in GB Studio it will automatically create an ‘assets’ folder. Inside this folder, the assets are split into four categories. In the ‘UI’ folder you will find the assets used to create the frame, cursor, and all of the letters in your game. The ‘frame.png’ file is made of 9 8×8 pixel squares representing the edges and interior of your frame. The final frame is created by repeating the top, bottom and sides across the whole screen. You can edit this file to create any frame you want, but it must retain the original four colors. In GB Studio the color is added while building your game, as opposed to editing the original image file.
The key to creating frames that look different is to reuse the same color in multiple palette selections for an image. This allows you to turn elements of the design on and off. Here is an example:
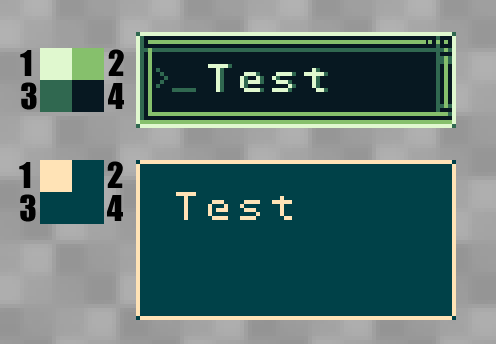
In the lower frame, you can see that colors 2, 3, and 4 are all the same in its palette. As a result, a lot of extra information is hidden that can be activated by changing the colors again.
Once you have created the frame you want, you will need to add the palettes you want to use to your game. You can press Ctrl+6 or go to View > Palettes to get to your game’s palettes.
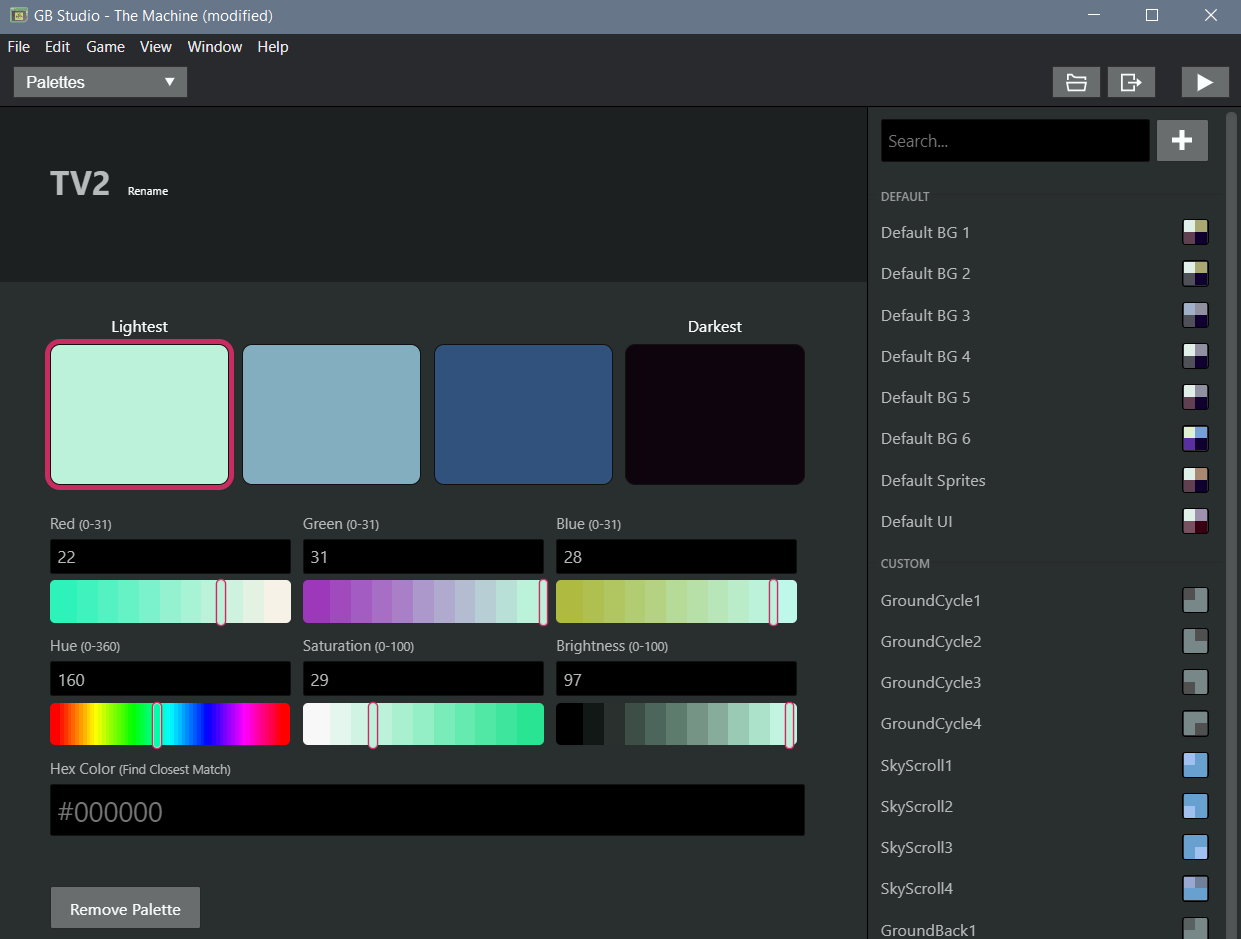
You can click the plus [+] button to add a new palette. I always include the letters ‘UI’ in the name of my UI palettes so that they will be faster to search for when creating my game. This screen is pretty self-explanatory. You can paste the hex value of a color into the text field on the bottom to import a color from your image editor of choice.
Keep in mind these colors will replace the four shades of green in your original image file. Even though it says ‘lightest’ and ‘darkest’ you can invert the lightness to create more variety in your dialog boxes.
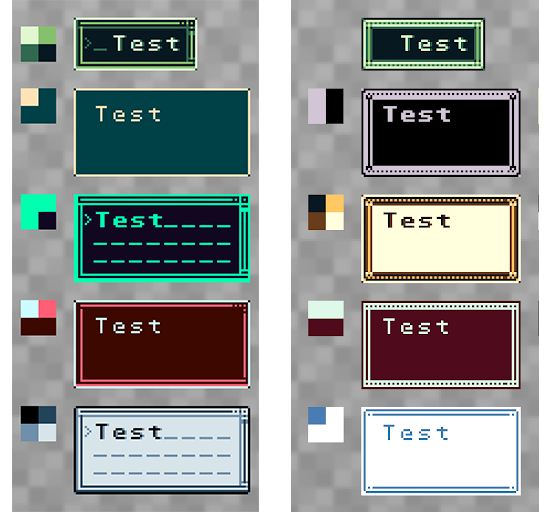
Here are a couple of examples of what you can do with this method if you use some creative problem solving:
Remember these colors also affect the text and the character avatars. When creating an avatar, you will need to plan which palette will be used when it is displayed. You can even change the font to be wider in some palettes than others by editing your ‘ascii.png’ file!
Now that you have your frame created, you will need to implement changing it when you need to in your game’s code. You do this with a [Palette: Set UI Palette] event.
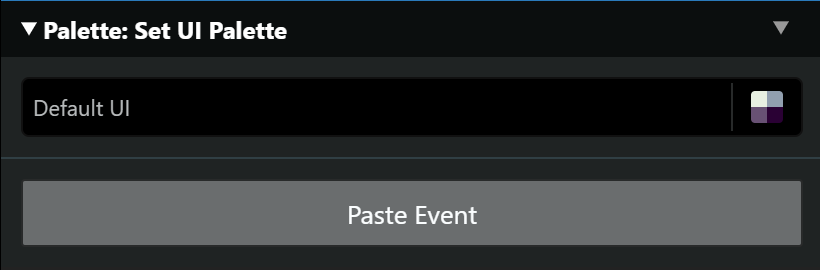
All you have to do is search for the palette you created by name. Keep in mind that this will permanently change the palette color, so if you only want it to only change it for this dialog box, you will need to set it back to the default palette after the dialog is displayed.
I hope you found this tutorial useful! I’m looking forward to seeing some cool UIs using this method.
Independent game designer, comic artist and art instructor. Creator of Opossum Country,
Heliosphere, and many other comics and games including the upcoming Game Boy game The Machine. (he/him)
