
I remember the day as clear as crystal, I had just walked into my science class in high school. The smell was pungent, nearly unbearable, I heard whispers over and over of the word “formaldehyde.” The lights above were blinding and my knees were weak. My stomach tossed around like a ship at sea. At each table in the lab were six baby pigs, all dead. That day so many years ago was dissection day. Some felt excitement. All I felt was dread.
As morbid as dissection can seem, from a scientific standpoint, there are undoubtedly benefits. Today we will also be dissecting! Thankfully, not a cute baby animal, but instead some of our favorite Game Boy cutscenes. No smell, no bright lights. The purpose is to learn how some of the best game developers used the Game Boy’s limitations to create special experiences on our favorite little handheld. In today’s article I would like to show you a fun way to pick apart cutscenes from your favorite Game Boy games for learning purposes.
Setup for Study
Unfortunately, we don’t always know exactly how the aforementioned cutscenes were made– however, there are ways to learn some of the clever tricks the developers employed. I hope thinking about these will help inspire you to know more of your options when working with GB Studio, and will result in helping you to create the best cutscenes for your game!
The main tool we will be using today is a fantastic emulator called mGBA. If you would like to conduct your own research on your favorite games, this emulator has a host of tools that can help you. You will also need a GB ROM of some kind, it can even be your own game.
Once you have opened mGBA and loaded your ROM the fun can begin. Navigate your cursor to the top left of the screen and select the “Audio/Video” tab. Near the bottom of this tab is the option “Video Layers.” From here you will see three options which can be toggled off. Two of these three options are the key to understanding the basic choices the developers made when creating their cutscenes.

Briefly here is what each of these options do:
- Unselecting “Background” will remove the background of the cutscene.
- Unselecting “Window” will remove any text, text boxes or elements related to overlays. We won’t be using this feature for today’s research, however it is still a useful feature to know.
- Unselecting “Objects” will remove what GB Studio refers to as “Actors,” which would also remove projectiles.
Let’s demonstrate how toggling these options can help us better understand the thought process behind a famous Game Boy cutscene. Maybe you recognize this one:


A Battle of Resources
By taking the opening Pokémon cutscene apart this way we can determine what is happening here quickly. By removing the background we can understand that Gengar is drawn entirely with background tiles and Nidorino is the only rendered actor. One rationale the developers structured the cutscene this way is to prevent an overload of actors on screen at one time.
Since we understand the structuring better now, let’s examine the techniques used so you can use them in your GB Studio project.
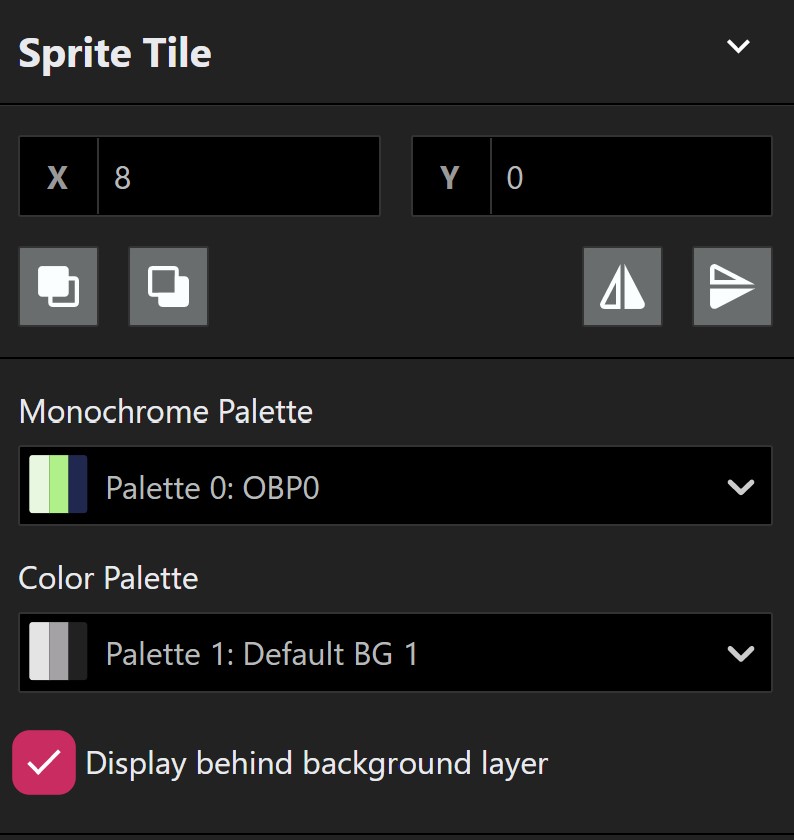
If Nidorino is the only actor, why does he appear behind Gengar? Aren’t actors rendered above the background? If that is your question then I am happy to introduce you to an incredible option every GB Studio dev should know about: “Display behind background layer.” To find this option you need to navigate to the Sprites tab on GB Studio. Then select the actor that you want to display behind the background layer. With a sprite tile selected, you can then tick the box “Display behind background layer.”
Using this sprite technique and a simple “move actor” script, you can recreate a similar dynamic camera effect so that an actor and some background tiles can shift positions. With just a few tricks the developers created an unforgettable cutscene that captured the imagination of a whole generation of Game Boy players. What will you create by using this feature?
You may have noticed we didn’t talk much about how the developers were able to animate Gengar by using background tiles. The reason is because Pearacidic wrote a wonderful article about how you can use this technique in the article “Tile Swapping 2.0.” Please give that article a read because tile swapping is one of the most useful tools we have access to in GB Studio.
A Perfect Storm of Techniques
By examining the opening cutscene of Link’s Awakening we can immediately notice a few things that can help us push our own cutscenes to the max. When all the moving pieces are present, this cutscene looks absolutely packed with motion. Lightning striking left and right, rain coming down in buckets, and a ship tossing in a fast-moving ocean as the clouds swiftly pass. How can our favorite little handheld keep up? And even more importantly, how can we learn to use some of these tricks for our cutscenes?
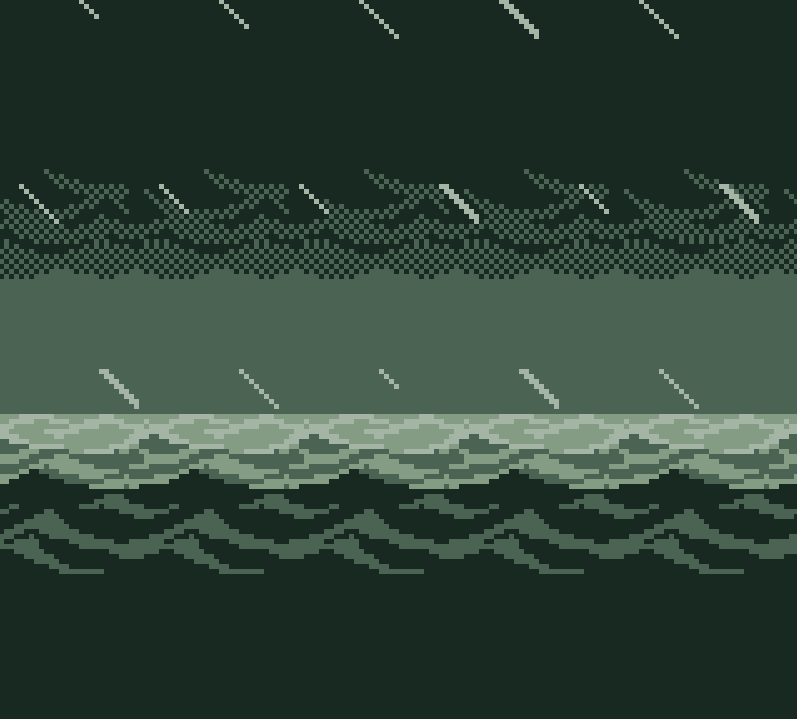

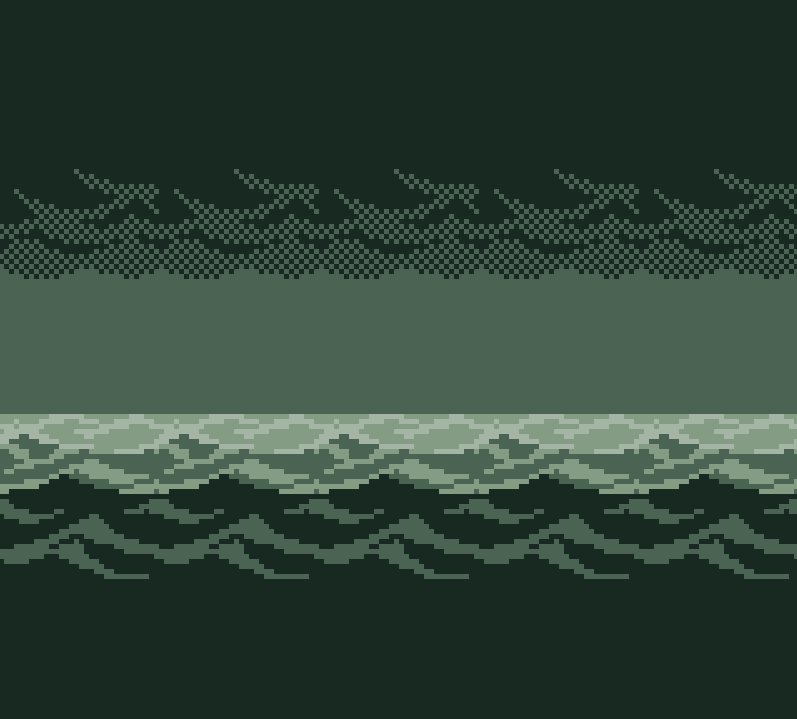
When we examine what is happening here we get some insight into the developers’ sleight of hand. Without the background, we notice the ship doesn’t actually animate much more than a bobbing motion. The graphical artist cleverly carved a couple of wave-shaped cutouts on the bottom of the ship which creates an illusion of waves crashing on the bow at different heights when all together. Can you think of a way you could use transparency on your sprites to overlap with your background to create unique effects?
If you are counting lightning strikes and raindrops, you might be confused how so many sprites are being rendered on screen. Without the background, the illusion is a little more obvious, helping us learn there are really only two unique raindrops and three unique bolts of lightning. Reusing sprites in clever ways like flipping lightning strikes so they look like a different bolt is a technique we can use when trying to save resources in our creations. When you are creating the pixel art for your game, why not see how it reads if you flip it horizontally? You might be able to save time and unique sprite counts when crafting your cutscene if you learn from these developers resourcefulness.
In the case of the rain, why not try this well loved GB Studio trick, which involves just one or two unique raindrops. Bryan Rollins succinctly describes the process here.
As for the background, we can see how the developers use motion to create immersion. The clouds are moving, the ocean is moving. Can you think of how using parallax scrolling could enhance your cutscene, or what if you could adjust the way the Game Boy draws to the screen to create effects similar to the waves in this scene? With the Scanline FX plugin you might be able to create an effect you never dreamed possible on the Game Boy.
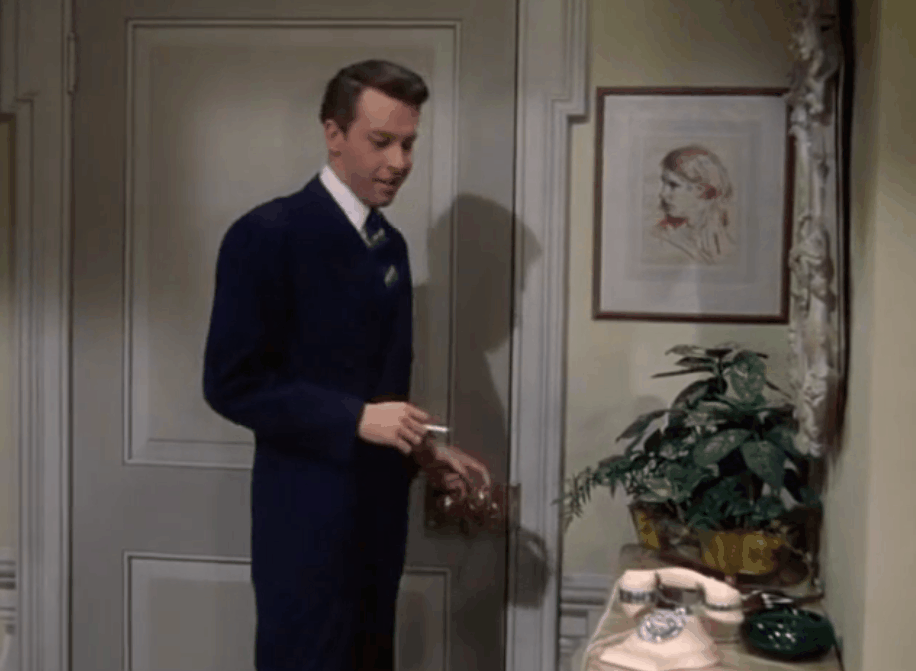
When we are shifting scenes the screen has to cut to white or to black. If you are cutting repeatedly you might find the screen fades undermine the experience. However this subject of screen fades and cuts are not limited only to the Game Boy. If you study cinema, one thing you will hear over and over is a saying that good editing is invisible. A movie known for mastery of hiding screen fades is Alfred Hitchcock’s “Rope.” Notice just a taste in the clip below.
With that thought in mind, an underrated aspect of the Link’s Awakening cutscene to me is the clever fade employed when lightning hits Link’s boat. The screen fades just like a bolt of lightning that close to our faces would turn everything to white. How does dissecting the cutscene in this way help you think about the editing you have chosen to use in your cutscene? Can you think of an area where you can do some sneaky transitions?
That was quite a Trip…
We have been to battle and we have been to sea, now to our final destination of this research trip. Though Trip World is considered a “holy grail” of Game Boy collectors, the game’s opening cutscene is not as well known as the last two examples I provided. However, there is more to learn from such a rich game. From this cutscene we can see a similar DNA of camera and background tricks used previously.


I felt it was necessary to research this cutscene though, as it displays a few more “need to know” tools at your disposal that we have not mentioned in this article, specifically how much palette-shifting and the use of sprites can benefit your cutscene when you have the resources to spare. Gumpy Function wrote in the “Creating a ‘Reward’ Scene” article the details of how to do just so.
In conclusion, regardless of how you feel about the limitations of the Game Boy, with some forethought and these tools, you can create the next memorable cutscene!
Editor’s Note:
This article was submitted by Howdy Riceball. We’ll be updating the article with a proper author bio once we get that built!

