Random Puzzle Generation
Welcome back! Now that our puzzle is functioning and you can beat it, we should add some quality-of-life improvements. Since nothing happens after getting the win state, we need to add replayability by offering a new puzzle. To do that, we’ll add random puzzle generation to the code. Beyond that, we need a menu system to give the player a choice to start a new puzzle when finished. These additions take our puzzle from a simple solution to a fully realized game.
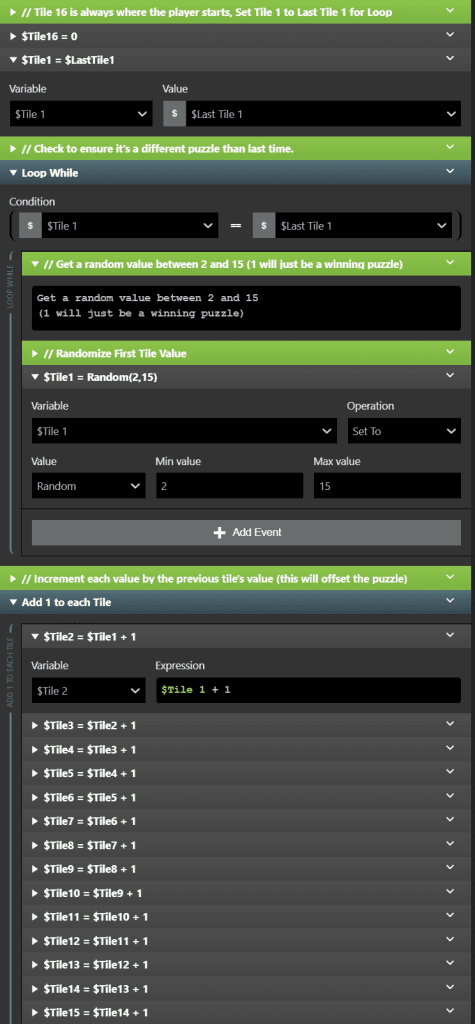
Let’s begin by creating a new custom script named Random Tile Assignments. We will use this script to grab a randomly generated number (2 through 15) and make the puzzle in sequence from whatever was picked.
Add two [Variable Set To Value] events to the top of the script, setting the first one with the Tile 16 variable equal to 0. The second one will be switched from “number” to “variable” and set Tile 1 equal to a new variable Last Tile 1. This variable will be set to ensure the player doesn’t see a repeated puzzle from the last one generated.
Next, we will add a [Loop While] event, setting the condition to Tile 1 and the equals to Last Tile 1. You need to add a [Math Functions] event inside this event, as this allows us to continue running a random number function until we arrive at a different number than last time. Set the variable to Tile 1, the Value to “Random”, the Min value to 2, and the Max value to 15. Usually, we would worry about needing a random set that is either binary or divisible by 8, however, since all we are doing is looking for a different number, this should suffice.
Add an [Event Group] event, and make an array of [Evaluate Math Expression] events inside. Within each event, we’ll set the Variable to the Tile # variables 2 through 15 and the Expression to “$Tile # + 1,” where the Tile # is the previous # in the sequence. For example, Tile 2’s Expression would read “$Tile 1 + 1.” This adds 1 to the Tile 1 value randomly generated earlier, and the following events would continue the sequence, filling in the values from the top left of the puzzle space.
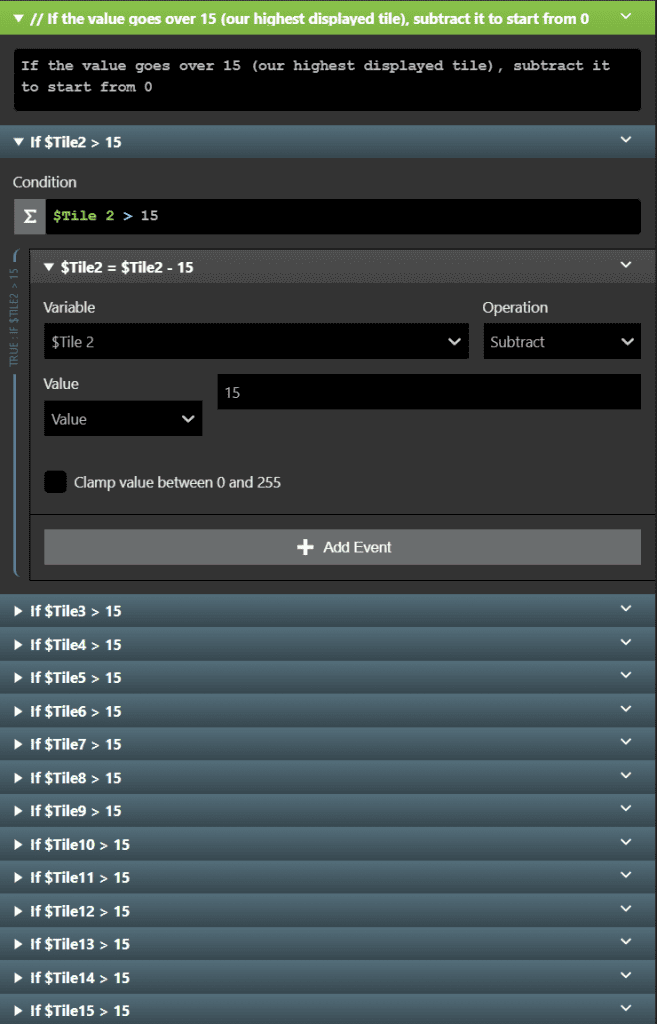
Finally, add a series of [If Math Expression] events, each containing $Tile # > 15, where the #’s are 2 through 15 again. Within, we’ll use a [Math Functions] event in each one to subtract 15 from each respective Tile # variable. This checks to see if the value of that variable is over 15 (our highest displayed tile), and subtracts 15 from it, if so.
For us to use this newly minted custom script, we’re going to need another script to swap the tiles we determined with our random pick. Something you must always concern yourself with during GB Studio development is making scripts too big, and for this reason, we’ll split this additional code that handles the tile swaps into a separate script.
Random Assigned Tile Swaps
Create your custom script titled Random Assigned Tile Swaps and begin by creating 15 [Event Group] events, renaming each from 1 to 15. Inside each one, use a [Variable Set To Value] event to set the Current Tile variable to the Tile # variable that matches each event group. For example, in event group 1, it would be $Tile 1. Next, we’ll copy over the Current Tile Switch we made for the Get X & Y Tile Values for Swaps custom script. We’ll finish each with a [Swap Tiles Var] event, with the Scene X and Scene Y values found in the Background Swap script in Part 2 from our Scene’s On Init code.

Now that we have both of these custom scripts together, we’re going to use them in multiple areas to set up the rest of our project. We’ll need to use them to initialize the puzzle scene as well as within a pause menu.
Start The Shuffle
When we start the puzzle scene, we want to give the player an appearance of control over the random puzzle generation. To do this, we’ll add two new sprites:
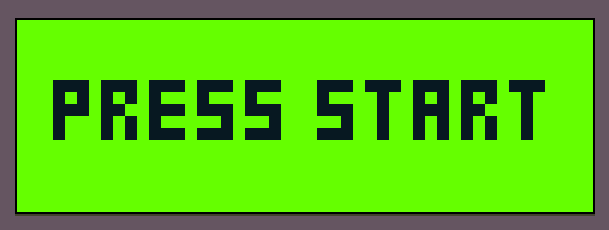

Go ahead and add a blank frame to the end of each sprite in the Sprites section of GB Studio and make sure the Animation Type is set to Fixed Direction. You will then take these sprites and apply them to the Sprite Sheets of two new actors in the scene, “Shuffling” and “Press Start.” Go into the On Init script for Shuffling and add a [Hide Actor] event, leaving it set to “Self.” Set both of these to an Animation Speed of 3. Place them in the scene as shown here:
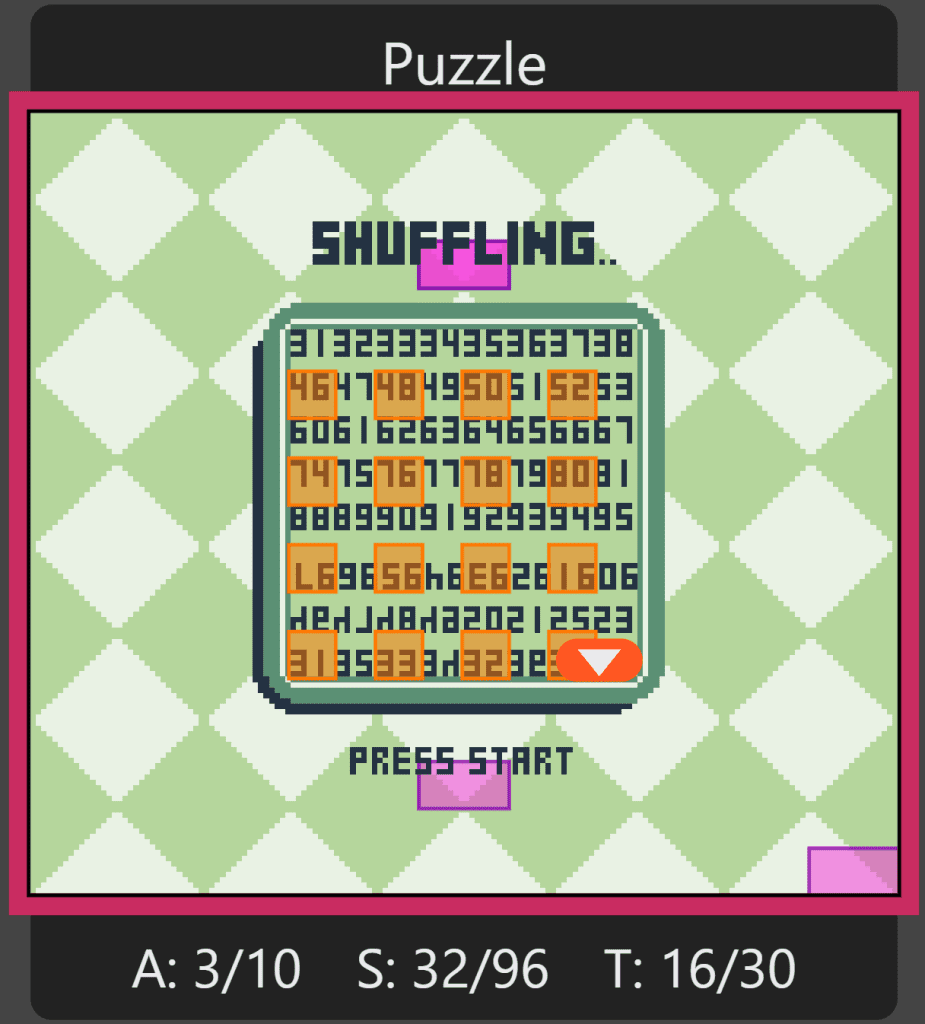
With our shiny new actors set up, it’s finally time to piece together our scene’s On Init script and finish our “Check For Win” script with an additional context menu.
Ending With Initialization, and the Check
It’s a rather unorthodox place to finish, but we’ll go back to the beginning of your setup in the On Init script where we previously added the DEBUG Section (or you changed it to Puzzle Set Up to test a custom version of the puzzle) and if you haven’t disabled your Background Swap [Swap Tiles Var] event, disable that now. We’re going to disable the DEBUG event group and add a [Hide Actor] event, set to Player after it.
To help organize the next section, create yet another [Event Group] event and label it “Puzzle Initialization.” Inside, add a [Pause Script Until Button Pressed] event and set it to the Start button to keep players from being able to move around before starting the puzzle. Next is an [If Button Pressed] script that will encompass the rest of the code.
Start Button Code
Starting with a [Script Lock] event, we’ll copy or drag & drop the Background Swap event from above and enable it here. It’s a bit of redundancy, but either add or copy the [Hide Actor] event, set to Player. Next, add a [Seed Random Number Generator] to help with the random number selection for puzzle generation in our custom script, which will randomize the seed based on the frame data from the scene. Use another [Hide Actor] event, this time set to our Press Start actor, followed by a [Show Actor] event set to the Shuffling actor. Add a [Call Script] event set to the Random Tile Assignments script and a [Wait] event set to 0.5 seconds or whatever you prefer. This wait is not necessary for anything other than showing the Shuffling actor for a while to let the player know something is happening. Call the Random Assigned Tile Swaps script with another [Call Script] event, then [Hide Actor] to hide our Shuffling actor now that the puzzle has been shown. We’ll move our player to 12,12 with a [Set Actor Position] event, [Show Actor] to show our player, and finish with a [Script Unlock] to give the player control again.

To finish off our Puzzle Initialization, add a [Attach Script To Button] and set it to Start. This will serve as a pause menu button. Copy or create a [Hide Actor] event set to Player, then add a [Display Dialogue] event.
In menus, I prefer to use the Variable Width font, which can be selected if you type an “!” in the Dialogue box followed by the letter “f,” and select Font: GBS Variable Width from the options. Next, type another “!,” but this time follow it with an “s,” as it will give you “Speed” options for how fast to render the text. Set this to Instant so it appears more like a menu than dialog from a character. These two additions should appear as “FS” in your box. Finish the text in the box by adding “New Puzzle?” and then use spaces to move it over, citing the preview window by hovering your mouse over the event, to center the text to the box. Switch over to the Layout Tab in the [Display Dialogue] event, and change only the Min Height, Max Height, and Scroll Height to 3, leaving the rest of the options default.
Create a new variable named Menu Option and set it as the Set Variable in a [Display Menu] event. Set to 1 if Yes, and 0 if No. Check off the “Last option sets to ‘0’” option, and change the Layout to Menu. To finish this menu, we need to check if the Menu Option was set to Yes or No, True or False, or even 1 or 0. Add a [If Variable Is “True”] event, and set it to Menu Option. Inside, we are going to copy the exact contents of our Start Button Code, save for one small change: remove the [Seed Random Number Generator] event. Finally, in the Else section of the script, add a [Show Actor] event and set it to Player.

With our initialization script done, we only need to add the final menu to the Check For Win script to complete this puzzle game tutorial. Luckily for us, it’s simply a matter of copying & pasting the exact code we just finished and altering our existing [Display Dialogue] event. Use the shift key, and click on each event to highlight both the [Display Menu] and [If Variable Is “True”] events. Pull down the context menu and select ‘Copy Events.’ Then, in our Check For Win script, use either the Alt or Option key and click where it said “+ Add Event” before, as it should now say “[+] Paste Event.”

Once you paste these events, when the player solves the puzzle, it will prompt them with the existing box stating “You Solved The Puzzle!”, add an extra line below that that asks them if they want to “Play Again?” This will lead them into the menu we have set up, creating a loop back into starting a new puzzle.

Now that we have finished all of our steps, we have a puzzle game with random puzzles, a visual indication to the player what button to press to begin, and a loading sequence to inform them when the game is loading. There is plenty more that can be done to customize our puzzle, but I will leave that for you to decide.
I can’t wait to see what you create with this new knowledge, and even though this is just a dip into the ocean that is puzzle games, there are plenty of skills within this lesson that can be applied to other aspects of design, especially with UI and menu design elements.
If you haven’t yet, join the official GB Studio Discord and share what you’ve done with our community! Also, if you want, you can check out both of my puzzle games, In The Dark and In The Dark 2.
Good luck and happy puzzling!
💚🍐

Writer, Game Designer, Engine Bender, Retro Enthusiast. Co-creator of In The Dark. (He/Him)
