
On the 8th of September, Ian Michael posted a video of his version of GnuBoy running on the Dreamcast. This version auto boots a supplied rom and allows you to make custom splash screen images, making it perfect for our GB Studio games.
So how exactly do you get this working with your games? For those unfamiliar with the Dreamcast homebrew scene, the Dreamcast-talk forum linked in the video description doesn’t explain all the ins and outs too well. Luckily, this is actually easier than it first appears.
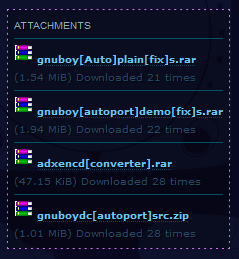
When you scroll to the bottom of the Dreamcast-talk forum post you will see that 4 files have been uploaded. Specifically, you will need gnuboy[Auto]plain[fix]s.rar and optionally adxencd[converter].rar.
Next you will need to get BootDreams. This gave me security warnings on my PC, so if you aren’t comfortable using it stop here. BootDreams is a widely used program in the Dreamcast community, so I think it should be fine to use but if you are worried I took the risk so you don’t have to.
Next up, unzip gnuboy[Auto]plain[fix]s.rar. Here you will see a number of files and folders. Go into the folder marked gb, there you will see gbs.gbc. Replace this gbc rom with your desired game (make sure you keep the same file name). For the most part, this is all you need to do, but it wouldn’t suit your game without changing some of the images in the folders INTRO and pics.
The order of the files that are displayed on screen are as follows:
- P.png
- P2.ping
- adx.png
- RAD.png
- RAD2.png
- imrok.png
- L.png
- l2.png
For the intro, you can remove some of these images but it will hang on a black screen until it loads. The next image that opens before the rom is loaded is startup.bmp in the pics folder. All images need to be 640×480 and compressed in order for them to work correctly. You can use this website to compress them.
Here is where the optional download comes in handy. If you want to change the audio used in the intro, you can do so by following these steps:
- Unzip adxencd[converter].rar
- Find/create a .wma audio file
- Place it into the same folder as adxencd.exe
- Run adxencd.exe to convert the audio file to the appropriate format
- Overwrite the current audio files in the INTRO folder
So now your GnuBoy should be set up for your GB Studio game. All you need to do now is install and run BootDreams.
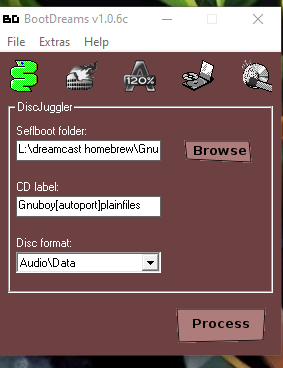
Select the root folder of gnuboy[Auto]plain[fix]s.rar, change the CD Label to the title of your game, leave the next field as Audio\Data and click process. BootDreams will make a .cdi file which you can name as you wish. Then burn this .cdi file to a CD at the lowest writing speed you can. Finally, put the CD in your dreamcast and off you go – you have successfully ported your GB Studio ROM to the dreamcast!
This is still early on in development, there are more features planned such as full CD quality audio which is very exciting! I can’t wait!
As a lot of people are swapping out the Dreamcast optical drive assembly for the GDEMU, you may want to also release the CDI image if you plan on doing a physical release. It’s so awesome that we can add Dreamcast to the devices that GB Studio games can be released on.

Game Boy Enthusiast, Hardware Fanatic, Mad Man. (he/him)
