
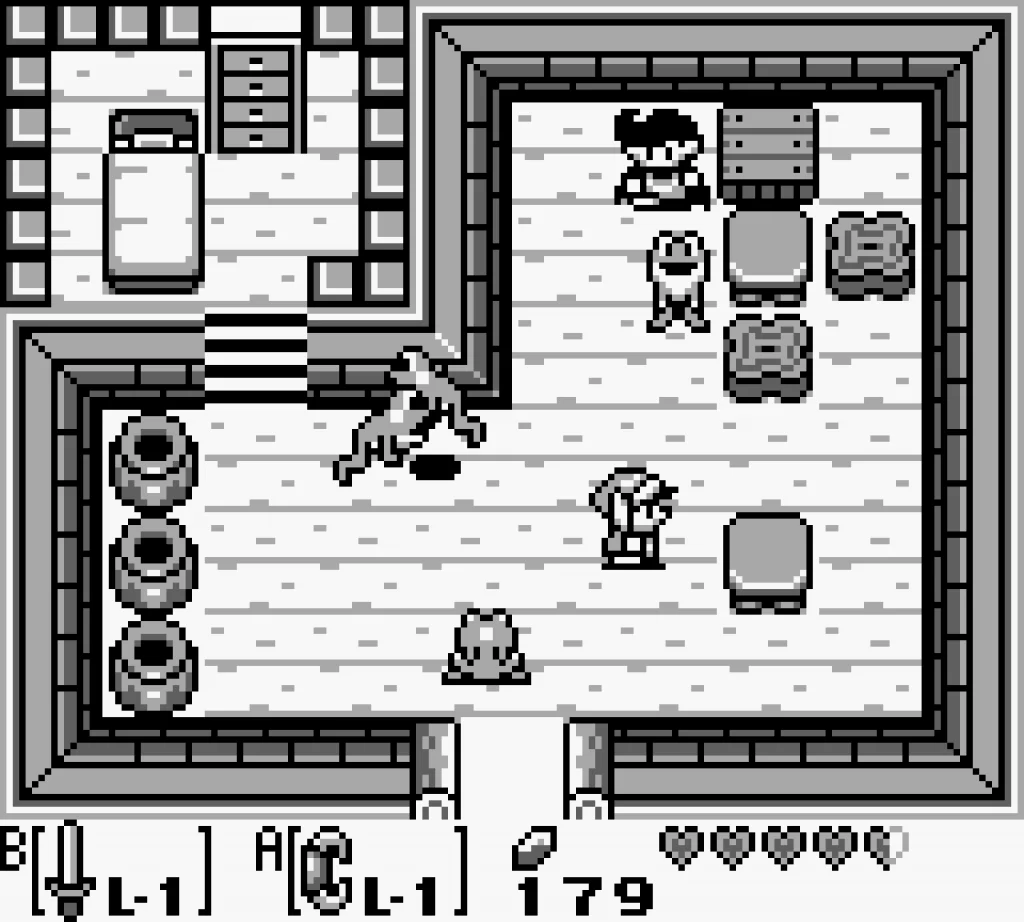
In a previous article, we demonstrated how a pinned actor can be used as a simple Heads Up Display (HUD). This method is simple and easy to implement, but ultimately has many limitations. There are limits to how many actors you can have in a row as the Game Boy can render only 10 sprites per line, and GB Studio has specific limits on how many actors can be added to a scene as well. With this in mind, it’s a good idea to consider using tiles to display information to the player. This is a common practice in classic games, with titles like The Legend of Zelda: Link’s Awakening and Metroid 2 displaying player health and other information toward the bottom of the screen, and games like The Legend of Zelda: Oracle of Ages/Seasons and Super Mario Bros. on the NES providing information toward the top of the screen.
There are multiple ways of implementing a tile-based HUD in GB Studio, but all of them require the use of GBVM commands, and it is helpful to understand how to use tile swaps as well. With this in mind, please check out our previous articles on Learning GBVM and Animating Background Tiles if you haven’t tried using these tools before. This tutorial uses GB Studio 3.1 for it’s implementation.
The Static/Parallax Method
If your scene is a single screen or moves only horizontally, you can simply opt to define an area of the screen as your HUD. Think about how Tetris on Game Boy has a fixed playfield on the left and several areas to the right of the screen that display the score, level, line count and upcoming brick. To get this method to work, you will need to make sure that collisions in a scene prevent the player or other actors from moving into that HUD area – unless you’re planning on having behaviour that mimics Super Mario Bros. on NES, where the player could in fact move into the top of the screen. Additionally, as these tiles will be uniquely addressed and manipulated with tile swaps, each tile you wish to update needs to have a unique tile in the background (refer to Animating Background Tiles for more details).
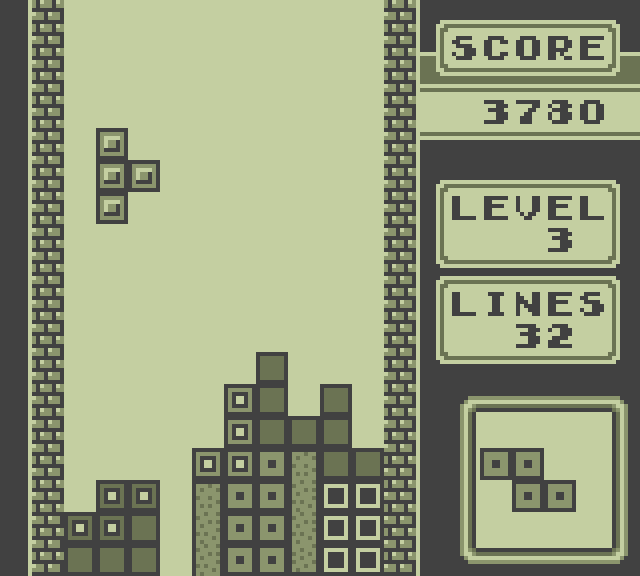
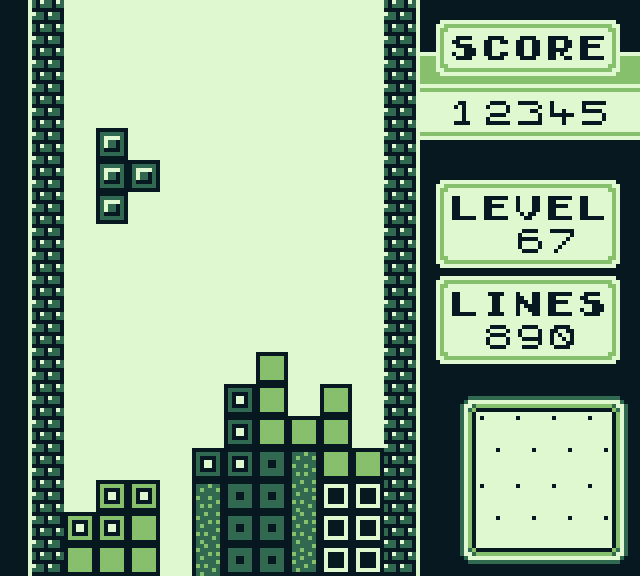
There are a few ways you can make sure all the tiles you need to address are unique. One method is to copy and paste unique tiles from the gbs-mono.png file that is generated in a GB Studio project’s /assets/fonts folder. This has 205 unique tiles, so there is a lot to pick from. If you are using similar number/font tiles in your background already, you could also use a single pixel offset tiles as an alternative. For example, if you consider a tile an 8×8 grid of pixels, having an all white image with a single black pixel at the top left can be your first unique tile, while another tile with a black pixel shifted one pixel to the right can be your second. You can then continue adding single pixel offsets to denote unique tiles. Below I’ve used both methods, editing the Tetris screen to be useable in GB Studio. The score, level, and lines HUD areas are set using the gbs-mono font 0-9 numbers tiles, while the next brick area uses pixel offset tiles.
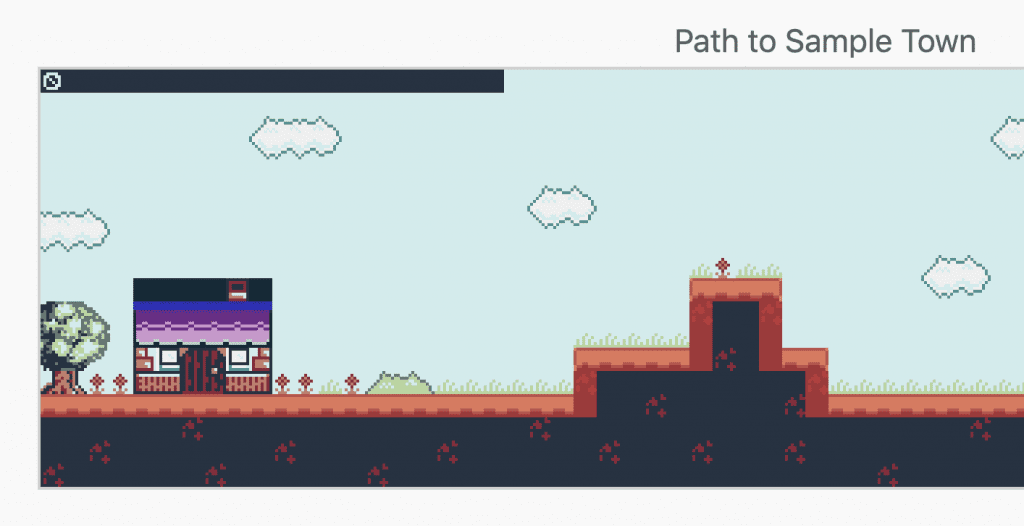
However, if we want to get something like a Tetris HUD working in GB Studio, there would be a lot of code to make, not to mention getting the actual Tetris mechanic itself to work, so instead let’s start with something much simpler to implement. For this example, we’ll use assets from the sample game. The “Path To Sample Town” scene has a fairly simple horizontal screen and some variables we can play with – in this case the number of turnip enemies left alive. Let’s create a simple HUD that will display how many turnips are left.
We’ll be using the same method that Super Mario Bros. uses on the NES, and fix the position of the top row of tiles to use as our HUD. While it might seem like the score, timer, and player life count is “moving” with the player in that game, it is in fact a static row that is kept in its position across the entire level as the player moves to the right. While the traditional method of implementing this on Game Boy would use Horizontal Interrupts to “freeze” the top row of tiles in place, it’s much simpler in GB Studio using the Parallax options (although those technically use interrupts too).
First, I’ll use my favourite image editor to change the first row of tiles visible on screen into the HUD. In practice, this could be left the same as the original background to better sell the effect, but for demonstrative purposes I’m filling it with black tiles to make it easier to see the effect. In the very first tile, I’ve put a single number from the gbs-mono font as mentioned previously. Any number will do, as long as that same tile does not get re-used somewhere else in the background. The result looks like this:
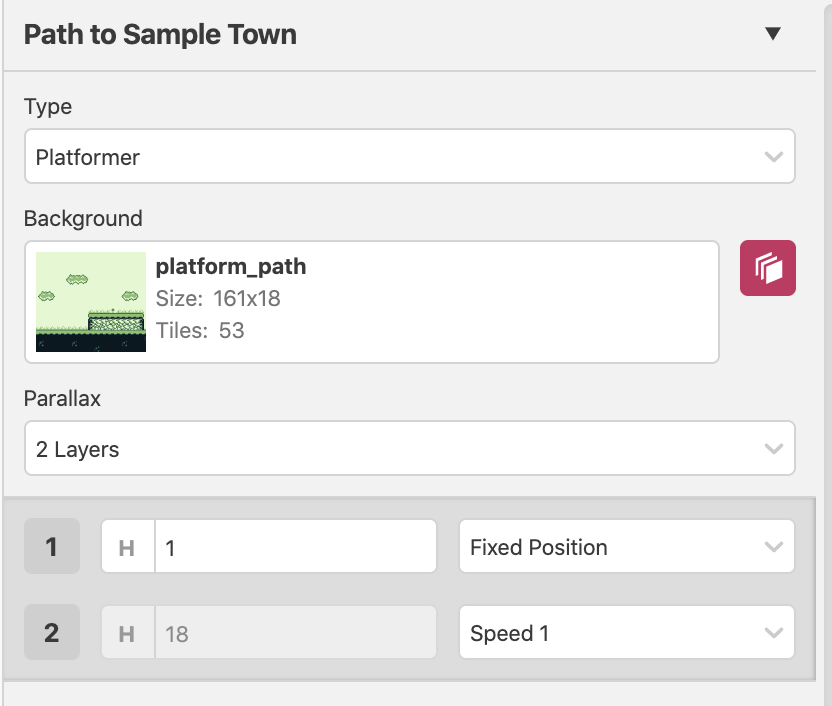
Again, that top row of the HUD is one screen wide: 20 tiles or 160 pixels wide by 8 pixels high. Now we need to tell GB Studio that the top portion of the screen is going to stay in place. Click on the Scene in question to bring up the information sidebar on the right, and click on the button directly next to the Background selector that looks like a stack of squares – this is the Parallax button. Select 2 Layers for the Parallax options and set layer 1 to 1 row (this is the height of the layer in tiles), then set the first row’s speed to “Fixed Position”. With everything set correctly, it should look like this:
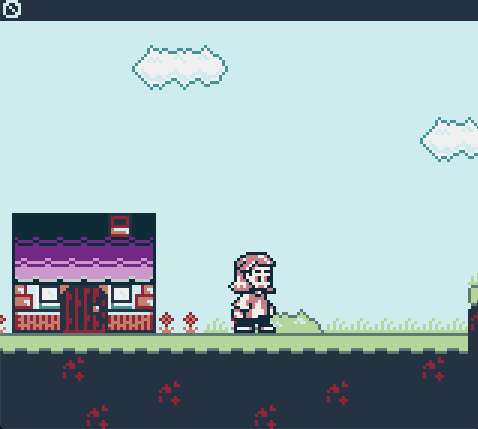
And the result when we run the game:
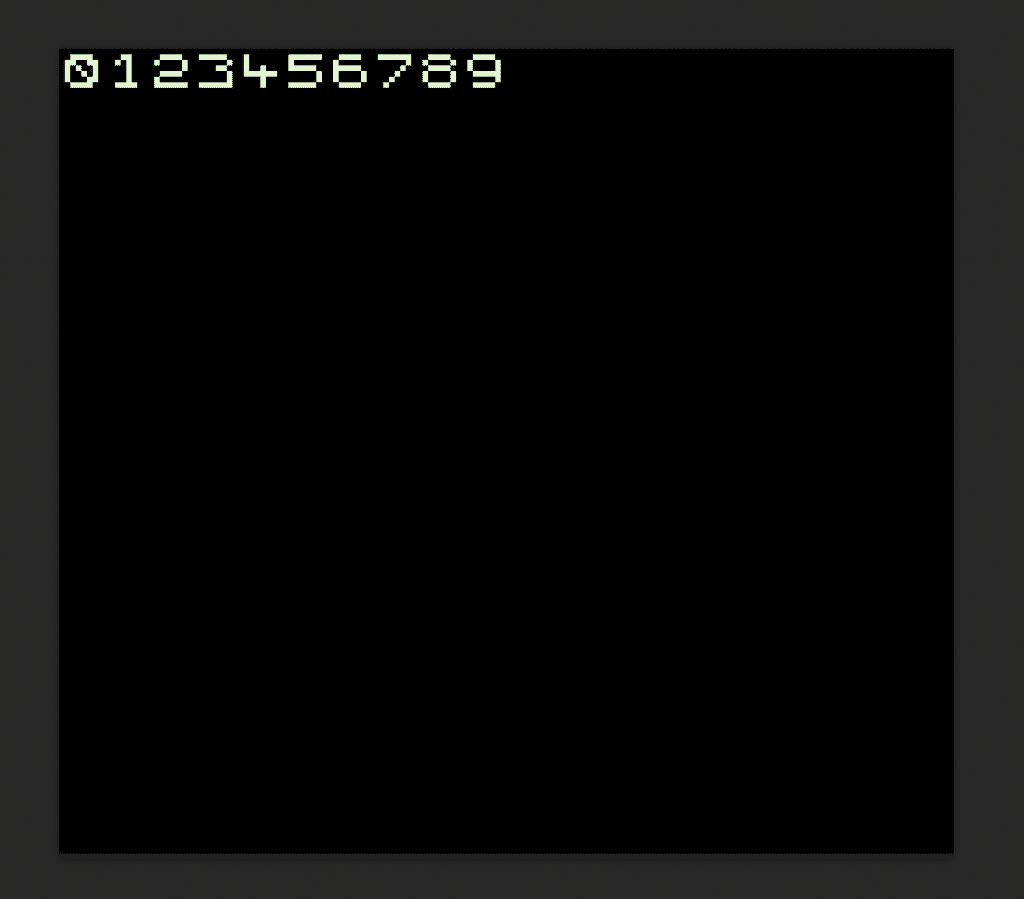
Success! The top row doesn’t move, but code still needs to be added to get the counter to update when the turnip enemies are defeated. Luckily, we have all the knowledge we need to fix that from the Animating Background Tiles article, and we can add a simple GBVM script that uses an existing variable already baked into this scene. In the sample game, the player is expected to defeat 3 turnip enemies that roam the path, and checks if the player has completed this task, so we can use the “Turnip Counter” variable in conjunction with the Replace Tile GBVM command. I’ve created a simple tile sheet to facilitate this function, added the numbers 0-9 to the first row (one number per tile), and saved this file as “numbers.png” in the project’s /assets/background folder.
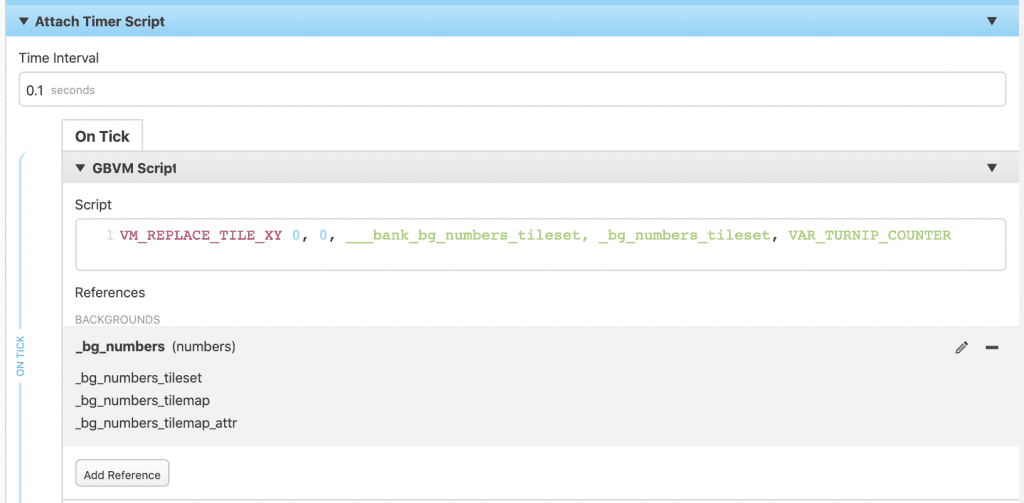
This background file doesn’t need to be added to any scene, as it can be referenced in a GBVM event. Now I’ll add a GBVM script event to the scene’s On Init tab, and copy this code to it:
VM_REPLACE_TILE_XY 0, 0, ___bank_bg_numbers_tileset, _bg_numbers_tileset, VAR_TURNIP_COUNTERAgain, refer to the Animating Background Tiles article if the above command doesn’t make sense. Since GB Studio is 0 indexed, the first tile in the numbers sheet is 0, then 1 and so forth, so it all conveniently matches up with the variable value (hint, this is a very effective method for displaying values on screen).
The scene will now display the turnip counter value when it initializes, but it won’t update it as the player defeats the turnips. There are a few ways to accomplish this, but for simplicity, I’m going to add this to an “Attach Timer Script” event. Since this doesn’t need to constantly update, I’ve set it to 0.1 seconds and simply added the exact same GBVM script into it.
Let’s run the game and see how it looks.
The combination of the timer script and the GBVM event works! We have a functional HUD made with the sample game to count the number of turnips defeated.
Now it’s up to you how you might want to put this method to use. You could track player health and lives, add a score counter, or have an item selection displayed. The key to this system working is knowing which tiles are being targeted in the tilemaps to which you feed the command. This method has its limitations though. If you want to have a HUD on the bottom of the screen, you could make the first layer in the parallax settings 17 high, and set the bottom row to Fixed Position, but this won’t work if your screen is higher than one screen tall as the maximum size for the first parallax layer is 17. You can use a taller scene with a HUD on top, but you will need to use a different GBVM command (VM_REPLACE_TILE), as the X/Y position of the tile will change as you move across the screen.
So what should you do if you want a more complex HUD, or want to have more verticality in your scene? Well that’s where you’ll need to be introduced to the power of the OVERLAY and setting SUBMAPS, which will be detailed in an upcoming article.

Audio Engineer, Mac Technologist and Video Game Developer. Managing Editor of GBStudio Central. (he/him)
