
When I was 10, I remember playing Donkey Kong Land when it was first released back in 1995. I was a big fan of the SNES version that had exploded onto the market a year earlier, and was excited to see Rareware’s take on Donkey Kong barrel it’s way onto Nintendo’s handheld console. When I turned on my Game Boy and began playing stage one however, I was alarmed to find that the large sprites were quite hard to see against the detailed scrolling backgrounds! So much so, that I found myself losing life after life, trying my best to make sense of the muddy tones of green that wildly smeared across the screen as I played. The developer had faithfully translated the artwork of Donkey Kong Country as best they could (minus the color, of course) but that choice made it difficult to see platforms, enemies and even Donkey or Diddy Kong as they moved across the dot matrix screen of the original DMG. Even the Game Boy Pocket, with its improved display, also succumbed to the debilitating problem of blurred visuals when anything was in motion.

You have to admit, it’s not easy playing that game on un-modded hardware… and it’s considerably worse on the DMG.
These days, we are spoiled with backlit, high resolution screens packed into our portable devices that would have ten year old me weeping with joy. But, back in those days, no one was the wiser. I saw a new portable Donkey Kong game and, without question, bought it (and loved it), warts and all. The fact remains though, if you want a game to be readable on original hardware, the artwork needs to be very carefully considered! And I’d be remiss if I didn’t cover this subject for the purist’s out there who love to play their Game Boy games as they would have originally been presented back in the 80s and 90s.
In Part 1 of this article, we explored Maru’s Mission, an action platformer released in 1990 by Jaleco with some unfortunate readability issues. I spent some time revising the tones in stage one to provide a higher contrast between platforms and the empty space surrounding those platforms, thereby improving the readability during game play. Before we take a look at those revisions on real hardware, let’s see what Maru’s Mission looks like in its original state for the sake of comparison:
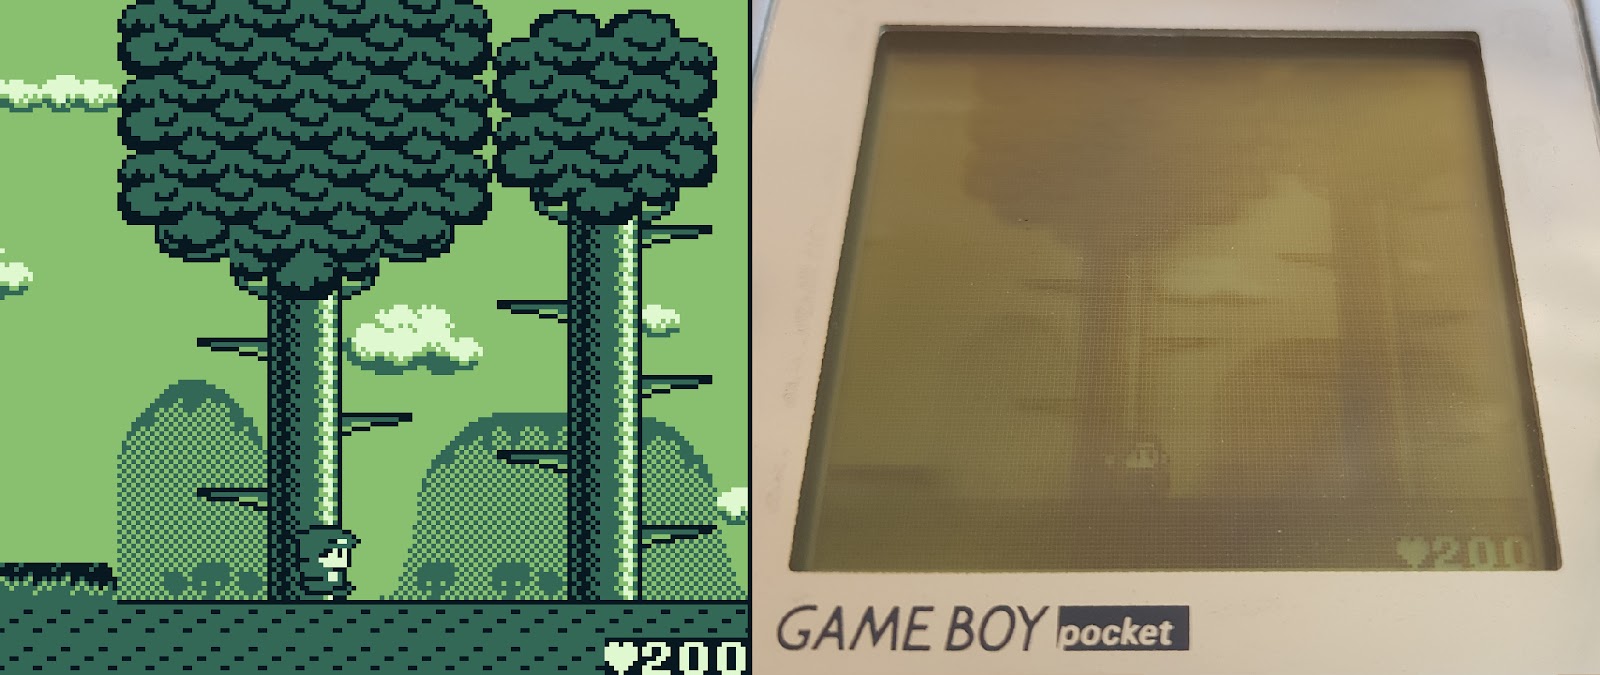
It certainly looks like the darker tones are causing a lot of the scrolling image to blur, making it extremely difficult to determine what is what! It’s still playable of course, but I’m not sure the fun to frustration ratio is weighted in favor of a particularly good time. Let’s see what we can do to improve the fun factor…
For the sake of this article’s demonstration, I took the “re-toned” scenes I created in Part 1 and inserted them into the platformer engine of GB Studio. Maru’s Mission Re-toned is available to download if you wish to play the ROM on real hardware and see the revisions for yourself.
To start, we’ll look at the night-time scene, in which the background has been set to the black tone (and Maru’s sprite has been colored white so we can actually see the player character):
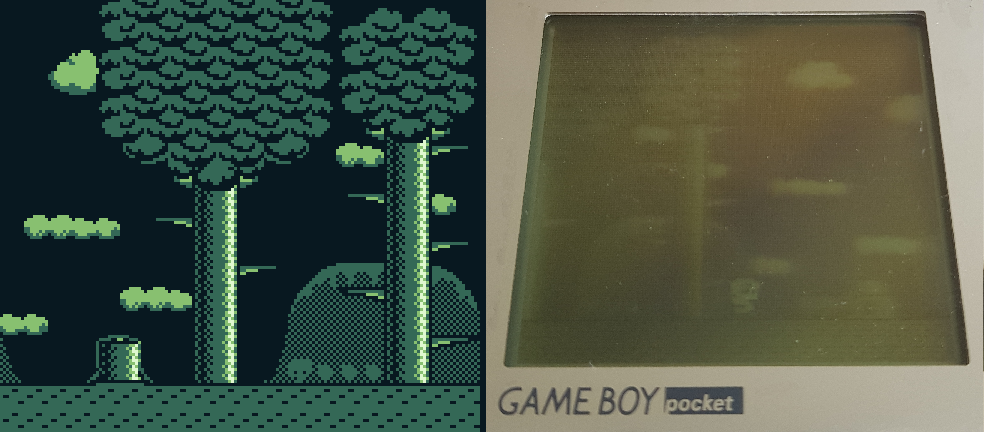
The screen looks more like a thick soup than a platformer, doesn’t it?! It’s becoming very clear the black tone is to be used sparingly if you’re developing a Game Boy game with screen scrolling functionality.
Now let’s take a look at the same scene, but with the background image set to the lightest possible tones while still retaining the tree, cloud and hill background detail:
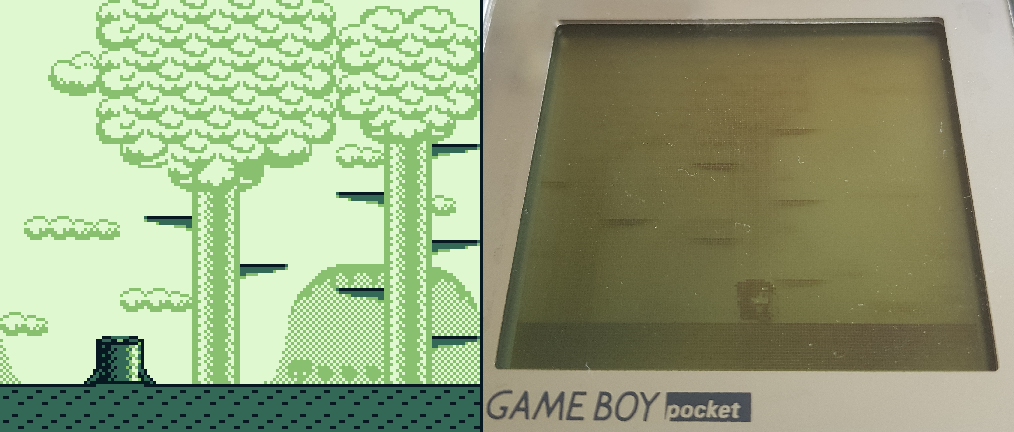
The tree branches remain a dark tone to indicate they are themselves a platform, much like the ground extending across the bottom of the screen. The background is using only two tones; white and light green. Now when the screen scrolls from left to right or vice versa, it’s much easier to tell the platforms from empty space and the player can more easily focus on the game play rather than interpreting cryptic visuals.
But while we seem to be improving game play with our changes, the level of detail in our background artwork is also being reduced as a result! But, by utilizing some well considered art asset layout and limiting the direction of the screen scroll, we can ensure the player can enjoy more detailed and expressive background artwork while still keeping the game play relatively unharmed.
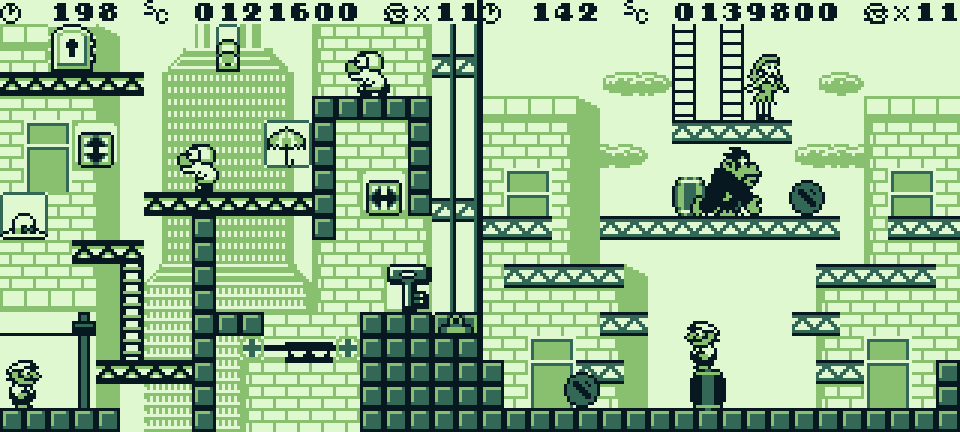
We used Super Mario Land 3: Wario Land as an example of excellence in readability in Part 1 of this article and we will return to it again here:
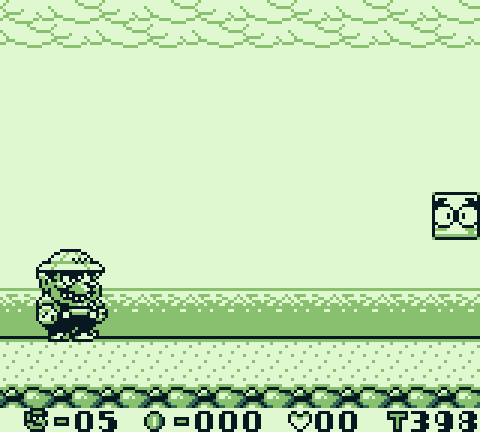
The clouds extending across the top of the background layer of this level as well as the ocean towards the bottom are not only using the light green and white tones to reduce image blur during screen scrolling, but also form clean horizontal lines that extend the whole way through the level. The areas of sand and the rocks at the very bottom of the screen are also constructed in a similar fashion. When the screen scrolls (limited to the horizontal axis only), the details of each art element will blur, but because each is laid out to create a “ribbon” of tone, the game play is not greatly affected. In this way, we can create interesting visuals that can be enjoyed to their fullest … at least when the screen isn’t scrolling!
The same strategy can also be utilized for something like a top-down shooter. Basically, as long as the unique areas of detail are constructed to form a clean line and run parallel to the direction of the scrolling screen, decent readability will be maintained.
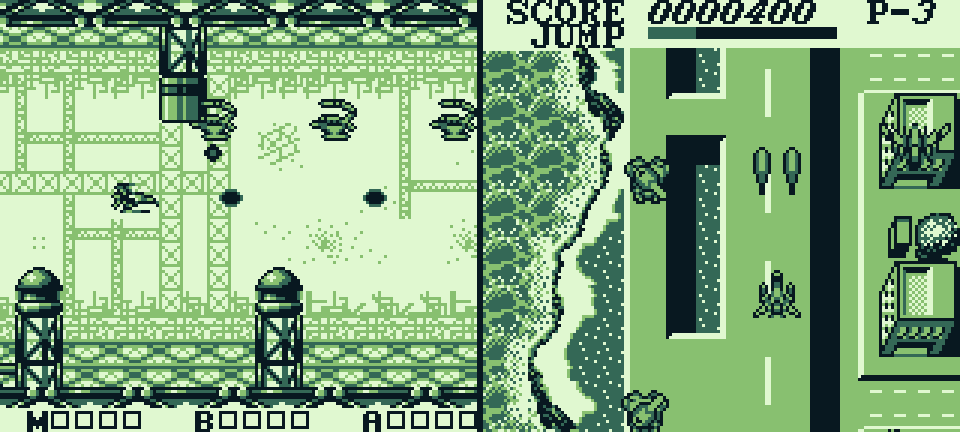
Sagaia 1989, a side-scrolling SHMUP (left) and Aerostar 1991, a top-down SHMUP (right)
Ultimately, screen scrolling tends to be a dangerous and risky proposition when developing for the DMG and Pocket. That’s why there are so many static screen puzzle games and slow moving RPGs on the system. Even the team at Nintendo’s Research and Development No. 1 department knew that the Game Boy is best suited to slow moving platformers. That’s likely the very reason Wario Land exists as it does, rather than a third Super Mario Land featuring the fast moving Mario. A rotund, slow moving Wario, who can’t sprint to save his life, just makes far more sense when readability is considered.
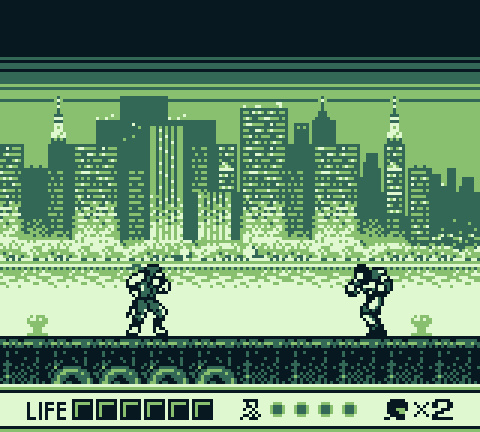
As a comparison to Donkey Kong Land, let’s take a quick look at another Donkey Kong game. One that excels in all aspects of game design: Donkey Kong ‘94.
While not all stages are this small, many limit the playable area to a single screen, removing screen scrolling issues entirely. The detailed background art limits itself to the two lighter tones only to ensure the darker solid walls and steel girders are easily readable when playing. Finally, the enemies, interactable objects and collectible items all have a solid black line around them to make sure they are easily located at a quick glance. Donkey Kong ‘94 is made for the Game Boy, and by that I mean it really is a perfect Game Boy game!
Thankfully, with the release of the Game Boy Color in 1998, new technology gave rise to new possibilities. Blurry screens became a thing of the past and with the addition of color, developers now had a new tool at their disposal. When applied to the issue of readability, color can be used to push strong contrasts just as tone does, thus improving readability too!
In the next Chapter, we will explore an aspect Game Boy game design exclusive to the Game Boy Color – Palette construction and Color theory!
You can find Maru’s Mission Re-toned available for download here.
Independent Games Designer, Artist, Film Enthusiast and Full-time Dad (he/him). Check out my games here!
