
Have you ever used undo enough times to hit the program limit? Maybe you are saving multiple copies of your project as a way to create backups? Without a doubt, making games can get messy. There’s nothing worse than breaking a project, and having no way to go back to a working version of it.
Thankfully, every GB Studio developer can use a tool to help them manage things: Version Control. Version control lets you go back in time to a previous version of your project. If some of your files go missing, your code breaks, or your files get corrupted, you can restore it to a previously functioning state. It’s a lot like using save states in a Game Boy emulator. If you’re afraid of losing a lot of progress by dying, you can make a save state to ensure you can go back and try again.
In Git, a popular version control system, these save states are called commits. There are many services that utilize Git’s system for tracking changes, but for this guide we’ll be using GitHub, one of the most popular websites for version control. This guide will show you how to backup your project, and make a commit when you want to update your project’s state to the site.
You will need a Github account (which is free for most of its features) and a GB Studio project. If you’d like to follow along with something risk-free, try using one of the Sample Projects. To create a repository for your GB Studio project, in Github:
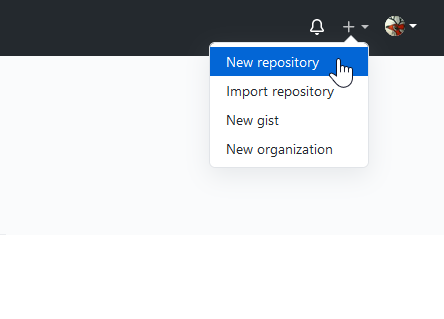
- Click the + at the top right of the screen
- Click “New repository”
- Name your new repository
- Choose Public or Private
- Click “Create repository”

Note: If your project has personal information, or assets you don’t want to make public, make sure to set your repository to private.
You should see a new page for your empty repository. Github offers a lot of ways to upload your files, but right now we’ll simply use the website.
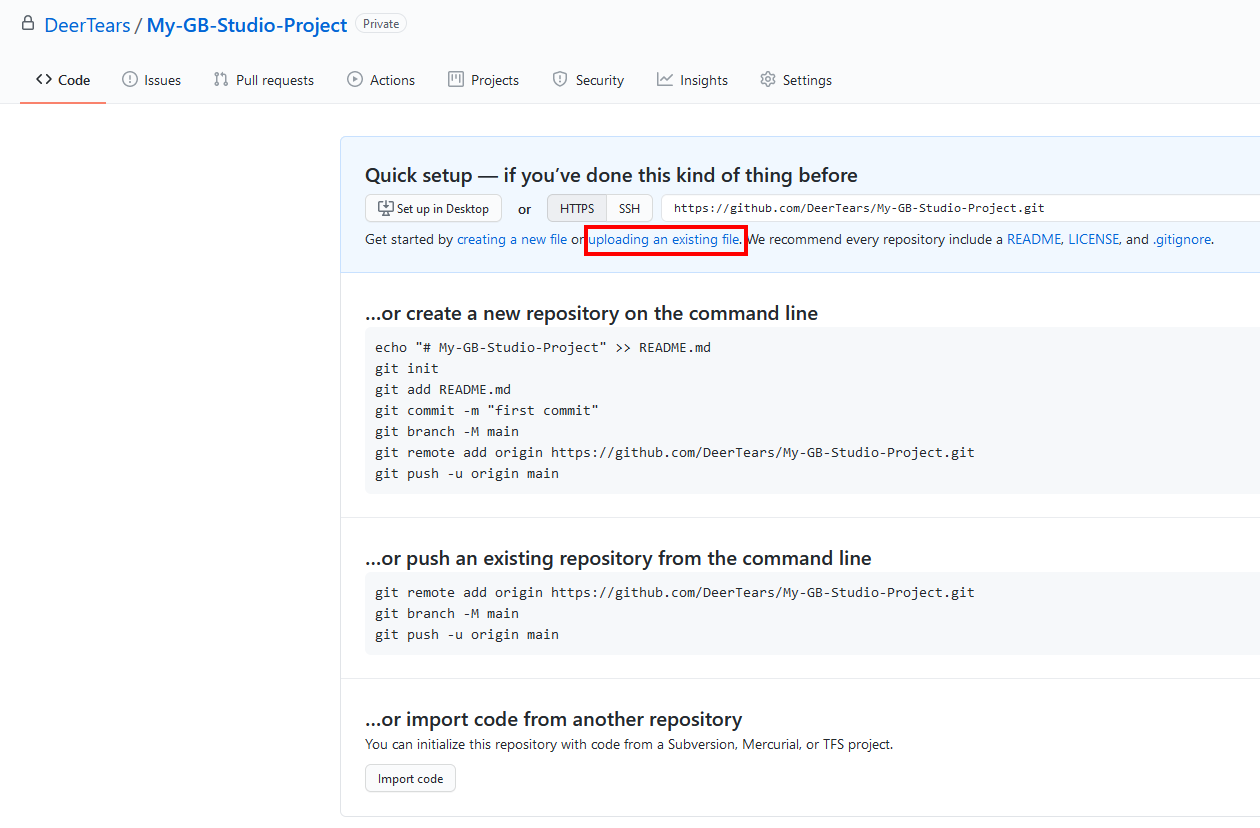
- Click “uploading an existing file” in the Quick setup box
- Drag your entire project folder into the space provided
- Type in a message for your commit
- Click “commit”
Commit messages are notes that help describe what you added to the project. This will make it easier to tell what’s changed if you have to go back and find a previous snapshot of your repository. “Adds player shooting script” or “adds town background” are some examples. Look here for how to write really good commit messages.
You have now backed up your GB Studio project to Github.
If you want to update this project, click “Upload files” on your repository page, then repeat steps 7-9.
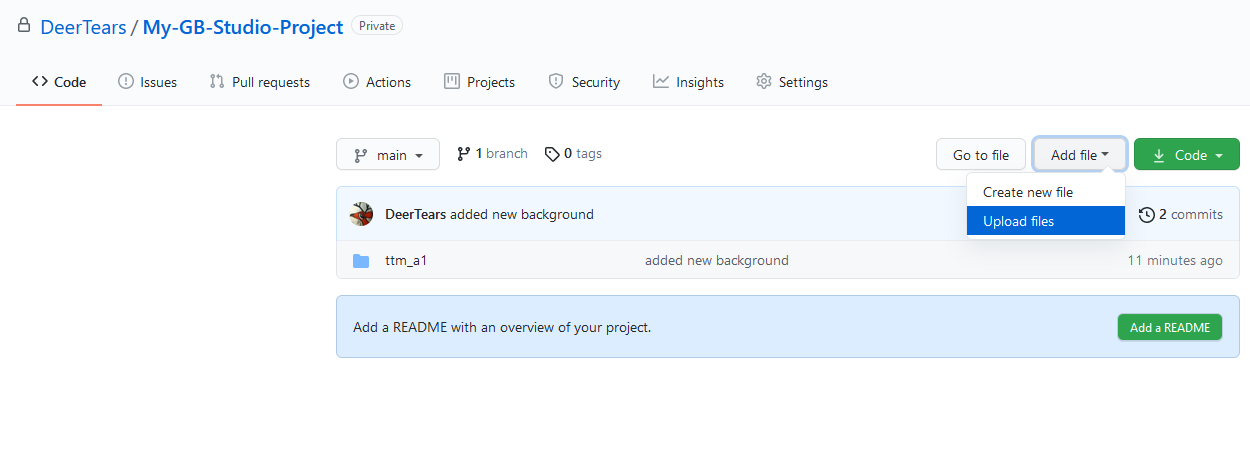
Note: I like to give my project files absurdly short names like “ttm_a1”, yours should show up as whatever you named your project in GB Studio.
Using the Github website to update your files is not a great long-term strategy. Version control is best when you can make it a part of your project workflow. An example workflow could be:
- Work on your GB Studio project
- Open a program like Github Desktop
- Make a commit
- Click “push”
This backs up your whole project privately to an external location, making it safe in case of hardware failure or broken code.
Congratulations! You now know how to use Github to backup your projects and create commits to demark versions. Next time, I’ll show you how to restore previous contents of your repository, and introduce you to using clients for git. This will make it much easier to rollback, move, and rename your project files if you need to.

Musician and GB Studio Composer. Manager of the GB Studio Community Assets Collection. Contributor to the GB Studio Documentation project. (she/her & they/them)
