So now that we understand all the channels and effects, it’s time to delve back into our sample song and finally finish it off. As we last left the song in Lesson 5, it had most of the elements of the final sample, but it was playing slower, didn’t have a kick drum, and the bass was just long notes.
All these missing elements are supplied by effects. We will look at each channel’s effects at a time to get a better understanding. Remember that almost every effect works in any channel. The way they’re laid out for this song is just based on its specific needs. We will start with the least complicated and work our way to the most complex.
Noise Channel
The noise channel is pretty much perfect. However, the fact that it has no other effects going on here makes it a good candidate for song-level effects such as the tempo, and in this case, that’s what we will add. Put an F04 in the first row.
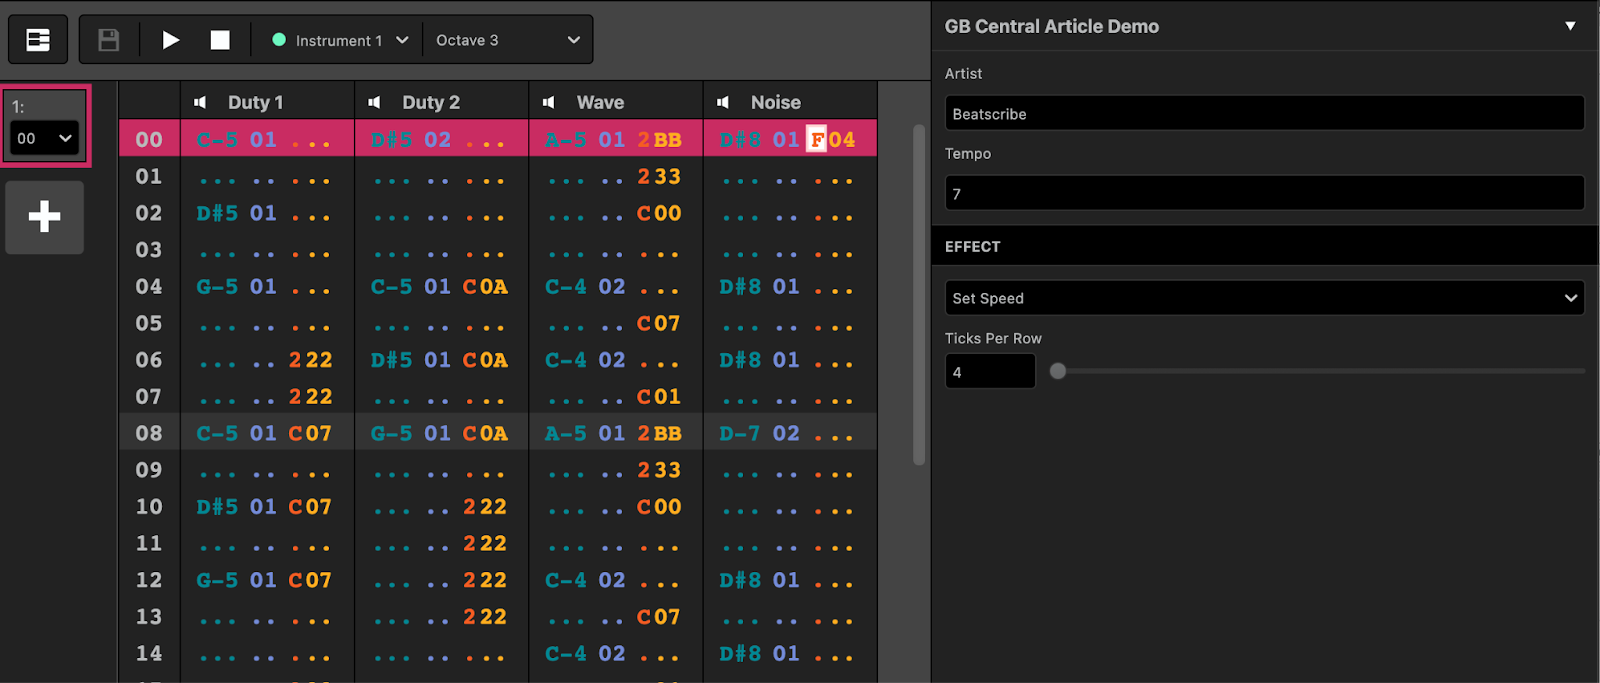
Now play the song. The tempo has been kicked up a notch and now the song has a bit more energy! Progress!
Duty Channels
Things start to get more complex with the duty channels. If you listen to the full demo (available at the bottom of the article), you’ll hear the first 3 notes echo away 2 times. Here’s one of the big secrets to creating a truly full sounding song with only four channels: the echoes span both Duty channels and overlap each other. See the following photo to understand:
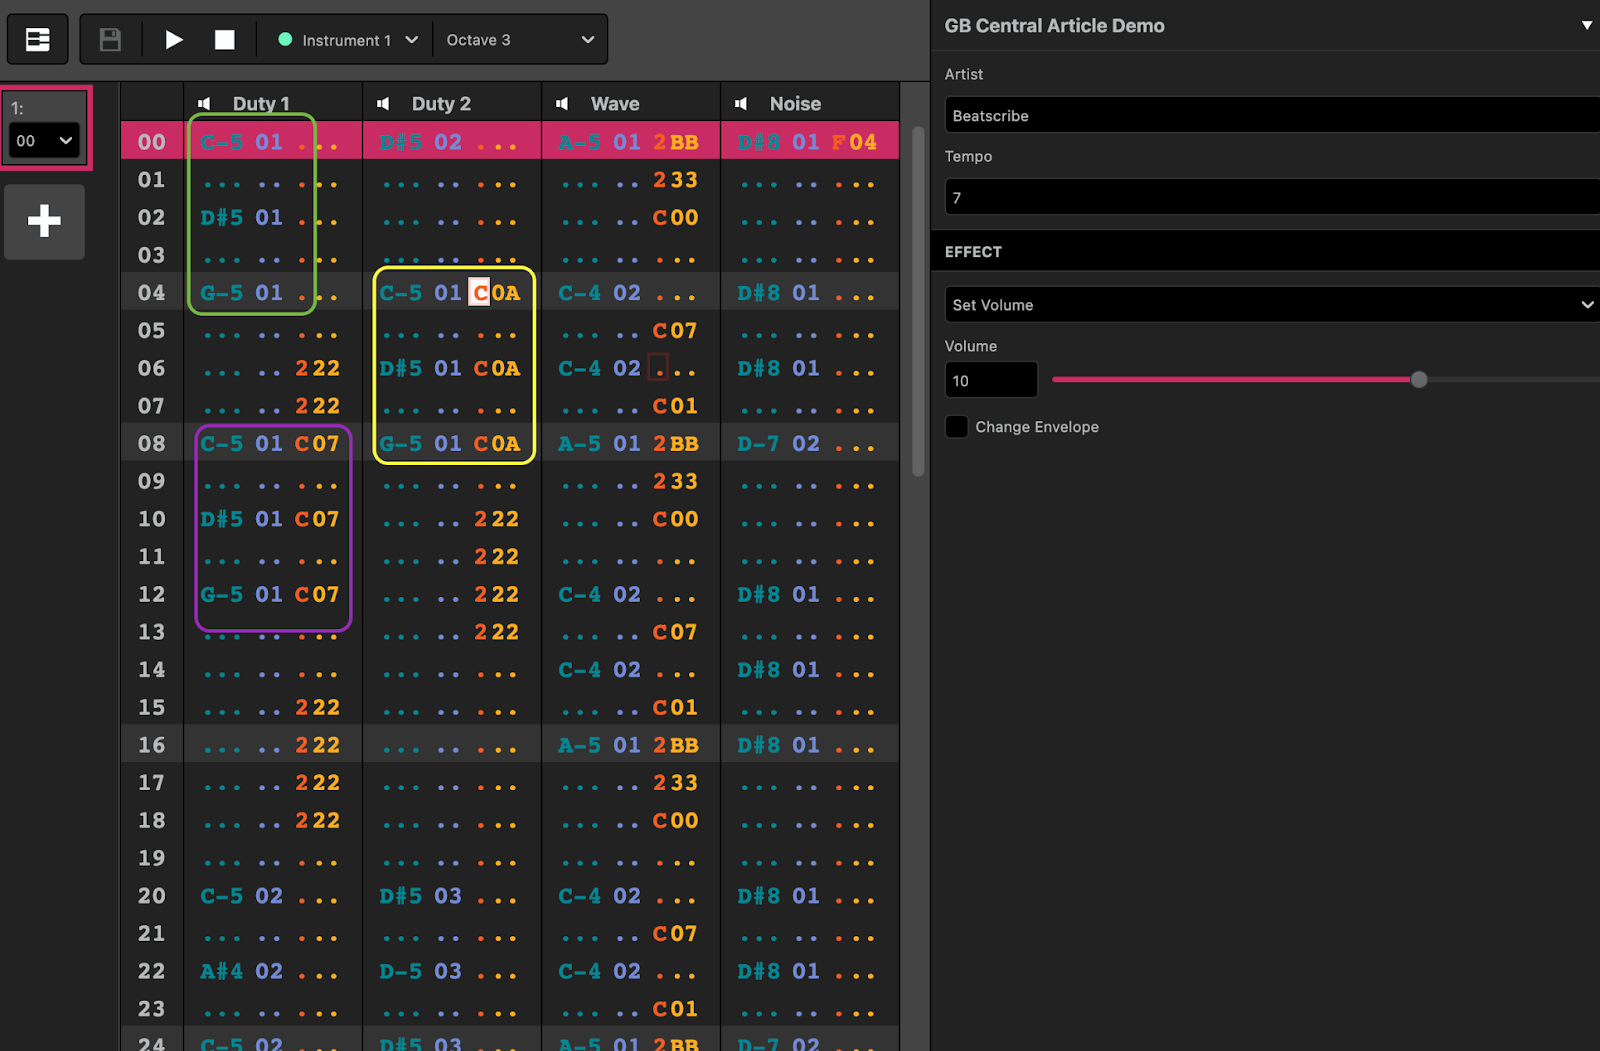
Don’t worry about the 2XX effects for now. The green notes are the initial DA-DA-DA! From there, the yellow set of notes lays the same notes again from the same instrument (01) but the C0A tells the system to play it at volume 10 as opposed to volume 16 (F). Next, as the original 3 notes have faded away in channel 1, we can set off another set of echoes – the purple selection – with even lower volume. When played quickly it sounds like way more than 2 channels are working together to play the echos.
Next you’ll notice some 222 commands in both channels. 2XX means bend a note downward. Kind of like an 80s guitar “dive bomb”, a common chiptune trope is to have notes slide down as they fade away. Add in the 222’s where shown and you’ll hear the nice effect as the echoes fade away as they also bend downwards. Small things to be sure, but they add a lot of polish!
Wave Channel
Now we come to the most complex part! As we learned, packing multiple things into channels – like the echoes in the 2 duty channels – really makes a song feel like more than just 4 notes playing at once. Fortunately, our ravey bass line only plays on the off beat 8th notes (meaning you have 1 – and – 2 – and – 3 – and 4; the kick drum hits on 1 and the bass pops up in between on the “and”’s).
First off, we’ve designed a new instrument to use as our kick drum. Wave instrument 01 is just a triangle wave. It’s round and smooth sounding. When played quickly and bent downward, it gives the sound of a punchy kick drum like you’d hear in an IDM song.
The wave channel really shows the pinnacle of how many effects can work together.
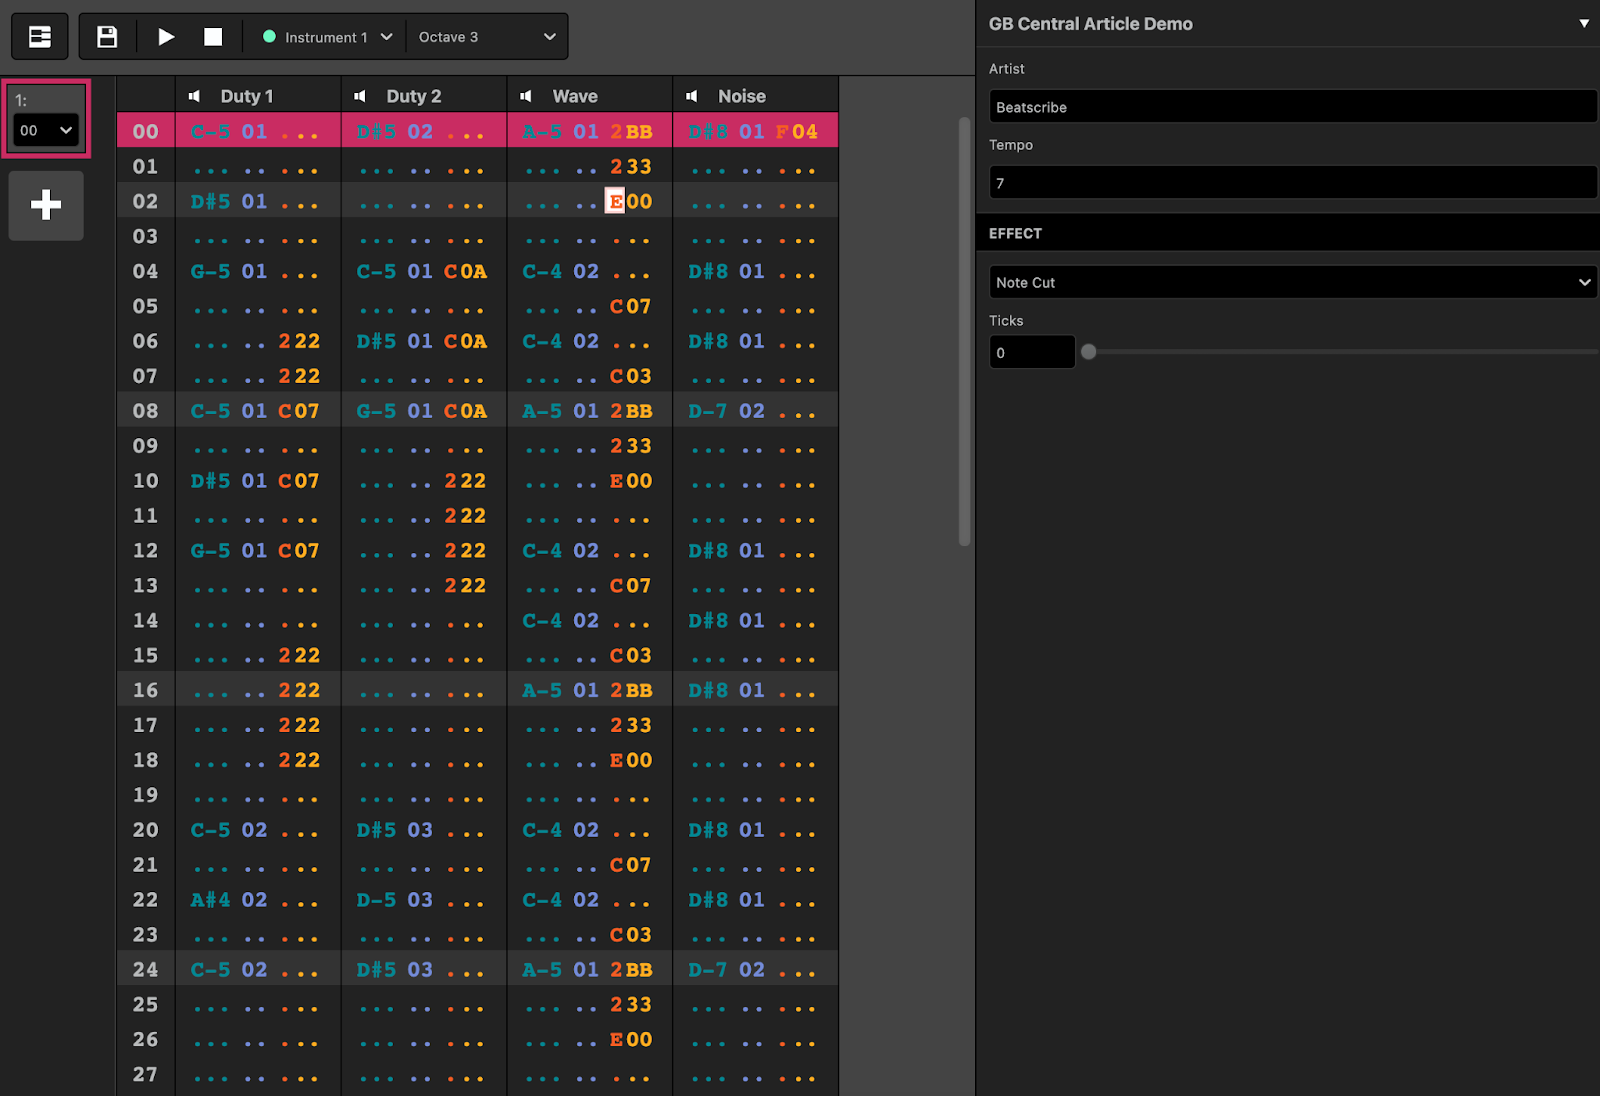

Before adding in any effects, lay down the notes with the instruments as shown. It will sound kind of odd. Note that we alternate between 01 (the kick) and 02 (the bass) many times. Build the pattern as shown only up to row 31 (you’ll see why soon enough).
Next we have to add a few different effects. The 2BB and 233 makes the kick drum sound, the triangle wave starts playing, bends quickly down and then a little further down. Then we hit a E00 which stops the note. The bass kick is snappy, so it doesn’t keep playing, it would just become low buzzy noise that muddies the song without the E00.
After that, in row 04, the first bass note plays. Just after it, we see a peculiarity of the Wave channel. The C07 on a line by itself turns the volume of the bass down to 75%. Only the wave channel lets you use a Cxx without a triggering note accompanying it. Almost immediately we again trigger the wave 02 instrument. With no Cxx, it’s automaticaly at 100% volume. Then we do a C03 which takes us down to 25%. This gives the bass notes some shape instead of blaring the entire time. This quick succession of kick – bass – bass – kick – bass – bass repeats until row 31.
We will learn one last trick. We need to copy everything to rows 31-64 but that would take some time. Drag over the wave channel from row 0 to row 31. If it’s too far away on your resolution you can hold shift and down arrow to select as shown. Then press Control + C (Command + C on Mac).
Move to row 32 in the wave channel and press Control + V (Command +V on Mac). There you go! You just saved yourself setting up a ton of commands. Now change the 02 instruments from C4’s to A#4 and F4’s as shown.
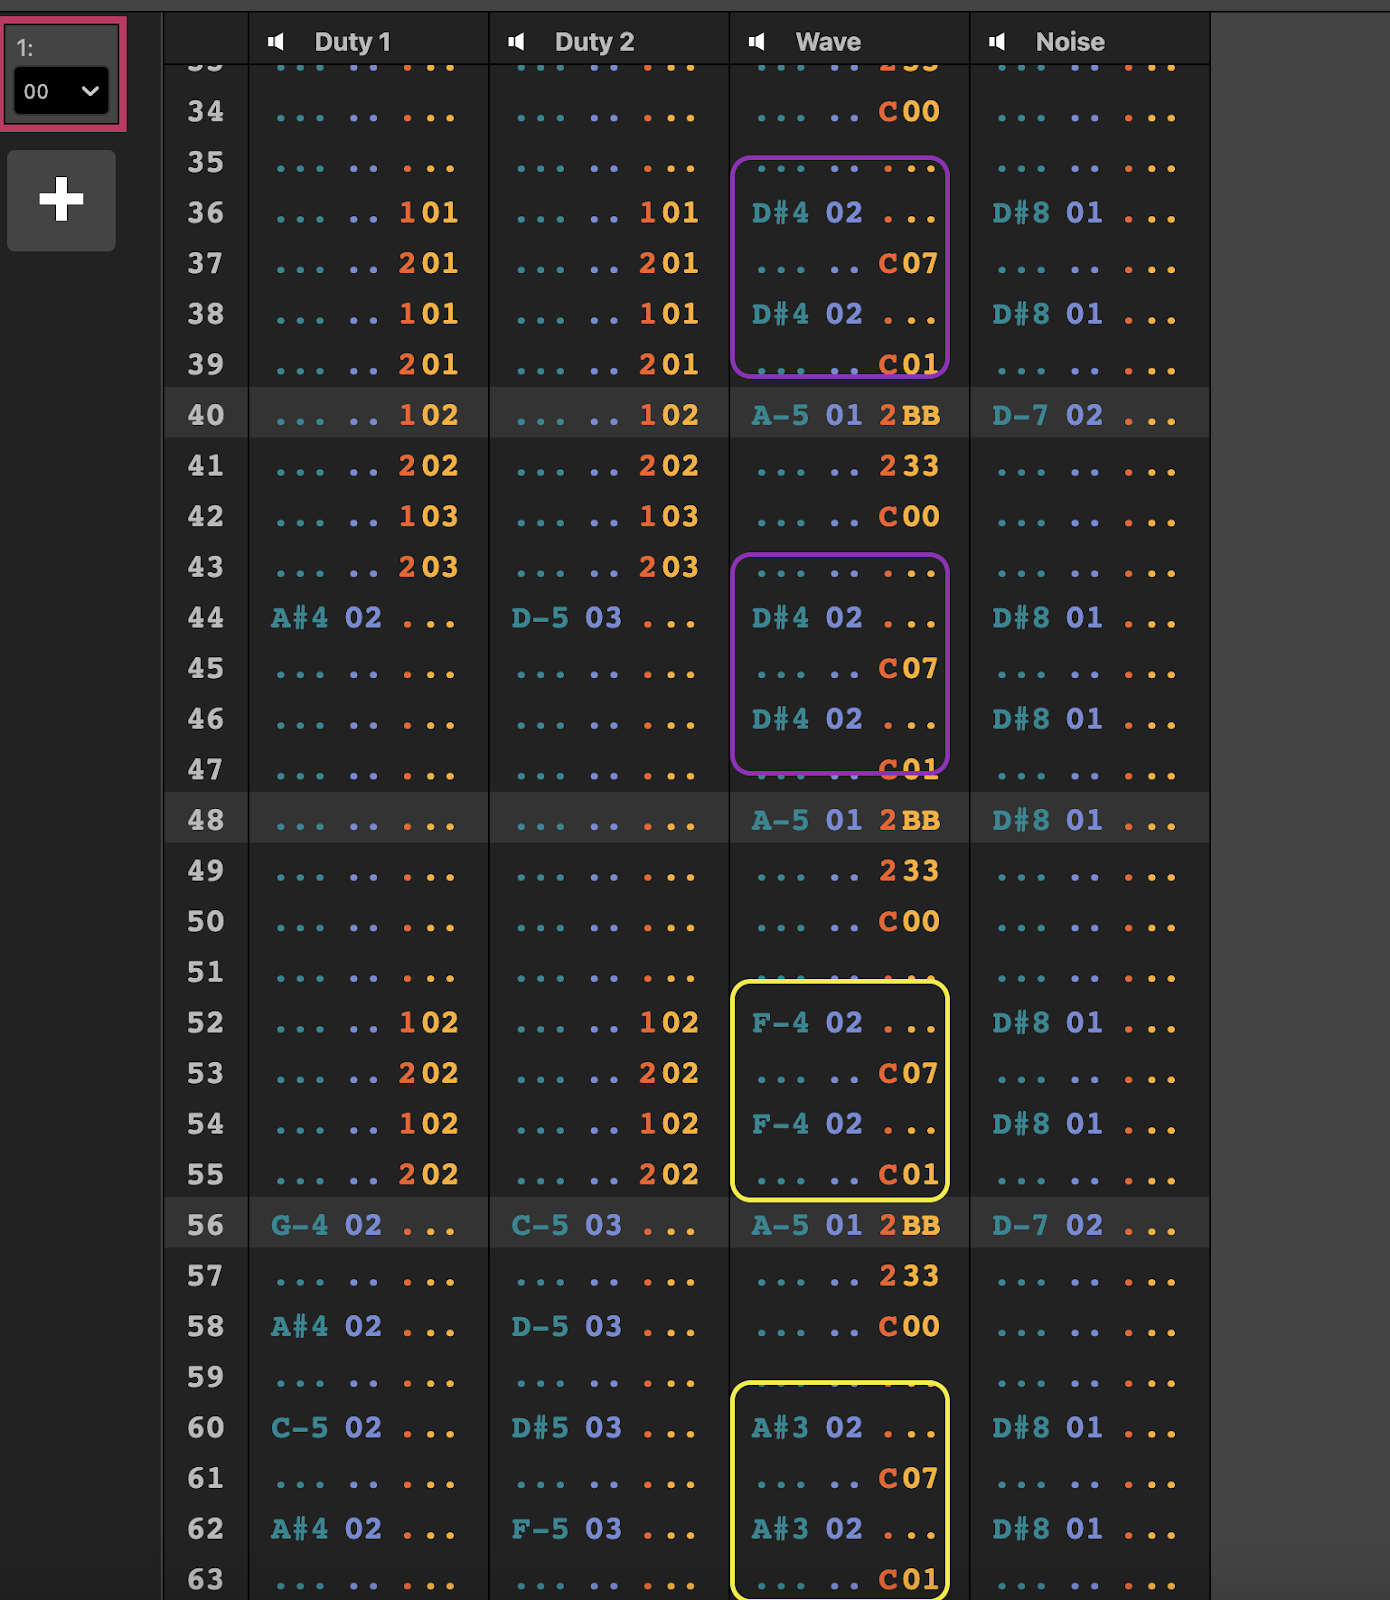
If you’ve done everything right, the song should sound exactly like the original demo we heard in Lesson 1. Congratulations! You’ve now mastered all of the basic things you need to know to make a song for your GB Studio game!

Beatscribe has composed and produced soundtracks for games on Nintendo DS, Nintendo Switch, PS4, Xbox1, Sega Genesis and numerous iOs and Android games for over a decade, but his true passion is creating epic moods on ancient hardware like the Game Boy and NES.
