Trigger Happy
Triggers in GB Studio are essential tools. They allow players to access the next scene, collect objects, enter zoned areas for gameplay, and more. Within these orange boxes lie innate abilities that transcend their original intentions. There are some unique ways of tapping into their power that have remained unseen until now.
These new concepts and uses will seem trivial at first, but when you finally dive into the usefulness of them in your projects, you’ll wonder how you ever developed without them!
Platformer Position Checks
To effectively check where a player enters or exits an interactive zone, we can use triggers to determine their exact height or horizontal position in the level, providing us a means to gatekeep certain gameplay elements. For this example, I will be referring to the skateboarding sections of Grimace’s Birthday, because without triggers, these sections would have been nigh impossible to create in GB Studio.
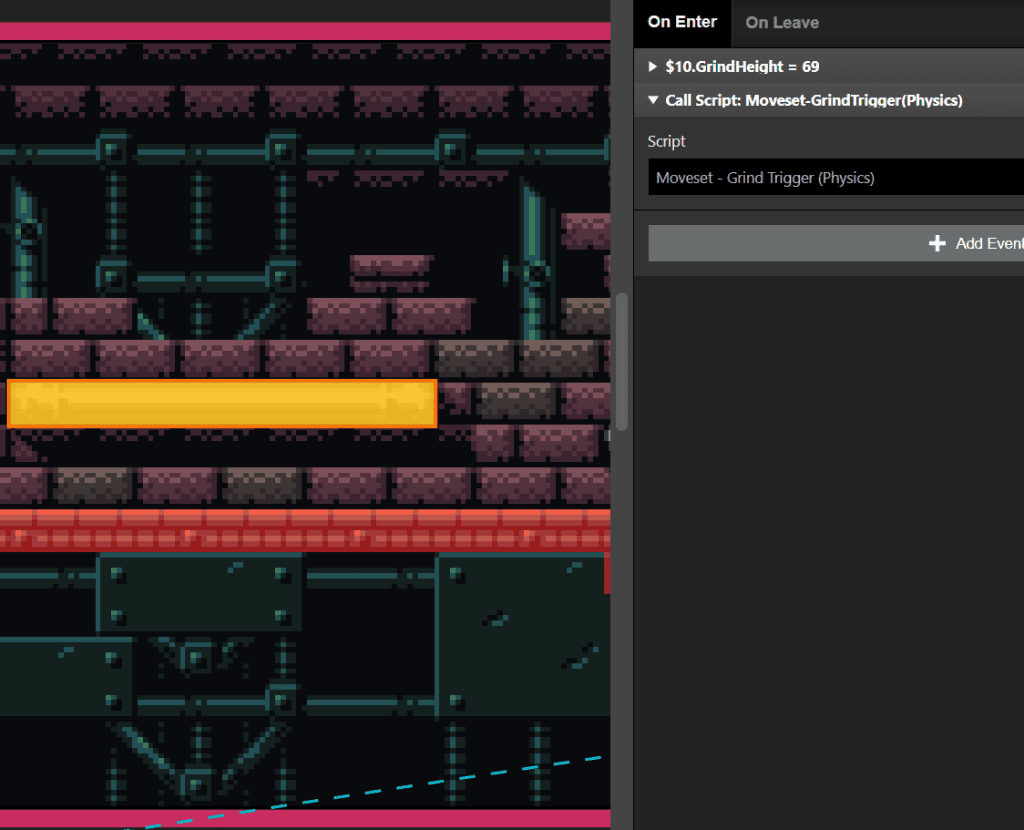
I used triggers for skateboarding to determine if the player was above the railing when they entered the trigger, and if so, allowed them to grind on that surface. The trick to this technique is to use a [Store Player Position In Variables] event in the On Enter section of the trigger and switch the units from Tiles to Pixels. Then assign the X and Y values stored by the event to specific variables. I prefer to label them something specific like “x_position” or “y_height.”
When you enter the trigger, it will now give you a numerical amount stored in the Y position’s height variable, and then you can use that to check with an [If Variable Compare With Value] event to determine whether the player is coming from above or below. This technique is greatly improved by either using the built-in Debugger to check the values of the watched variable or a non-modal [Display Dialogue] event that displays your variable with the $ symbol before (example: $y_height).
Keep in mind that if you use a math comparison with your variable value, a lower number results in a Y-axis position higher on the screen, so check for less than or equal to your value to check above, and greater than for below. You can also use this to check left or right positions as well, which can be useful to determine if a player is entering or exiting a trigger into a new zone from the left side or right side. Make sure you do multiple tests when debugging these triggers to get an approximation of where the player is and use that data to arrive at the value you check for.
Users and Interfaces
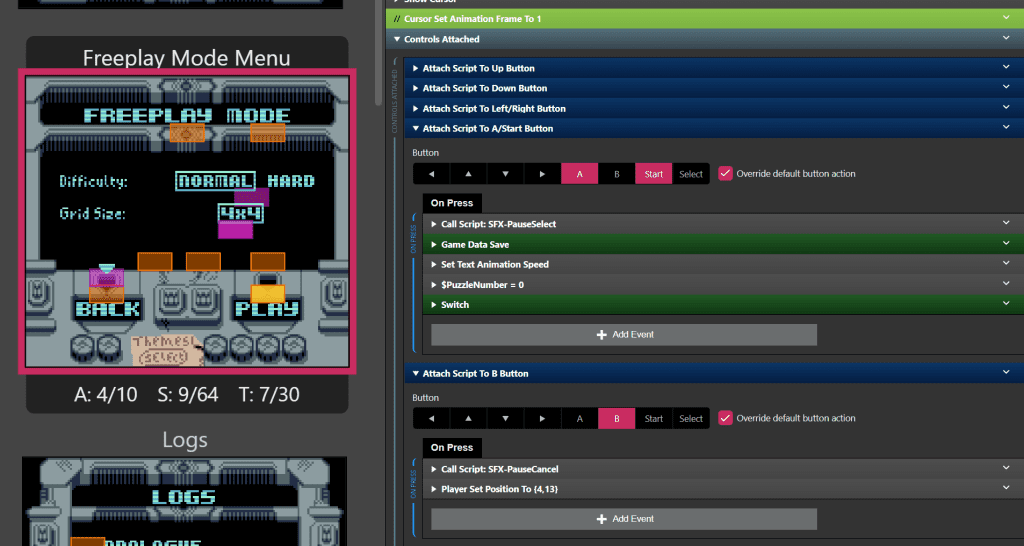
When creating a menu system, you have a couple of options. One option uses the player as a cursor and allows them to select different actors to activate or deactivate them, which can be tricky to ensure they can interact exactly where the elements are, but might be a stylistic choice that works better for your game. Another option is when you’re allowing the player to move from one element to another using the D-pad, and it’s typically best to use triggers to accomplish this.
As the player is thrown from trigger to trigger, using [Attach Script To Button] events to define what each direction does gives a more streamlined experience and provides a faster way to traverse interfaces. You can also use these Button events to attach what each option does. For example, using the A button to select that option, while the B button will use a [Set Actor Position] event to place them right on the exit trigger, giving them one last chance to pick whether they want to exit the menu or not.
Cutscenes and Other Similar Uses
Since the entry and exit of triggers run their scripts before giving control back to the player, you can also use this exclusivity to ensure events happen on the entry or exit of your trigger before you move to another trigger or area. This can be quite useful for cutscenes and other long-form events to be able to pause and run code in a sequence, similar to the On Init script when loading in a scene.
A quick note about using this “freeze” is the animation of the player typically continues to run their current animation state. A separate idle or single-frame animation state used exclusively during cutscenes might be a good way to alleviate this awkward visual glitch. Switch back to your previous animation state when you are done with your sequence.
A Trigger in Disguise
Triggers do not react to actors or projectiles. Actors in the latest versions of GB Studio also don’t react to collisions with each other. That’s a tough reality, but something that makes defining areas for your actors to move and fire off projectiles within even more challenging to script around. Additionally, while it’s not a common problem, you might also find yourself in trouble if you run out of triggers in your scene or if you need a trigger that updates your location as you move through it. In those situations, you might want to use an actor with a [Launch Projectile] event instead of a trigger to serve as a fake one.
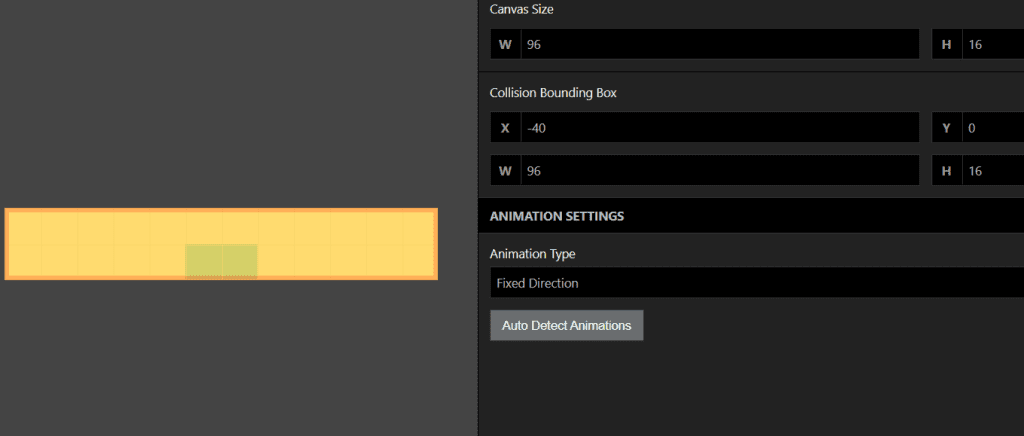
Using an actor this way requires some patience, but it is possible to use them as a means to define actions happening within a certain zone, especially if you need one that doesn’t confine to 8-pixel squares or if you’re checking for other actors or projectiles. You will need to edit the collision boundary box inside the sprite for the projectile you are launching, create a blank sprite to set this up, making it the size you need for your situation, and ensure your [Launch Projectile] event’s speed is set to “None.” Keep in mind that you need a unique sprite for each shape you want to set up this way, as you won’t be able to change the Collision Bounding Box of the projectile at run-time.
An example would be using it to see when an actor moves into an area to execute its events, say if it runs into a trap that would hurt them. It will then execute every time there is a collision between the actor and the projectile by running the events in the On Hit section — make sure both the actor and the projectile are set up to interact with each other first in their Collision Group settings!
Once you set this up, it’s worth noting that it will check for the collision every frame, so you may get some undesired results or slowdown. Enter the logic gate solution.
While it’s not an end-all solution — mostly because using an actor as a trigger doesn’t allow you to check when it is no longer touching another actor or player without using an [Attach Timer] event — using a logic gate will make sure that it either executes that action once, or at the very least, not immediately over and over.
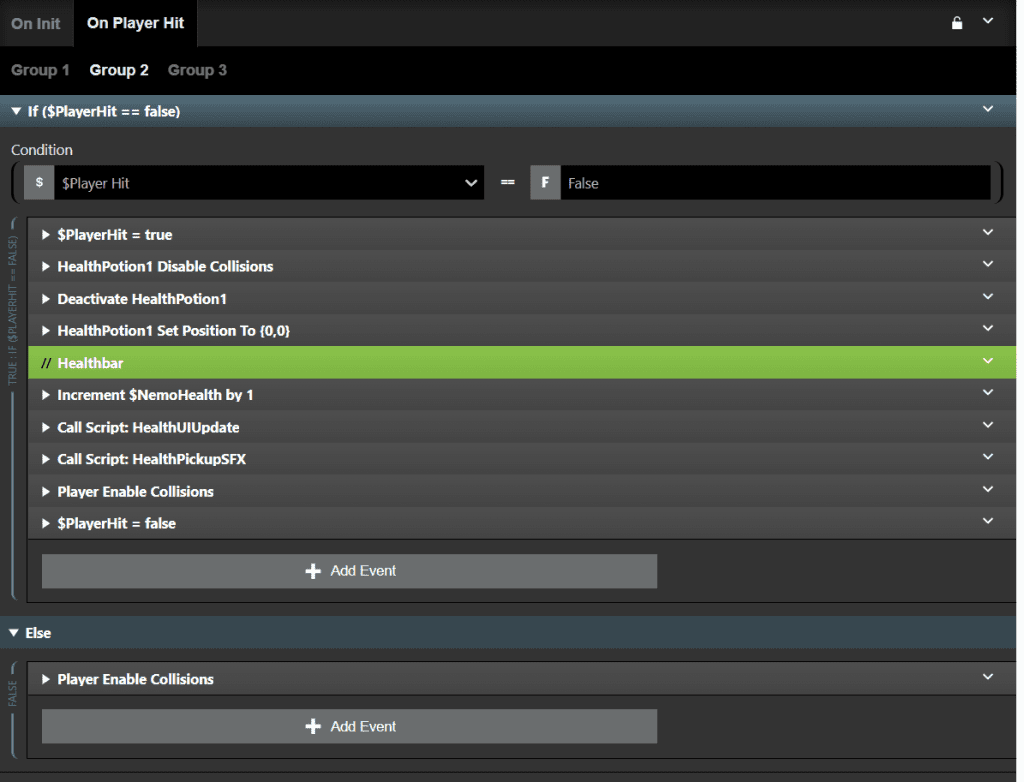
You can use this technique by checking with an [If Variable Is ‘False’] event, which should be its default state, and then immediately setting it to true using a [Variable Set To ‘True’] event as you run your code. Once it is finished, you can either use an [Attach Timer], a [Wait] event or just let the events naturally end to set the variable back to false again.
These logic gates are not confined to use within triggers, or using actors as triggers, but are useful any time you want to ensure that code will only execute when you want it to. Feel free to use them wherever it makes sense!
With this final trick in our arsenal, it’s easy to see how many different ways you can use triggers or actors acting as triggers to solve difficult problems. Hopefully, these tricks and techniques will help you utilize some unique ways with issues where an area or position needs to be checked, or many other situations. Triggers are great tools, so be sure to maximize their potential!

Writer, Game Designer, Engine Bender, Retro Enthusiast. Co-creator of In The Dark. (He/Him)