The RPG Series
RPGs are one of gaming’s most popular and longest-lived genres, and some of the most popular series in the world have had entries (or even got their start) on the GameBoy. And now, thanks to GB Studio, it’s your turn to create an RPG of your own!
In this series, we will cover how to use GB Studio’s built-in events to create a basic RPG system that you can expand on for your own game. All project files will be available to download at the end of the article, and inside you’ll have all the examples and assets we use in each article (along with some additional comments). You can use these as a reference or even expand on them to create your own game.
Quest 1, Part 3: Animations & HUD
Now that our combat system has the core features in place, let’s take a break from triggers and menus, and start making our battle screen a little more interesting! Visuals are more than just for looks, of course; we’ll need to communicate key information to the player (like how much HP they have remaining) so that they can make the right decisions during a battle.
In today’s article, we’ll add a few visual effects to our game, a monster sprite, and dip our toes into some basic tile swapping to display our player’s HP and MP
Enemy Sprites
In our last article, our enemy made their debut: we’ll be duking it out against GB Studio’s classic enemy, the Turnip! Coming in 32 x 32 pixels and a healthy 6 unique tiles, the Turnip will make a formidable foe, but still leave us plenty of room to work with when considering our scene limits.
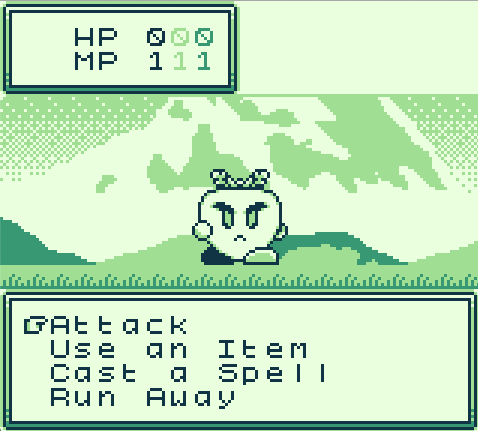
If you’re using our project files, you’ll find the Turnip located in the Assets/Sprites/Monsters folder, and it’s already been loaded into the sprite editor.
We’ve added this villainous vegetable into our Battle Scene as an Actor, and we can create some simple animations to give our attack actions a little more flair.
Simple Actor Animations
Head over to the Fight trigger; in our “Hit!” sequence, we’ll use the [Hide Actor], [Show Actor], and [Wait] events to add a simple “flicker” sequence to confirm the hit. For an alternate method, or if you have a sprite that shows a damage animation, you could use the Sprite Editor to add an animation state to your enemy and play it here instead!
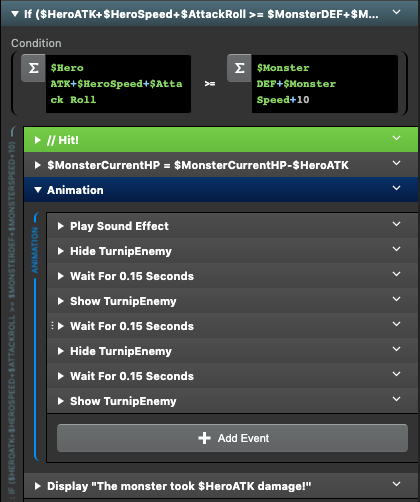
Note: We’ve put the “Animation” event group in place of our placeholder comment from earlier articles!
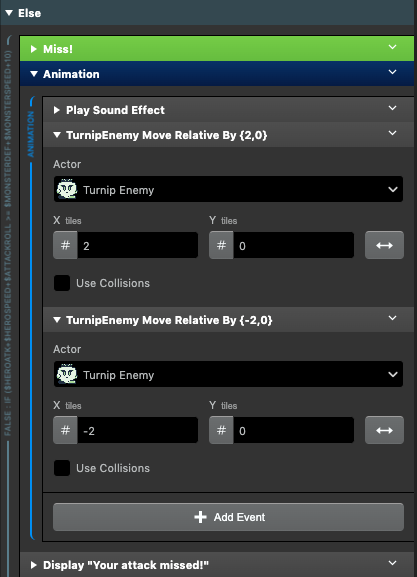
Next, let’s make the Turnip look like it dodges an attack when we miss. In our “Miss!” sequence, we’ll add an Animation sequence using the [Actor: Move Relative] event to move our Turnip actor 2 tiles to the right, and then 2 tiles back to its original position.
Let’s see it in action:
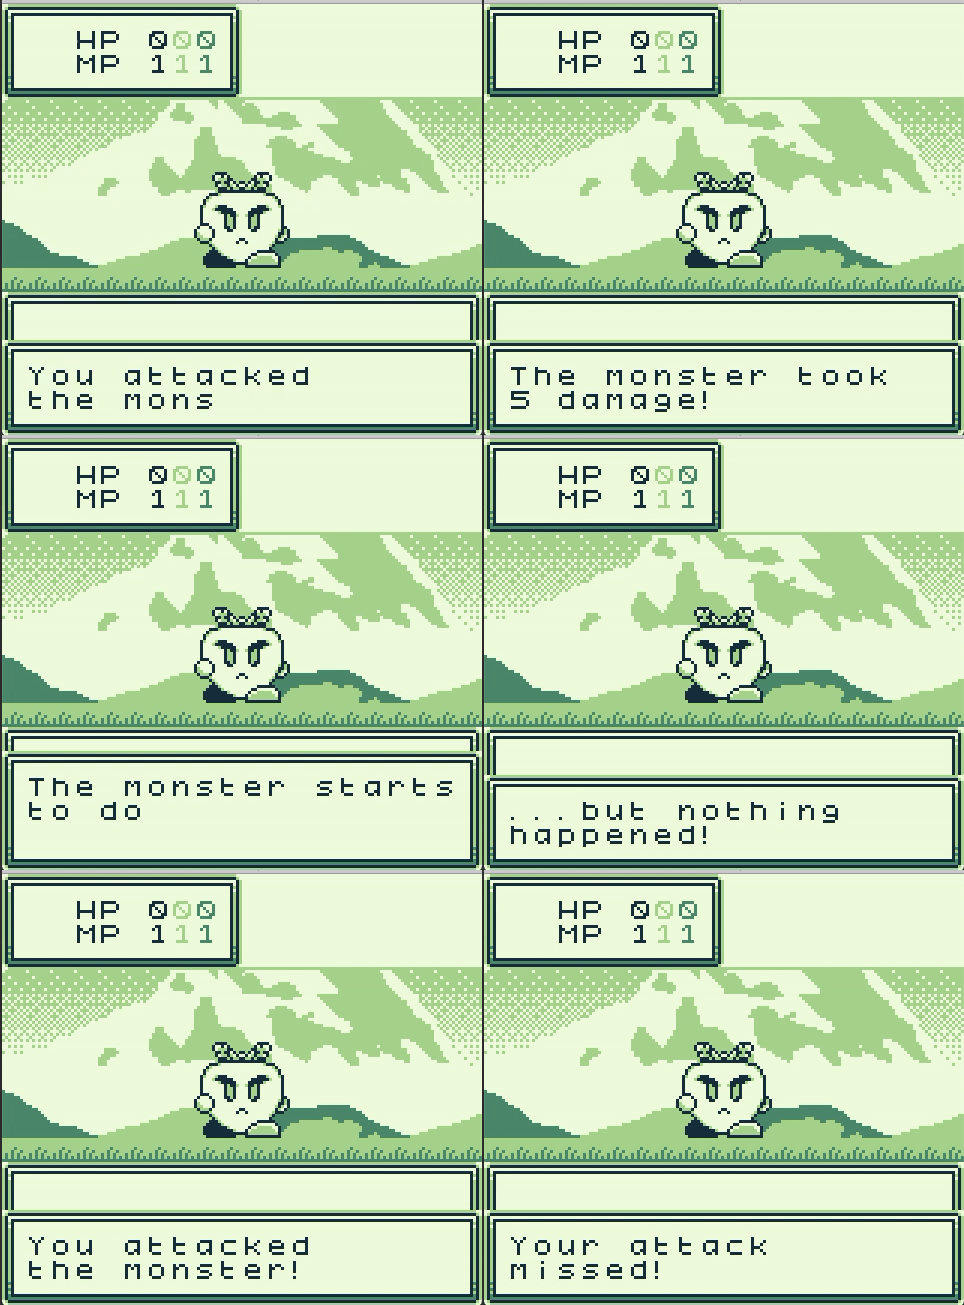
Combat Effects
Our battle sequence is already looking better, but let’s take it even further. In our Assets/Sprites/Effects folder, you’ll see we have a spritesheet called “slash”. It’s already been loaded into the Sprite Editor, so let’s use it to show that our attack occurred!
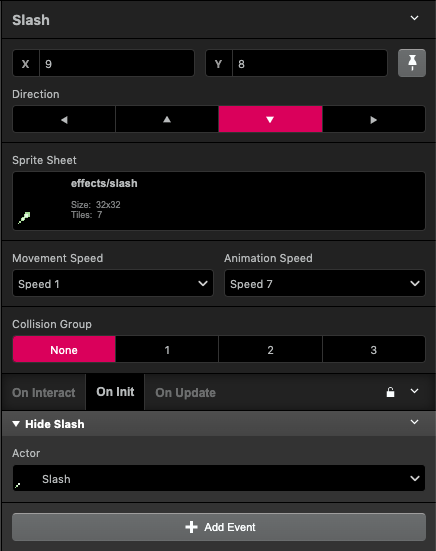
In our Battle Scene, add a new Actor called “Slash” to scene, placing it overlapped with our Turnip actor.
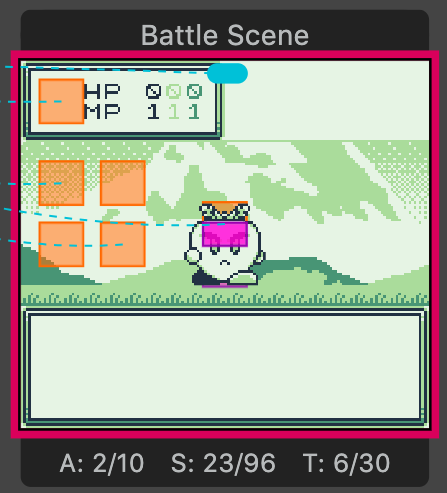
We’ll want to make sure our effect only plays when we want it to, so we can use [Hide Actor] on its Init tab to always hide this at the start of our battle.
Then head back to our Fight trigger. We’ll place another animation event group at the start of the sequence, just after our dialogue event. In that event group, we’ll add the following events:
First, we’ll use [Show Actor] to make the Slash actor visible.
Then, we’ll use [Actor: Set Animation Frame] to set the animation frame to 0. This will make sure the animation always plays from the beginning!
After that, we’ll add a short [Wait] event. We set this to 9 frames, because that’s how many frames are in our Slash animation (which was created in the Sprite Editor).
Finally, [Hide Actor] will make the Slash actor invisible again.
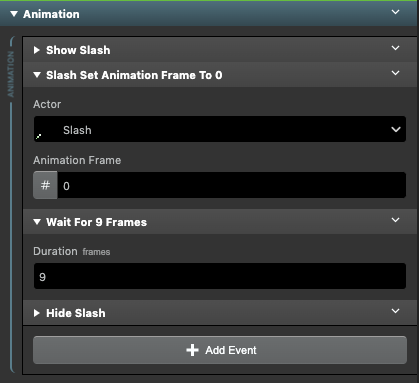
With that sequence, we should end up with something like this:
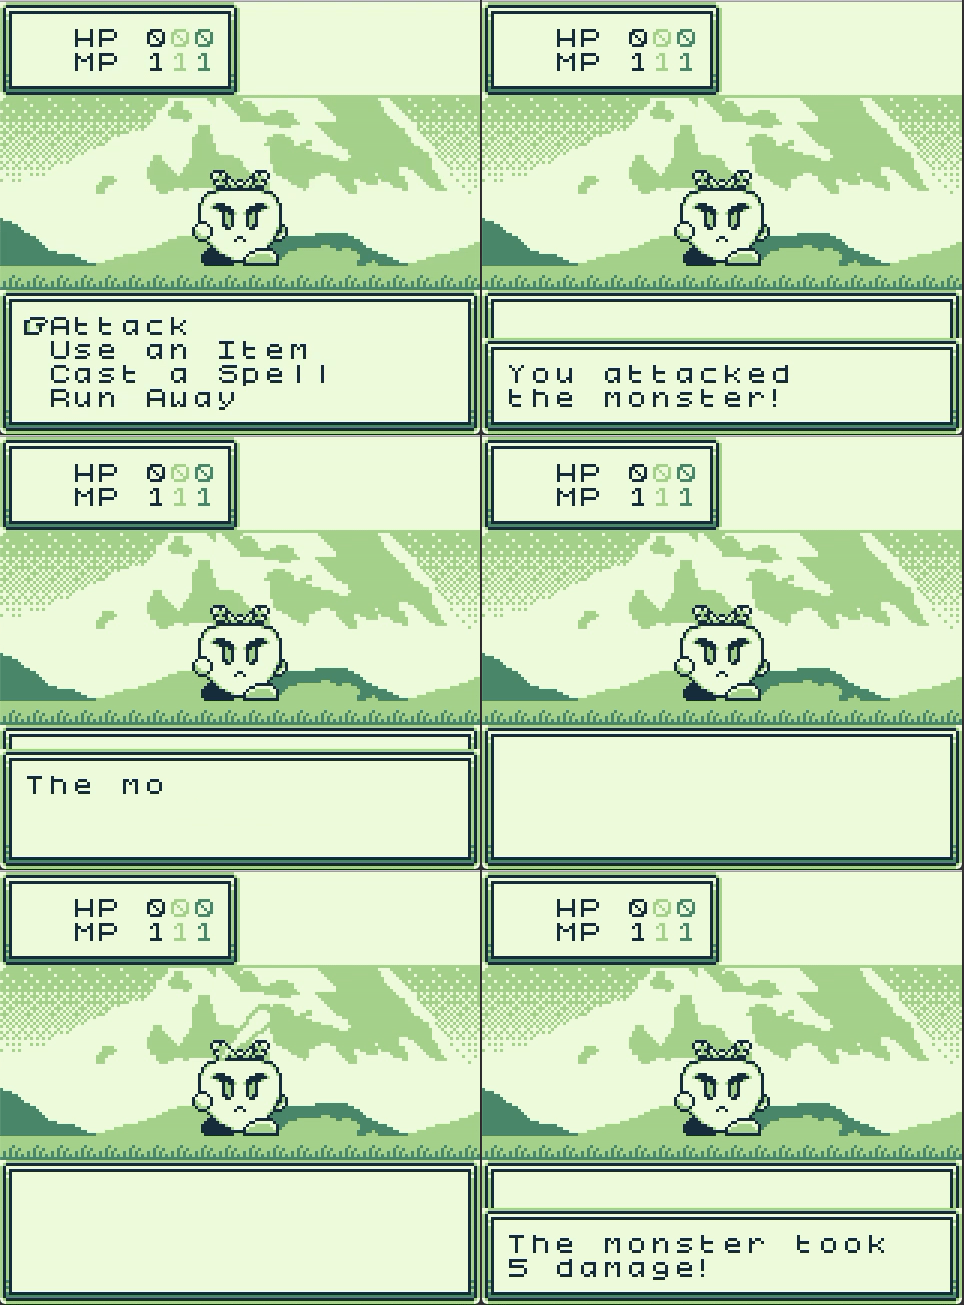
Perfect! Now our player has plenty of visual feedback for when we’ve performed an attack. But what about when we get hit in return?
Changing Background Tiles
In order to update our HP numbers, and eventually our MP, we’ll need to change our background, and we can do this by manipulating its tiles. A background is made up of a series of 8×8 tiles, and more recent versions of GB Studio have given us even more ways to interact with backgrounds in real time. In 3.0, we gained access to GBVM, which enabled players to start making HUDS and animating backgrounds relatively easily. But with the release of 4.0, we now have access to the [Replace Tile at Position] event, making this even easier!
To Replace tiles, we’ll need to create a tilesets folder in our assets folder. A tileset is a lot like a background – it’s a set of 8×8 tiles that we’ll pull from to insert into our current background. We’ve already created this folder in the project files for you, and there are 2 tilesets in at this point: numbers.png and blank.png.
Let’s begin by updating our HUD when our battle begins. Head over to the On Init area of the Battle Scene. After we set up our monster, let’s create an [Event Group] to display our HP.
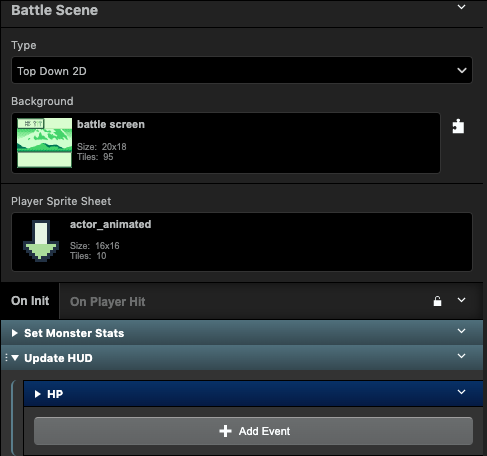
In this event group, we’ll be creating a series of [Compare Variable to Value] events to control our “ones,” “tens,” and “hundreds” columns of our HP display. We’ll start with the “hundreds” column.
The Basics of Replacing Tiles
First, create the [Compare Variable to Value] event, and set the condition to check if our Hero Current HP variable is greater than 99. If it’s not, we don’t need to show a number here, so in the Else area, let’s use the [Replace Tiles at Position] event to hide the hundreds column.
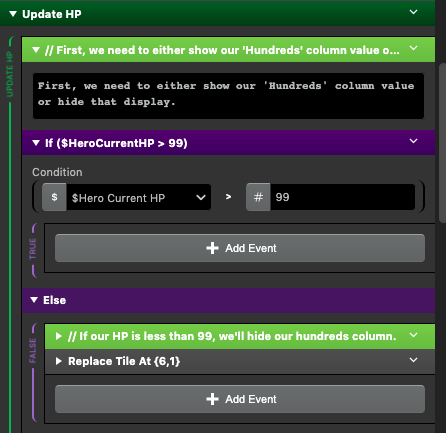
[Replace Tiles at Position] has a few parameters we need to enter. First, we’ll need to enter the X and Y coordinates of the tile we want to replace.
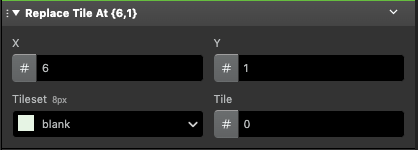
(Note: Replacing a tile will replace all instances of that tile in a scene, so always make sure you’re using unique tiles in your background for elements that you’ll be swapping!)
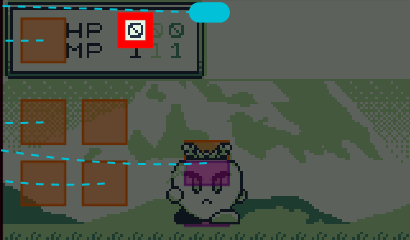
Once you’ve set the coordinates, you’ll select a tileset from your /assets/tilesets folder. Then, if your tileset has more than 1 tile in it, you can select the tile in your tileset to use.
For this event, we’ll use the blank.png tileset, and since this is a single tile tileset, we can leave the tile number as 0.
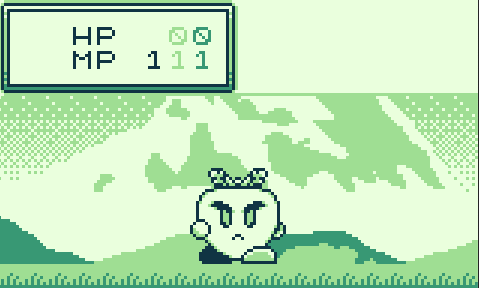
Since our Current HP is not more than 99, a quick check when running the game should show this:
Now that we’ve got the fundamentals down, it’s time for some math!
Using Math to Display our HP
Since our HP is split into 3 columns, but we’re only using a single variable to store our HP value, we’ll need to parse out the individual components of our number to get our hundreds, tens, and ones values. We’ll also want to start working with Temp Variables so that we don’t accidentally edit our hero’s Current HP variable!
Pro Tip: Temp Variables cannot be used in custom events; if you’re working on your own and utilizing custom events, you can create global variables to use in their place!
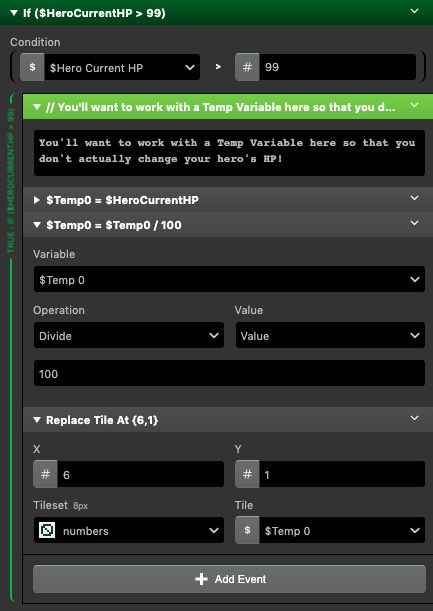
Let’s head back to the Compare Event – if our hero’s HP actually was above 99, we’ll need to display that number. Using a [Set Variable to Value] event, we’ll set Temp 0 to our Current HP variable. This will let us manipulate the value without actually changing our HP variable for other uses.
Once we’ve set that, use a Math Function to divide that number 100. This will get us the single digit we need to show our hundreds column!
If we change our hero’s HP back in the boot scene to a number like 123 for example, here’s what would display if we ran the game:
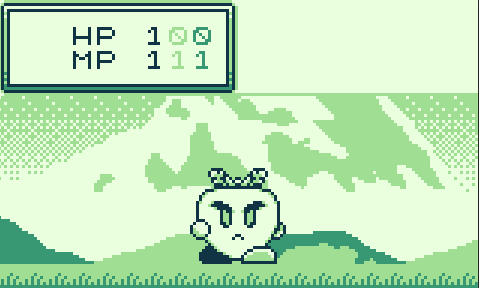
With the hundreds column solved, we’ll need to move on to our tens and ones.
Create another [Compare Variable to Value] event below our first. Here, we’ll want to see if the HP is above 9 – if we’re not, we can use the [Replace Tiles at Position] event to hide the “tens” column like we did earlier – select the coordinates and use blank.png to hide that number.
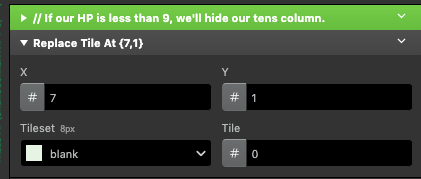
If we are above 9 though, we’ll need to get the right value. Just like before, we’ll assign the Hero Current HP value to a Temp variable, and then we’ll use a Math Function to find our value. To do this, we’ll need to use the Modulus math function.
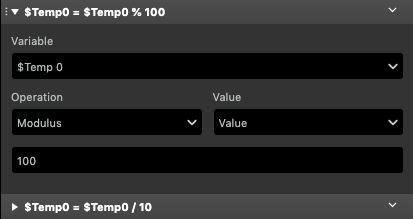
To break this down, Modulo gives us the remainder of a number after dividing by that amount. Since our HP in this scenario is 100 or above, we’ll enter 100 so that we divide by that amount, but are given the value left over. If our HP was 123, for example, we’d be given 23.
Since we’re looking for the tens column though, we’ll need to divide that remainder again by 10 so that we’re left with a single digit.
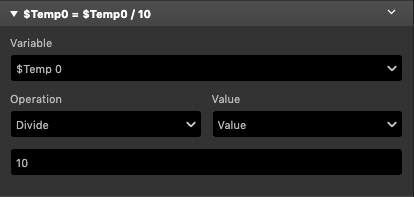
Then, we can replace our tile with the [Replace Tile at Position] event, just like we did for the hundreds column.
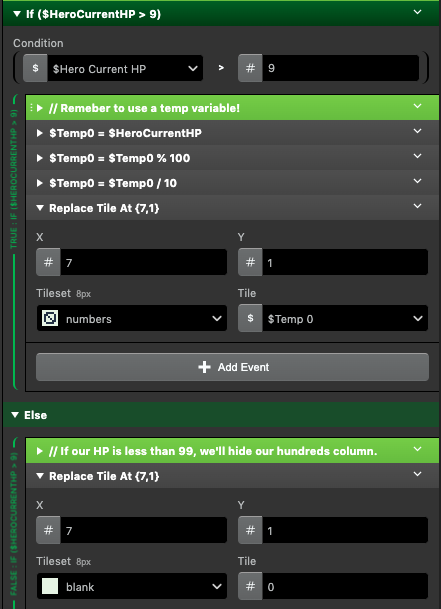
Continuing our example with an HP value of 123, your HP should now display a 1 in the hundreds column and a 2 in the tens column, like so:
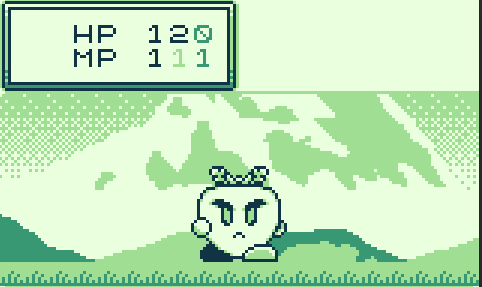
With that new knowledge, let’s finish off the “ones” column. We’ll need to run this operation twice – first, you’ll need to use the combo of Modulo to get the tens column like we just did, and then you’ll need to use another Modulo to get the ones column digit!
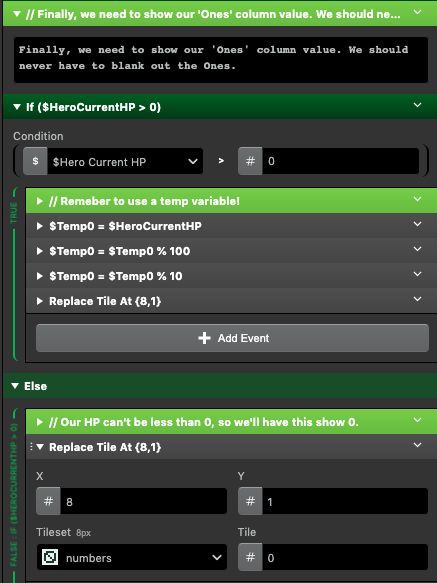
Note that since our HP can never be below zero, in our “else” section for our ones column, we’ll use numbers.png as the tileset instead of blank.png.
Now, when running the game, you’ll see a full HP value!
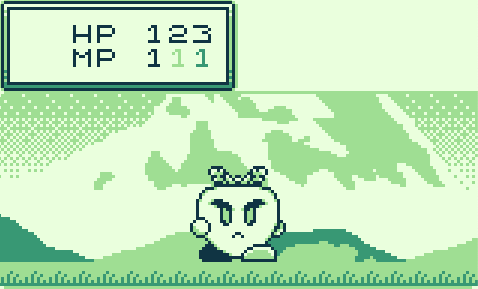
If we copy this event group into our enemy’s attack sequence (or wherever we update HP, like our Poison Status script), we’ll see these numbers update in real time as we take damage!
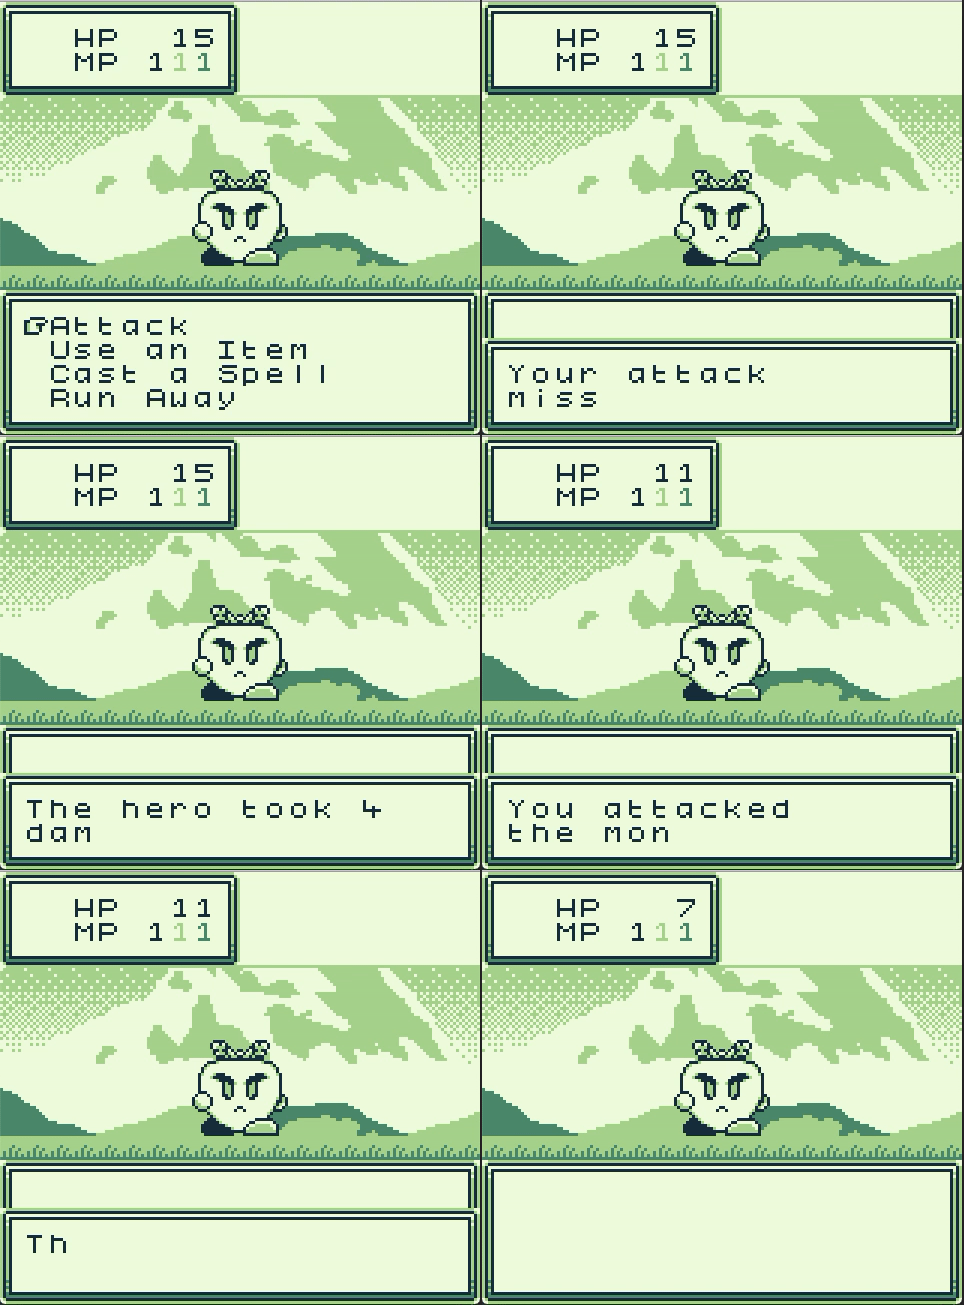
That’s a lot of damage! But the HUD looks great, and with the animations added, we’re looking even more like a real game!
Moving On
This wraps up the basic actions for our battle system, but there’s still plenty more to come. In our next article, we’ll start tracking XP and other battle rewards to start preparing us for our first trip to town!
Don’t forget to download the project files to see more details, and visit the itch.io page for the project to leave questions and comments. You’ll also find some more information on this series’ collaborators below!
Special Thanks
The amazing animations and fearsome enemy sprites that we’ll be using for the remainder of the series were provided by Eric Mack. As the series continues, we’ll add more awesome animations and enemies, expanding on the style seen in GB Studio’s Sample Game.
If you’ve been downloading the project files with each article, you’ll notice that I’ve slipped some music and sounds into our scenes. This tutorial won’t be covering how to make your own music, but don’t worry! GB Studio Central has you covered with another great tutorial series! There’s also great articles covering sound effects as you expand and customize your own game!
Our game’s music is provided courtesy of Beatscribe’s Free Music pack, and our attacks and damage actions are selections from their free Sound pack.

Friendly Neighborhood Game Designer, Podcaster, and (ex)Librarian (he/him)
GB Studio Games | Tabletop Games
